Saturday, 27 June 2015

A Lost and the Damned warband

As the Oldhammer movement (and all that it stands for) grows, it was only a matter of time until I found a local, like-minded enthusiast. And so it happens that Justin from the Masterwork Guild blog got it contact to say he only lives a short drive from Farnborough, where I reside. So after a few emails we have decided to meet up for an evening over the next few weeks (depending upon the date of my house move) to play some RoC and have a geeky look at our Oldhammer miniatures; I can't wait.

So we decided to roll up a RoC warband each and then perhaps play a few narrative based games with them. In an ideal world I would have rolled up my warband and then gone about sculpting/converting/painting the models to match the Champion, his retinue and their various chaos attributes, but that for now is not realistic task for me. So for my Champion I decided to use one of my completed models and then apply his attributes based on the appearance of the model.

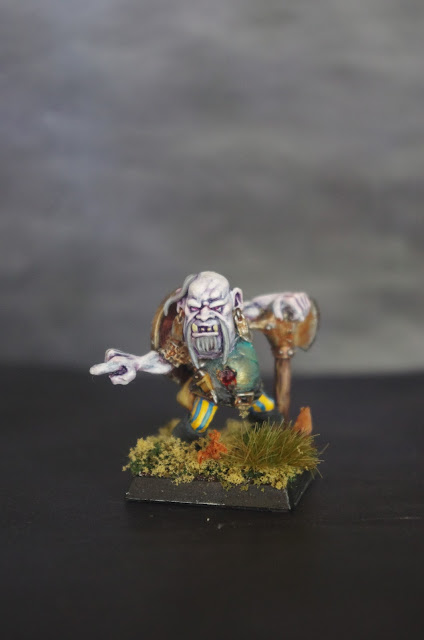
Introducing my Champion, a level 5 human; Istan Nnarth:


He has the Mark of Nurgle (+1 T), Huge Head (+1 FP) and I then rolled Involuntary Temporal Instability. For his equipment he has an axe, shield and light armour.

We agreed that our champions would have two rolls on the retinue table and I rolled a 63 for 2 Chaos Cultists:


These two are led by a Chaos Warrior, who should be given two Chaos Attributes, in this case Manic Fighter and Fear of Blood!:


The second roll saw me roll a 24 for 5 Beastmen of Nurgle: 


So here's the entire Nurgle warband, ready for action in about a fortnight's time:


I can't wait to play and meet Justin - I'll share some photos of the clash here.

Tuesday, 23 June 2015

My blog's 1 year old! Want something painted?

"Hmmm, what's this all about?" An old model of mine that I painted just over a year ago that I haven't shared here before.
Incredibly, as of today, I've been blogging for a year! it's flown by and been a real motivator for me to get stuff done, largely because I've received some really encouraging feedback from you followers/oldhammeres and it feels like I'm contributing a bit to this wonderful community. And it's this community which has also inspired me to create, paint, and explore my imagination within our hobby world.

So many thanks for contributing, in whatever way, and helping me to share and explore my love of this immersive hobby.

I'd like to contribute something back to my followers:

If you could let me know what your favourite blogpost of mine is in the comments section, then I will randomly choose 1 follower who I will convert/paint a model for!

(I'm thinking it may be good for the winner to send one of their unpainted/neglected models through to me).


Now surely all us bloggers must like stats; so here are mine from my first year to share with you:

  • Over 15,000 page hits

  • 68 posts (including this one)

  • 81 models painted (!):

4 Bloodbowl Orcs
1 Plaguebearer
6 Foundry Human runaways
6 Dark Elves (2 of which were speed painted)
1 Centaur
1 Plaguemarine
1 Empire Captain on the Path to Damnation
1 Great Unclean One
2 Mummies (in attendance to the GUO)
5 Hasslefree Heroquest adventurers
1 BloodBowl Dwarf referee
6 Jes Goodwin Ogres
1 Chaos Warrior
1 Chaos Marauder
1 Chaos Thug
6 Orcs
6 Goblins
1 Legacy Warband Elf
16 Mantic Zombies
1 Troll
1 Chaos Sorcerer
6 Beastmen
6 Chaos Dwarfs (including a mortar)

I'm quite impressed with myself! I've also broadened my horizons from purely RoC stuff, to Heroquest, BloodBowl and even a bit of 40k. At the same time I've moved away from purely GW miniatures and explored Hasslefree, Mantic and now, with my Freeway Fighter project; a diecast car and some Heresy miniatures too.

So to finish (and to start a second year of blogging), thanks again for following and contributing to my blog and inspiring my ideas for the hobby and being a part of this community in general; and if you'd like to be in the pot for me to paint one of your models, please leave a comment below, letting me know which is your favourite post of mine and why.

Thanks again all and looking forward to the next year!

Wednesday, 17 June 2015

Fighting Fantasy: Freeway Fighter (Converting to 40k) Pt.1

This is where I'm up to in my attempt to recreate the car from the cover of Freeway Fighter from the Fighting Fantasy series:


To get to this stage, I first deconstructed the original car (a 1:43 Chevy Bel Air convertible) from this:

To this:


Using a power drill to remove the rivets which held the body to the under carriage. I then removed all the plastic parts, including the chrome accessories so that I could strip the paint from the original die cast car using Dettol. 

Once I had the basic chassis to work with I then started added the bitz, my favourite bit! I like finding (and collecting) things that I may be able to use and have a sizeable bag of bitz horded away for just this sort of futuristic project. 

  •  the spiked additions to the headlights are the tips of wooden golf tees, with some carving on them
  • the longer spikes on the bumper are whittled down plastic skeleton standard bearer poles
  • the raised turret is a lid from a small plastic pot with a bendy straw for the large pipe
  • the front, raised engine is from a computer circuit board (I like the wires as is, but will probably remove them in favour of a bendy straw to match the original illustration 
  • the guns mounted in the bonnet are some small plastic piping and the smaller guns (which are hidden in this picture - but mounted in the front bumper) are snipped from the end of the metal pipe from a precision plastic cement dispenser.
  • the additional roofing is made from 3 layers of balsa wood and will be reinforced with a layer of milliput (I'm unsure how I will get this super smooth yet..)


Oh and here's my new toy, a circular cutter. Just because I'm a geek who loves new modelling tools (I'll probably never use it again!) but it was great for cutting circles out of my balsa and plastic lid.


For comparison purposes and maybe to refresh your memory, here's the original illustration by Jim Burns, an image much loved from my childhood and re-awakened with the release of Mad Max and my preparations for BOYL 2015's DeathRace 40k:


So next I will be finishing the roof with some milliput and constructing the lower front bumper with some plasticard/greenstuff. I'll likely be greenstuffing some of the additional details too. I've found a couple of old plastic Orc spear tips which will serve for the scythes and I'll have to think about how to imagine and then create the rear of the car. 

Eventually I'll be sanding the whole thing down and then undercoating white before applying spray coats of Tamiya Clear Red. I hope. I've also ordered some Bare Metal Foil for re-doing the chrome areas (I think this will be easier and look better than NMM chrome painting) but this is all a new experimental experience for me so thankfully the internet has introduced me to the new world of die cast modelling and all their tricks, tips and techniques.

Any advice or suggestions from more experienced modellers would be much appreciated..


Friday, 12 June 2015

Oldhammer BOYL 2015 Preparations


I can attend! It may mean a very early start and a long drive on Saturday 1st August up to the Foundry, Nottingham from Hampshire, but I know it will be worth it. Last year's BOYL was excellent.

I won't be running any games this year as it's all been a bit too last minute and there seems to be so much going on already, but I've earmarked what I would like to be involved with and how that correlates with my hobby ideas (and time) over the coming weeks. Here's the full list of events from the Oldhammer forums, that are running over the weekend. First up for me:

1. Deathrace 40k.

I'm slowly and tentatively being seduced by 40k (cautiously, because I've got enough projects on the go at the moment and I don't want to be distracted). I've always wanted to do some Dark Future stuff, converting Hot Wheels or Matchbox cars by adding guns, steel plating, spikes etc and the BOYL 2015 thread by Captain Crooks can provide me with the opportunity but with the bonus of working in an easier to manage 28mm scale... And of course I've just seen the Mad Max movie. And I love the Fighting Fantasy book Freeway Fighter, so why not combine them all....

This is the visual inspiration, the cover illustration of Freeway Fighter by Jim Burns:


And these are the models I'm going to use to make it happen. A diecast 1:43 Chevy '57 Bel Air Convertible:


The scale may be a bit big, but I was concerned that going smaller would just make the car look tiddly amongst it's competitors... It's taken me some time to source the correct car and decide upon the appropriate scale, but this seems the best fit and only cost me £6 off ebay, I'm now researching and considering how best to convert this into the above image; more to follow.

In terms of the characters shown in the illustration I've purchased the following gangers from Heresy that will need only a small amount of converting (or I may just keep them as is if I run out of time and imagine that the car has new owners):

Wesley - Sniper

Silk


2. Oldhammer Blood Bowl.

Over the years I've owned lots of Blood Bowl teams and painted quite a few commissions too. My current Orc team has been a WIP for absolutely ages and this will give me the inclination to finish the team and play with them at BOYL. The Oldbowl games are being run by Chico at oldhammeronabudget.blogspot.co.uk and here's the roster I'll probably be taking:


Thrower 5 3 3 8 Sure Hands
Blitzer 6 3 3 9 Block
Black Orc 4 4 2 9
Black Orc 4 4 2 9
Lineman 5 3 3 9
Troll 4 5 1 9 Loner; Always Hungry; Mighty Blow; Really Stupid; Regeneration; Throw Team-Mate
Blitzer 6 3 3 9 Block
Lineman 5 3 3 9
Lineman 5 3 3 9

So I've already got the thrower and two linemen painted (amongst other stuff not to be used on this roster) and last night I finished off the four Orc Blitzers (it's about time I showed some actual painted models); using my usual Orc skin recipe:


And WIP; here are the wizard and his two cheerleaders:


The two Black Orc Blockers:


A couple of Goblins (who I doubt will make this roster)


A two headed Troll: 


A Star Player/ Coach:


And the re-roll turn counters:


I'll keep you updated with my progress on both projects - I like the focus I now have with an imminent deadline and that joy of being given a pass to attend BOYL 2015!

Tuesday, 9 June 2015

Tutorial: Orc skin painting guide

I thought I'd offer another painting tutorial as a few people have mentioned my Orc and Goblin Army and the recipe I used to make browny/green Orcs. Here's an example of an Orc Shaman I painted a few years back:
Image
 
And here are the steps to get there:

Image
1. The converted model ready for painting.


Image
2. Primed black, with Graveyard Earth basecoat. I now use Baneblade Brown which is a silmilar coloured brown.
 

Image
3. Apply a very dilute Brown Ink wash (I now use Aggorax Earthshade). Re-apply Graveyard Earth over the areas which are to be highlighted, i.e those that are raised.

Image
4. Two/three highlights of Graveyard Earth < Rotting Flesh. I still have some Rotting Flesh, but perhaps Nurgling Green would be a substitute? I thin my paints so that they are transluscent enough to leave some of the underlying colour to show through. This helps "blend" the subsequent layers easily.


Image
5. Apply a very dilute Green Ink wash (with a touch of washing up liquid mixed in to help the flow).

Image
6. Re-work some of the extreme highlights if needed.


Image
7. And finishing up with the details. Adding some Gloss Varnish to under the nose, in the eyes and inside mouth to make them look wet.  Some very dilute Elf Flesh to the lips (sometimes I add this to the end of the nose and on the cheeks too to give a slightly ruddy complexion). And a highlighted purple tongue.


Image
8. The finished model. Ta da!
 

So if you've got some unpainted Orcs in your paint queue and you're tempted to avoid the usual Greenskin colour recipes, try this out and see if it works for you. Good luck!


Saturday, 6 June 2015

Tutorial: Nurgle skin painting guide

A few people have asked me how I paint the skin on my Nurgle models, so what better way to respond than by doing a step by step photo guide. I've sensibly chosen to work on a model that has lots of skin for this guide on how to paint skin, so I've gone for an old school Plaguebearer; here's the finished article:


Now this chap didn't turn out as well as usual, or indeed as I hoped! That's partially because I tried out something new and also because I lost my rhythm a bit as I had to keep taking photos. Excuses out of the way, here are the steps to achieve this type of look:


1.  Halford's White Undercoat/primer
2. Carroburg Crimson wash. I added a glaze medium and a touch of washing up liquid which helps make the paint more transparent and flow better respectively. This smoother application prevents pooling and tide marks and helps bring out the details (as the wash sits around theme) which ultimately makes the highlighting steps easier as the detail is pronounced.

3. Same as stage 2 but this time I've added a little Nuln Oil tothe wash. This one is applied to the darkest recesses and shadows. I don't always include this stage, but may instead re-apply stage 2 to deepen the wash colour.

4. Highlighting. Because the washes are very transparent, the general colour of the flesh at this stage is of course very pale due to the white undercoat. Therefore the highlighting colour is based upon the original wash colour (Carroburg Crimson) but only a small amount with a large amount of white. I apply this to the raised areas (and also I imagine where any light source is coming from - usually from above).

5. Subsequent highlight layers are added, each time a greater quantity of white is added to the mix and applied to a smaller area of the raised detail, so that the previous hue is apparent. By adding some glaze medium to each highlight the paint is quite transparent which means that some of the colour of the underlying coat shows through - which helps blend and unify the highlights.

6. Now this was the experimental part. (I did have some prior success on a Chaos Warrior - scroll to the bottom of that post) where I used some crackle medium. In that post I applied the crackle medium straight onto the model. In this case I mixed it with a touch of Nurgling Green in the hope that the separating nature of the crackle medium would reveal the crimson undercoat between the cracks, like so:


Imagine the cracks here revealing the crimson colour beneath a pale nurgling green layer - here seen as brown.
Alas the addition of the paint and it's own medium combined with the crackle medium, seems to have counteracted the effects of the crackle medium so the Nurgling Green layer has ended up appearing just like a glaze - not what I was intending - but it still looks ok.
7. So I continued on (but more experiments are needed in a future post), by working in some highlights for the uppermost layer of skin. Adding larger quantities of white to the Nurgling Green for raised highlights.
8. To create a greater contrast between the skin layers and the open sores, I mixed up a bloody combination of red, purple and black inks and applied several thin layers into the relevant areas. Again a touch of glaze medium and washing up liquid was used to help improve the flow.


9. Finally some Tamiya Clear Red was applied to small spots of the open sores to create a glossy, oozing feel to the wounds.

10. The teeth and horns were painted with layered up yellows (from Bestial Brown to increased amounts of Sunburst Yellow and white). I think I may have gone a bit too yellow and should really tone it down with some Bleached Bone. But that will never happen - I rarely go back to a miniature when it's completed! The tongue is painted with Titillating Pink. Any excuse to paint with it and name check it in a post.

11. The basing tutorial in all it's detail.


So the completed model. As I said it's far from my best ever paint job, but serves a purpose in sharing how I paint (if anyone is still interested!). Furthermore it shows my enjoyment of experimenting with new and different techniques, even if they don't always succeed. But I will persevere.


As an Art Teacher, I'm often asked how we mark artwork, well some of the criteria are:
  • how students (hopefully successfully!) experiment with a range of materials
  • how students realise their intentions
  • how students have developed their work, often through looking at how other artists have worked.
Well with regards to miniatures, the later we all do I'm sure - who doesn't have a folder of inspiration on their PC? Or at least we have all looked at an 'Eavy Metal article / Golden Deamon paint job from a White Dwarf of yore and based our own work on that. The last two criteria I haven't been so successful with here, so I certainly wouldn't mark this highly - I'll give myself a C.

I may go into this link between "successful" GCSE/A-Level art and miniature painting in a bit more in a future post, stay tuned, I bet you can't wait!