Scraping the barrel of blog posts here. Nothing new from me at the moment, the school exam period is taking up too much of my time, but I did photo-document my procedure for making scratch-built, rusty, battered barrels. So here it is, it may be of some use to some of you..:
 |
| 1. Using some thick cartridge paper, wrap it around a battery (or similar shaped object). Use superglue to attach the ends to create a cylinder. |
 |
| 2. Remove the battery and cut the cylindrical piece of paper to the correct barrel height. |
 |
| 3. Using the battery as a guide again, cut out the circles which will act as the top and bottom of the barrel. Remember they need to fit inside your cylinder so should be a touch smaller in diameter. |
 |
| 4. To insert them inside the cylinder, I used some blu-tac on the end of a pencil. Stuff it inside. |
 |
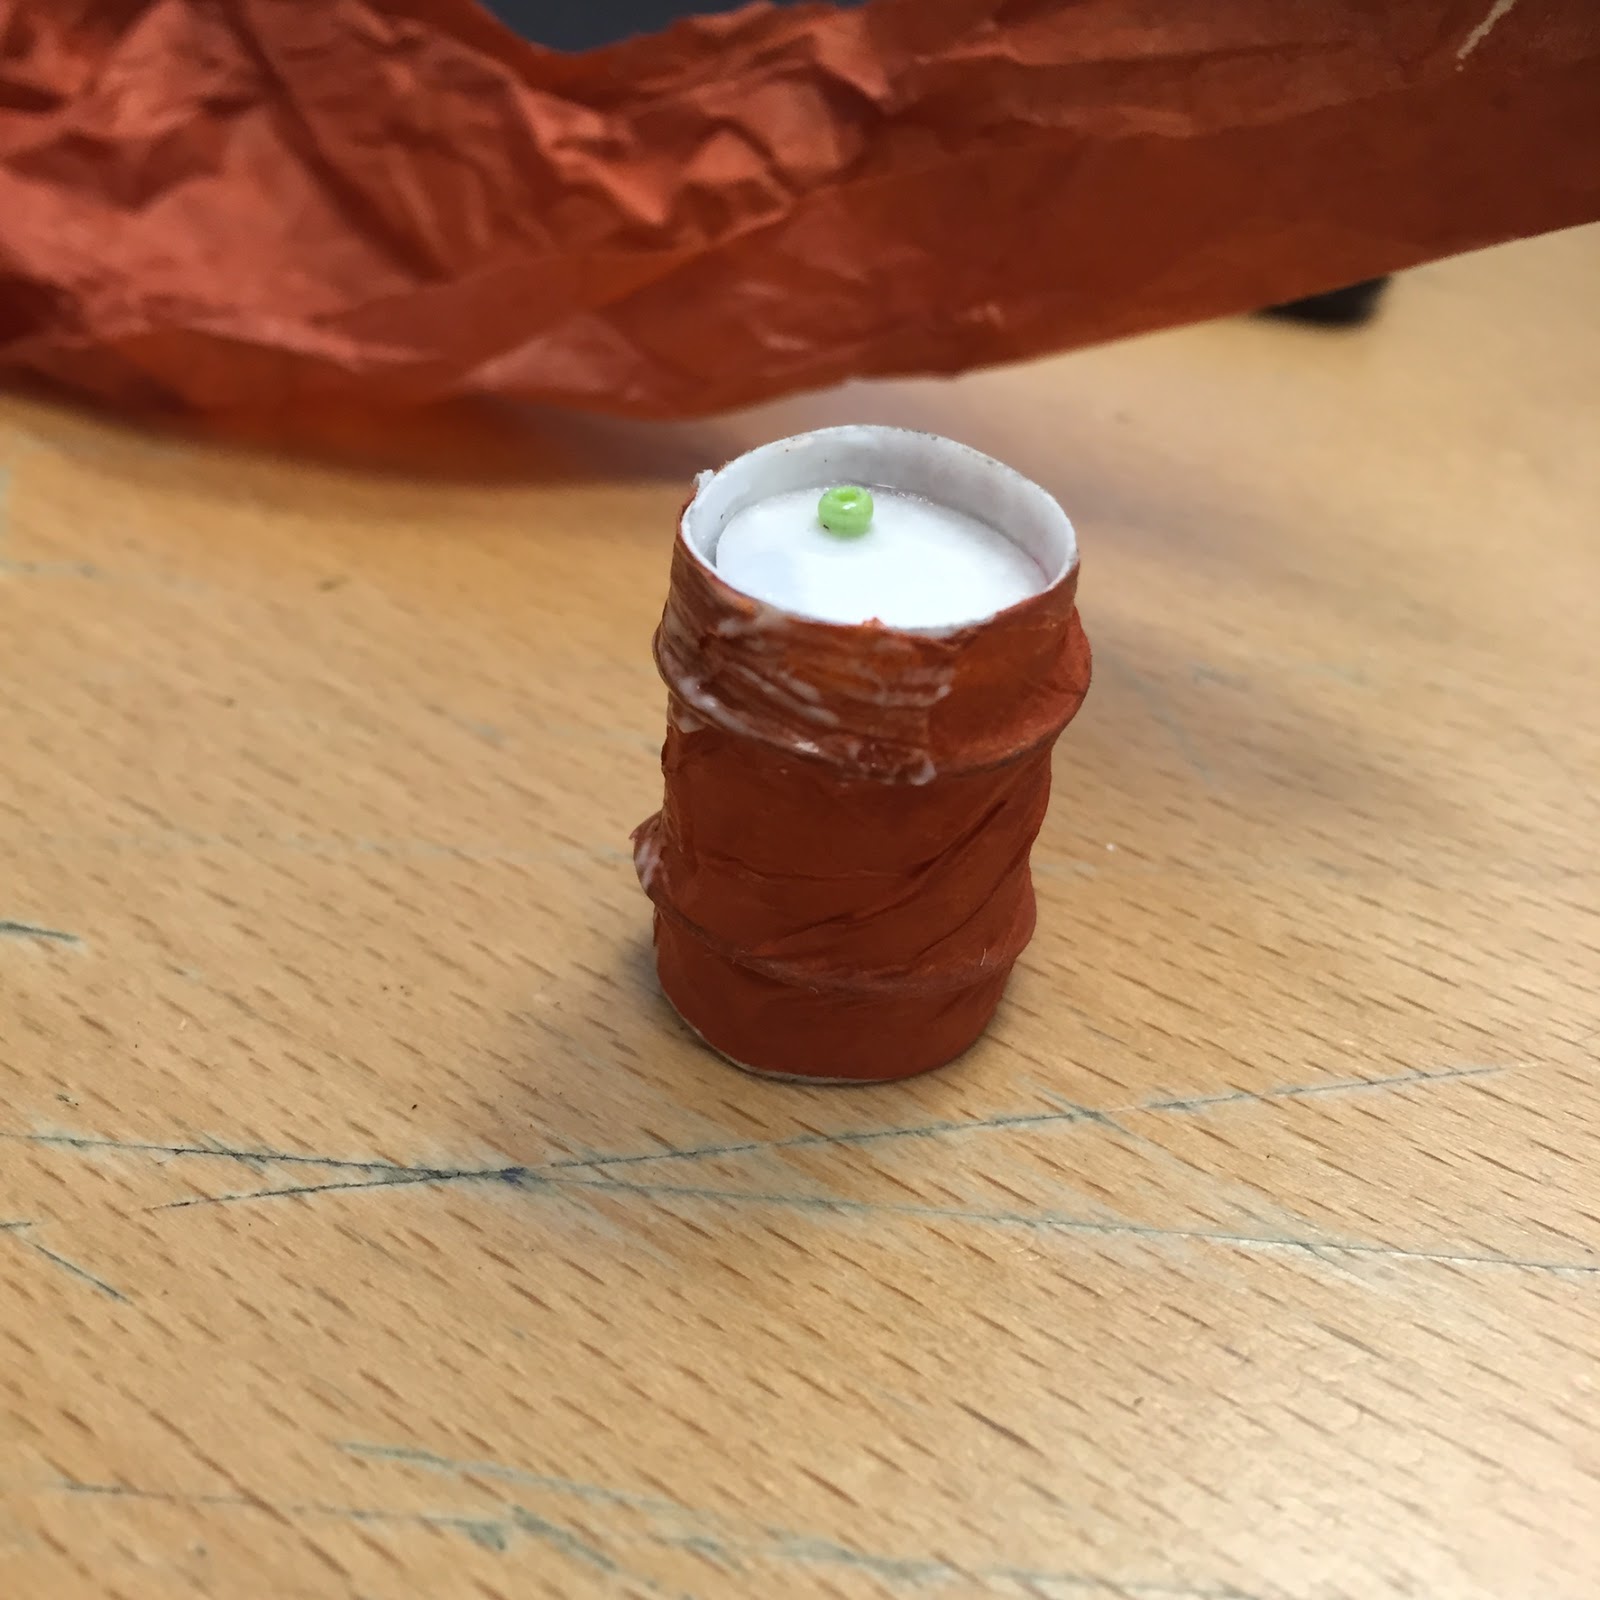
| 5. Superglue it in place, remembering that it should not be flush with the end of the cylinder so as to create a lip to the barrel. |
 |
| 6. You can see that the top of the barrel is slightly dented, this is a good thing. I then superglued a bead on the top to act as the screw top for the barrel. |
 |
| 7. I used some fuse wire as it is thin and really flexible; this was wrapped around the battery to create the correct circumference that will go around the barrel. |
 |
| 8. Super-glued into place. Imperfections are ok, this is a battered barrel. |
 |
| 9. Rather creatively (I thought) I pva glued some strips of rusty brown tissue paper onto the barrel, ensuring it covered the wire and smoothed out the protruding edges of the wire. |
 |
| 10. They were primed grey and then a quick burst of brown aerosol was added. Some of the brown colour of the tissue paper shows through. Some rusty washes were applied with some cheap acrylic paints. |
 |
| 11. Scratching on some metallic paint using an old kitchen scourer |
 |
| 12. The last stage was to add some rust texture using a small amount of matt medium and some dry pigment. |
 |
| 13. Some oil spills were liberally dribbled on with Nuln Oil and then some dusty dry pigments added so as to fit in with my barren, post-apocalyptic landscape. |


No comments:
Post a Comment