Showing posts with label diorama. Show all posts

Monday, 27 January 2020

Bob Naismith: A diorama

I've completed a little diorama, which is in fact a homage to Bob Naismith's Citadel sculpts. To the right is the familiar and imposing figure of Thrud and to the left is a dynamically posed fighter from the same period of time in GW's history; both painted using a verdaccio under-painting technique.

The always excellent Jean-Baptiste over at Leadplague has set a few "Oldhammer" sculptor based challenges recently and my two miniatures are for the #Naismithery version, presented here on a small scratch-built dioramic base.

Positioned like this, the two characters appear to show that Thrud's fighter friend is battling adversaries who are climbing the stairs whilst our hero considers how to open the door:


Whilst here, he us being attacked by the fighter, perhaps out of frustration! 


Either way to the two wonderful sculpts and poses were a delight to paint (even with a few interesting muscular anomalies) and will possibly be the start of a Brabarian warband for Mordheim or the like.. Here's a few close-ups of the Fighter;


And for completeness, Thrud:


Oh and I took a few photos of my scratch-build for the small dioramic base, using just insulation foam, a few bitz from the box, a couple of cocktail sticks and a mold of a door I had previously bought many years ago:


Thanks for looking!

Tuesday, 11 December 2018

The Spotted Dog Tavern Interior

I put together a photoshoot combining some of my recently painted ncp characters and some of my older scenery and floor tiles. It felt a bit like playing with a dolls house (with two daughters, this is from experience) due to the arranging and re-arranging of the composition. I deliberately tried not to create a narrative diorama, but the positioning of a certain figure in relation to the scenery or another figure always means something, but I will let your imaginations project onto the scene portrayed here.


Friday, 10 February 2017

A small restoration project - St. George and the Dragon

I originally painted these two when the Green Knight was first released by GW back in the early 90's (I believe). It was a diorama that I had intended to enter for Golden Demon (I never did) which used to have a plinth with a matching base (now lost), to show the story of George and the Dragon. It was largely inspired by Paolo Uccello's and Raphael's "St. George and the Dragon" the former of which resides at the National Gallery, London. I thought the Green Knight was a great Citadel miniature with a dynamic pose, crisp, detailed sculpting and characterful for a human model, I still think this today. 

So I recently found these in a box back at my parents house and they were a bit battered to be honest. Chipped paint everywhere, flaking paint on the dragon's wings (where they had been bent), dust, broken sword and a missing shield to name the worst of the problems.

So I set about restoring them. Now I was so keen to get involved in this process that I forgot to take any pictures of their condition, which I'm very annoyed at myself for, however if you look closely enough at the wings on the dragon you can see the texture of the cracks/flakes still. Obviously I could have stripped the paint and started the process from scratch, but I was keen to keep my original paint job (20-something years old and two of the few models that I still own from my original teenage hobby time), consolidate the issues and make some minor improvements to the original paint work.


After the models had been carefully dusted with a soft make-up brush (the wifes!) the Knight had his sword pinned back into position and then re-painted, originally I had painted it green, I think to keep a link to the Green Knight, but it looked terrible and so instead I plumped for a kind of purple nmm style. A new (Elven?) shield was attached and painted - this is the same shield design that I originally used as I liked the dragon emblem. I have updated the painting of the armour, the original painting was quite poor (I hadn't mastered metals at this time in my development) and very dull black, so I went for a layered gold effect, starting with dark bronze and working through copper and eventually gold highlights. A bit of touching up on the horse flesh and barding was also needed.


The dragon required a bit more work. I had to initially carefully reshape the wings which had been bent, this did result in some more paint flaking away. I stabilised this by using some dilute pva which ran underneath the flakes and when dried consolidated beneath the cracks. A really thin fill of putty was added to the missing areas of paint so that there was not such a large "step" in thickness between paint/primer and bare metal. 


The lance was intentionally broken (the missing section was a part of the base) and the dragon itself needed a lot of touching up. Trying to match the colours was quite simple - I could pretty much identify the colours I'd previously used (for example it was clear that Bestial Brown was the base coat for the fleshy stomach and it had been highlighted/layered with increasing amounts of elf flesh). I still have both these paints and would probably paint it in exactly the same way if I would be starting from scratch! The blood looked quite poor, so I reworked this using some Tamiya Clear red for the glossy areas and some purple/brown/black washes for the more dried looking areas.


And here are the images that I used for my inspiration all those years ago:

Paolo Uccello's St. George and the Dragon. I'd love to add the maiden and a cave to complete the diorama.

Raphael's version. Here you can see why I originally painted the armour black and how I got the idea for the broken lance embedded in the dragon's torso.


Sunday, 27 September 2015

Tutorial : Basing Trees

I decided that it was about time to have some trees in my scenery collection. I was toying with the idea of scratch-building the trees themselves (possibly from twigs), but after some research I felt reluctant that I could actually make them look as good as bought ones, so I went shopping at 
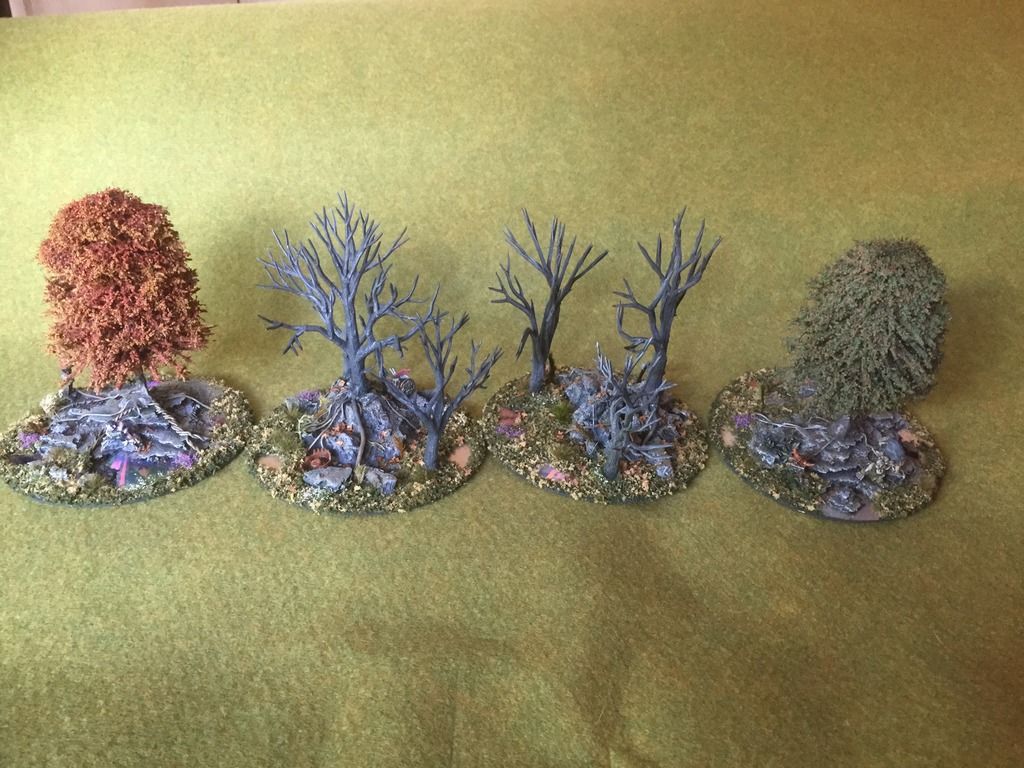
Antenocitis Workshop, did some experiments with ideas and materials and came up with these:


This blog post will show you how I made them.

I've always found it annoying that for gaming trees are often just plonked onto a small base and then become ripe for getting caught on the sleeves of your clothing or knocked over easily and in fact just end up being a pain in the arse when gaming. So they then just get moved out of the way. So to combat some of these issues I decided that my trees needed to be scenery pieces in themselves and to do this I would need to base them in an interesting way and if the base was large enough I can add some interesting details, experiment with some ideas/materials and also add stability to the tree itself. So I decided that a cd would make an ample sized base.

I was torn between using some of the armatures as old, gnarled and barren trees or maybe combining them with the lush looking ones on the same base. In the end I decided to (for now) make two of each on separate cd bases.


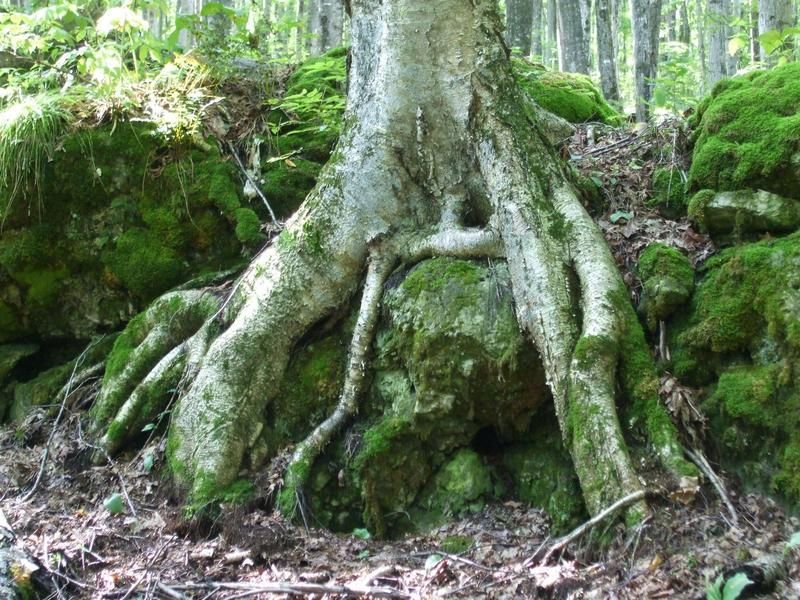
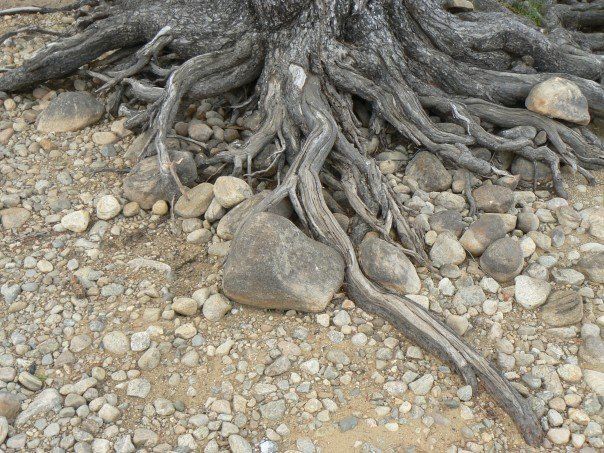
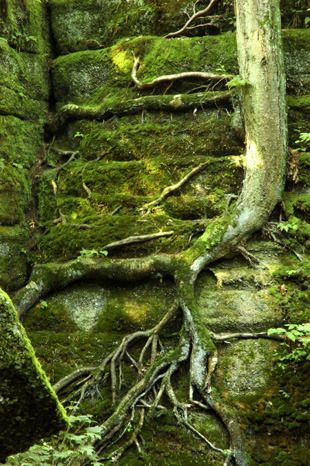
I always like to conduct some image research on Google images before I start and I was keen for my trees to be perched on rocks to give them a bit of extra height and interest and to challenge my modelling skills. These were what inspired me:


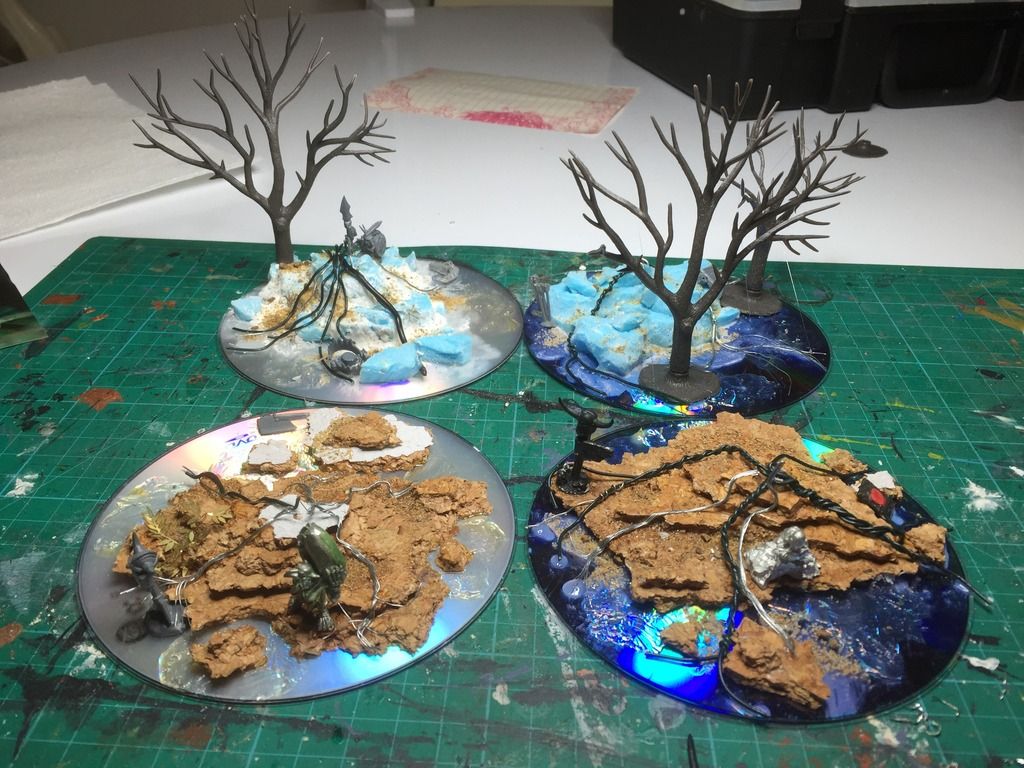
So here are the WIP photos:


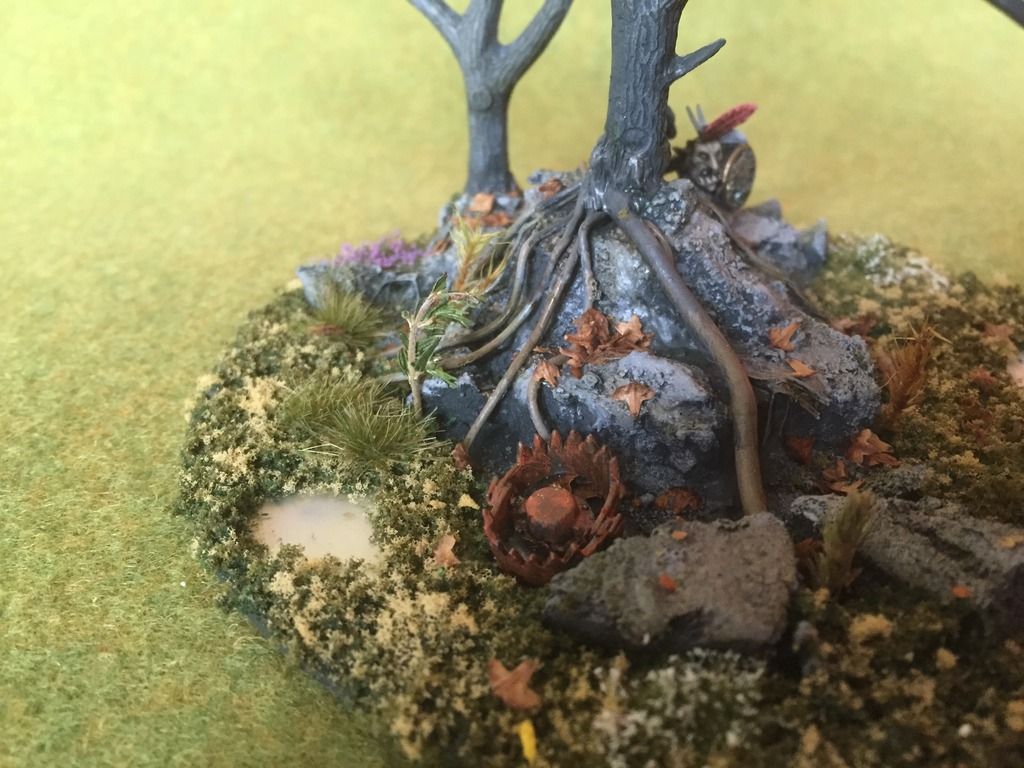
You can see that I've used old CD's for the base, extruded polystyrene and/or cork tiles to make the rocks (these have then been coated in pva so that they can resist the aerosol from the primer) and different gardening and diy wires which were twisted and then used for the roots. Halfway through the process I found some wire in the garage which is already twisted into strands (I think these are from a picture hanging set) and this was ideal for unwinding from a thicker stem into several smaller roots, as you can see on the left one at the front.

The dull, wrinkly patches on the CD's, which look like pva residue, is actually masking fluid - the idea being that after these are primed and painted, I can peel the masking fluid away to reveal the shine of the cd and have a very quick water feature / reflecting pool! I've also added some stuff from my bitzbox to add a bit of narrative to each scene:

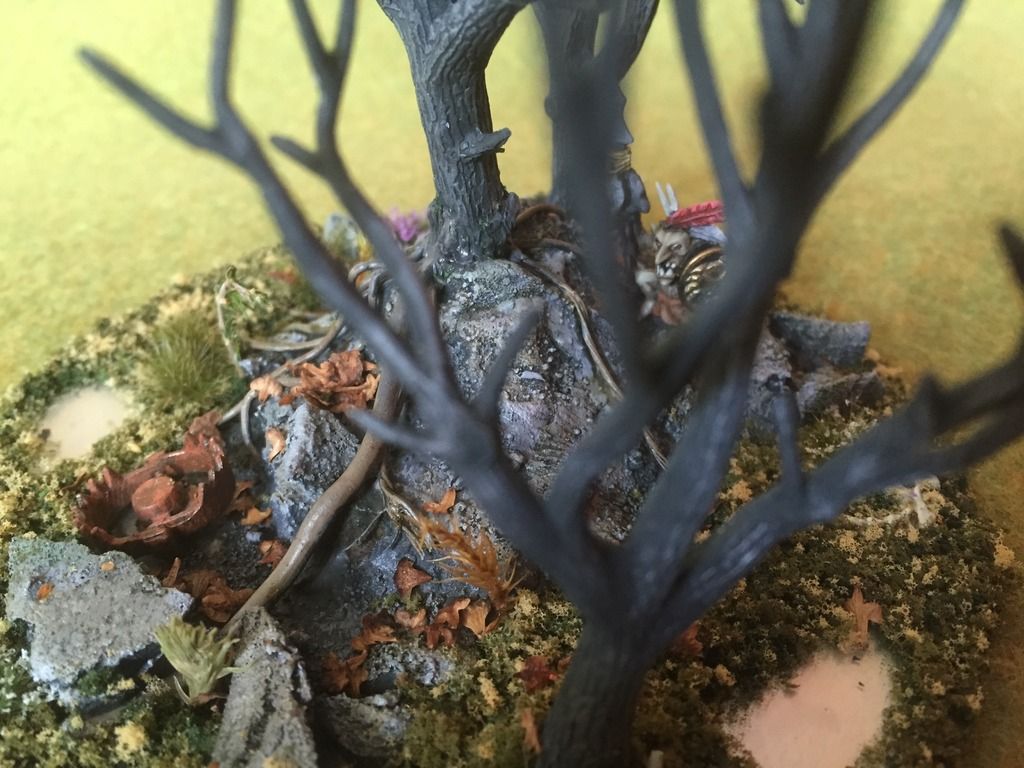
A forest goblin guarding his patch (with the help of a trap)

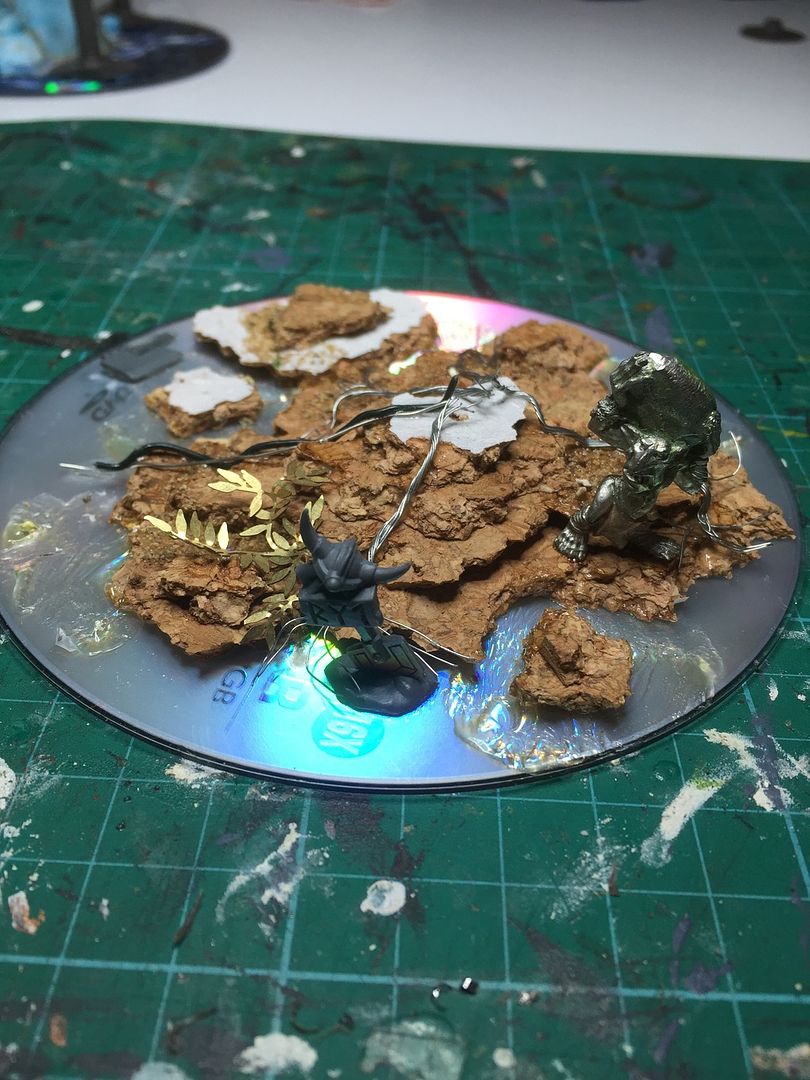
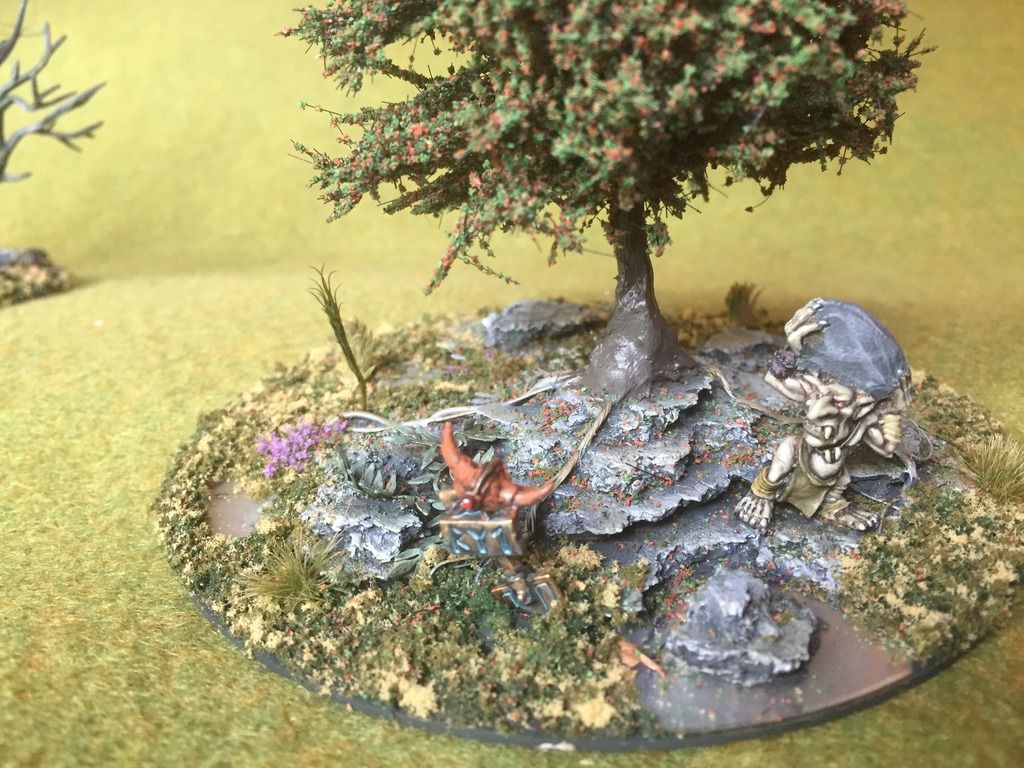
A goblin stealing a rock, from what appears to be a Dwarven area. Some brass etched leaves have been added here too

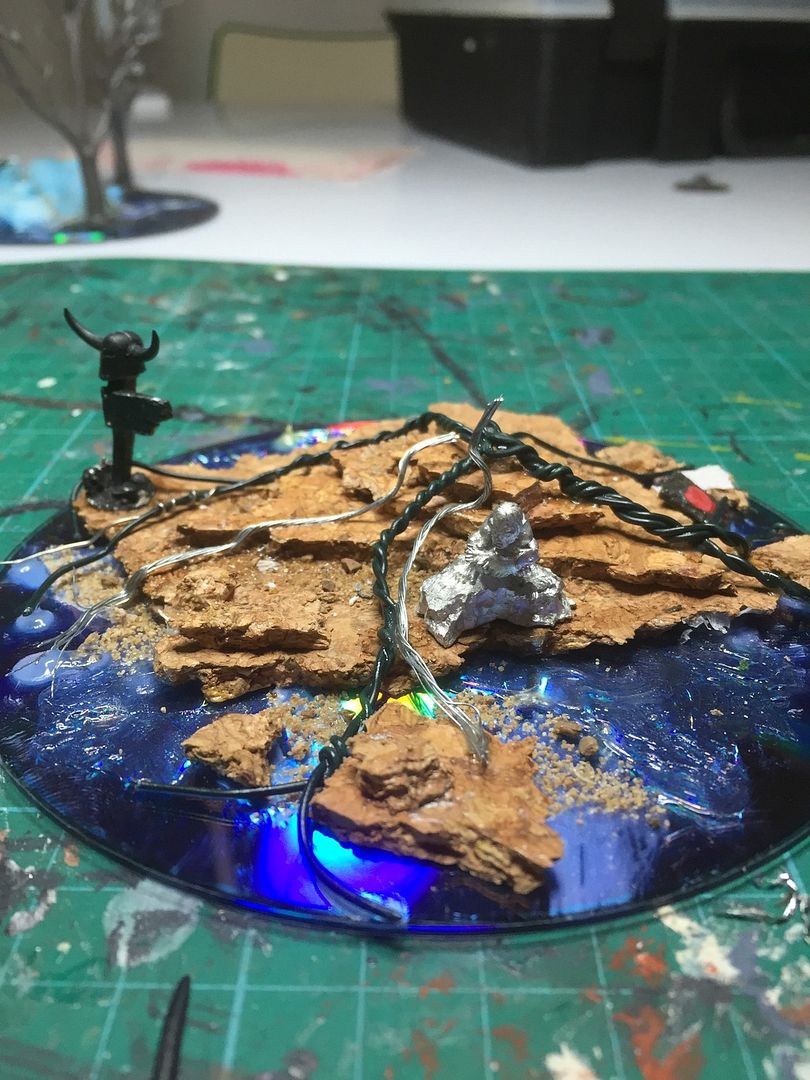
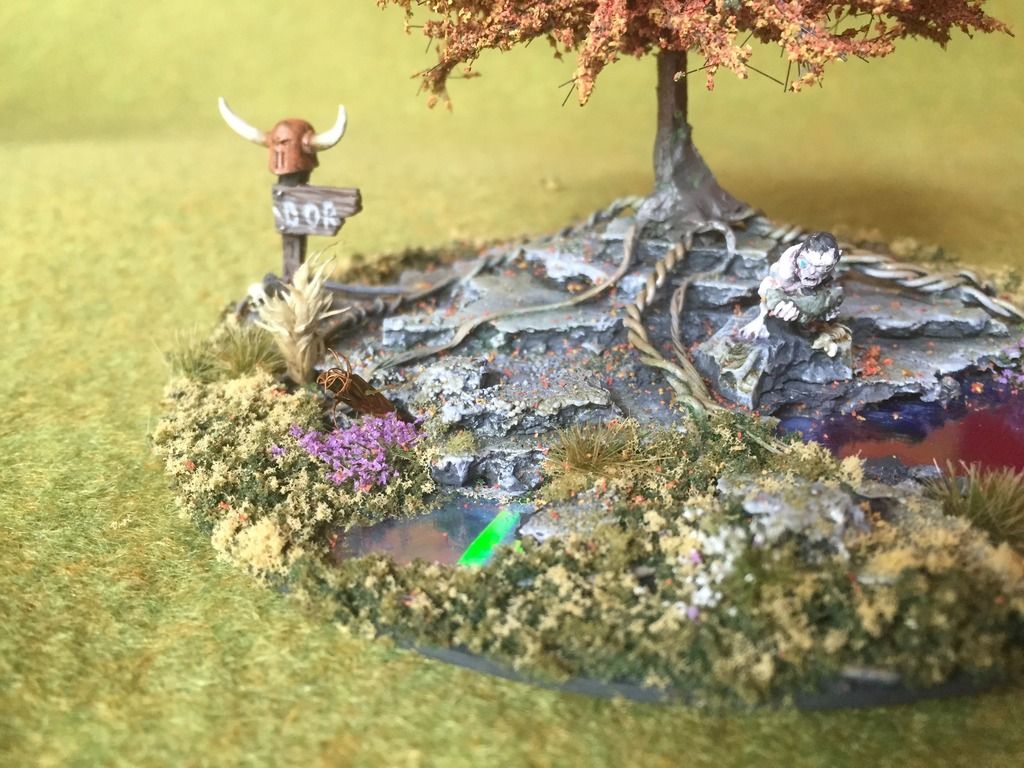
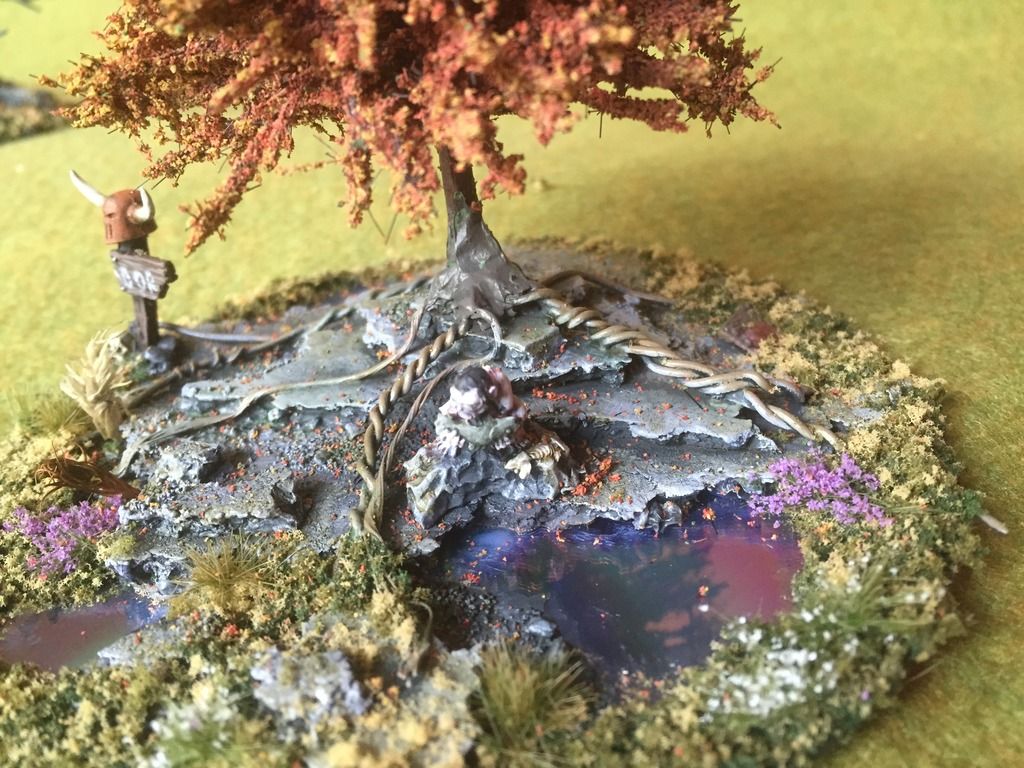
Gollum with a fish by the pool. You can see his reflection in there which adds to the narrative. And a broken signpost in the background which will say "Mordor" on it.

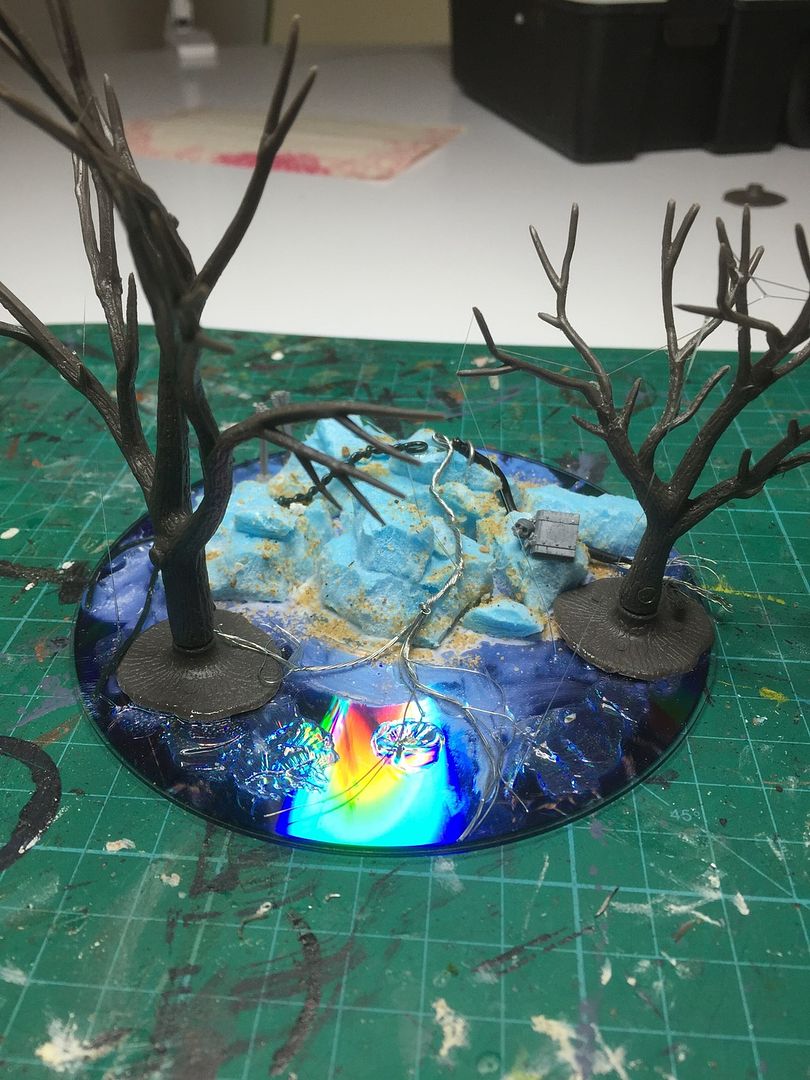
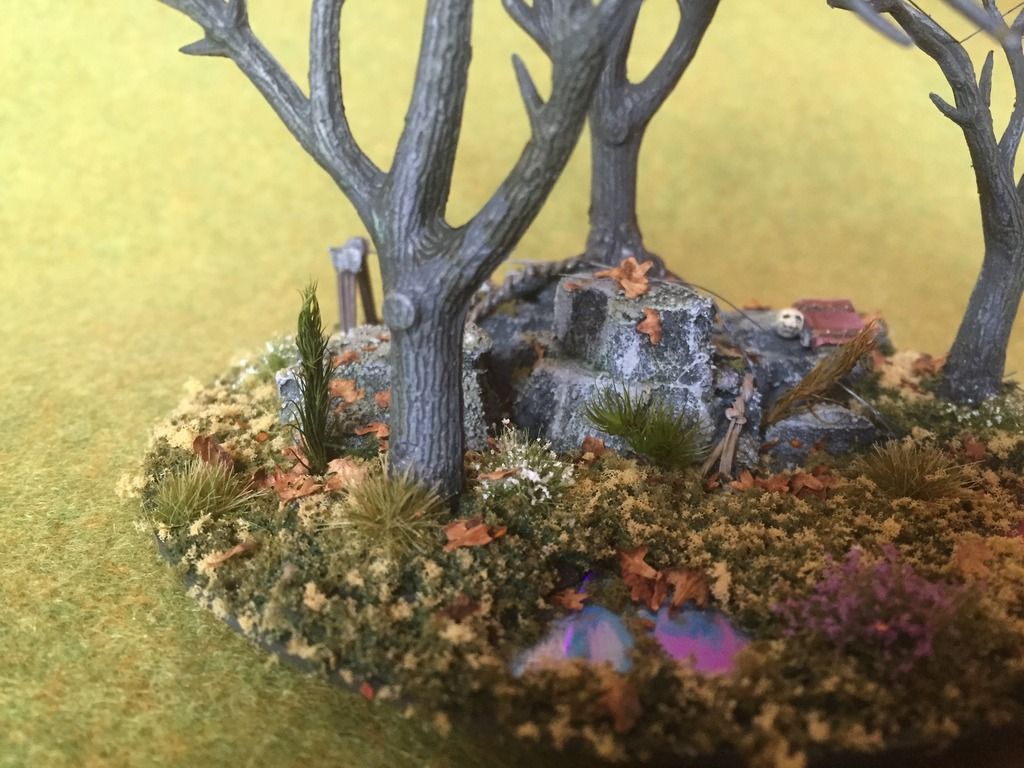
This one has a magical tome on the rock, which could be used as an objective for a scenario. I plan to add an elf leaping between rocks, I have a perfect old model from my bitzbox for this.
Once all the wires were superglued into place, some sand was added to pva to create a bit of extra texture to be painted as either smalls rocks on the base, or where I've added it to the rocks themselves, as moss.

The entire thing was then spray undercoated black ready for painting. In fact the painting was the quickest part. All of the bare trees were dry-brushed with two tones of grey and the rocks with highighted/drybrushed with about 4 tones up to a very pale grey. Lots of washes of greens and browns were added, once the rocks were dry, to create a weathered appearance. The bitz/details which I added took the most time to paint and in the end, to be honest, were a bit of a chore to complete. The problem with adding extra detail is of course that they still have to be painted to a decent standard... You may have noticed through my blog posts that I don't like to do things by half...

The final part was the basing of the scenery, which follows this 
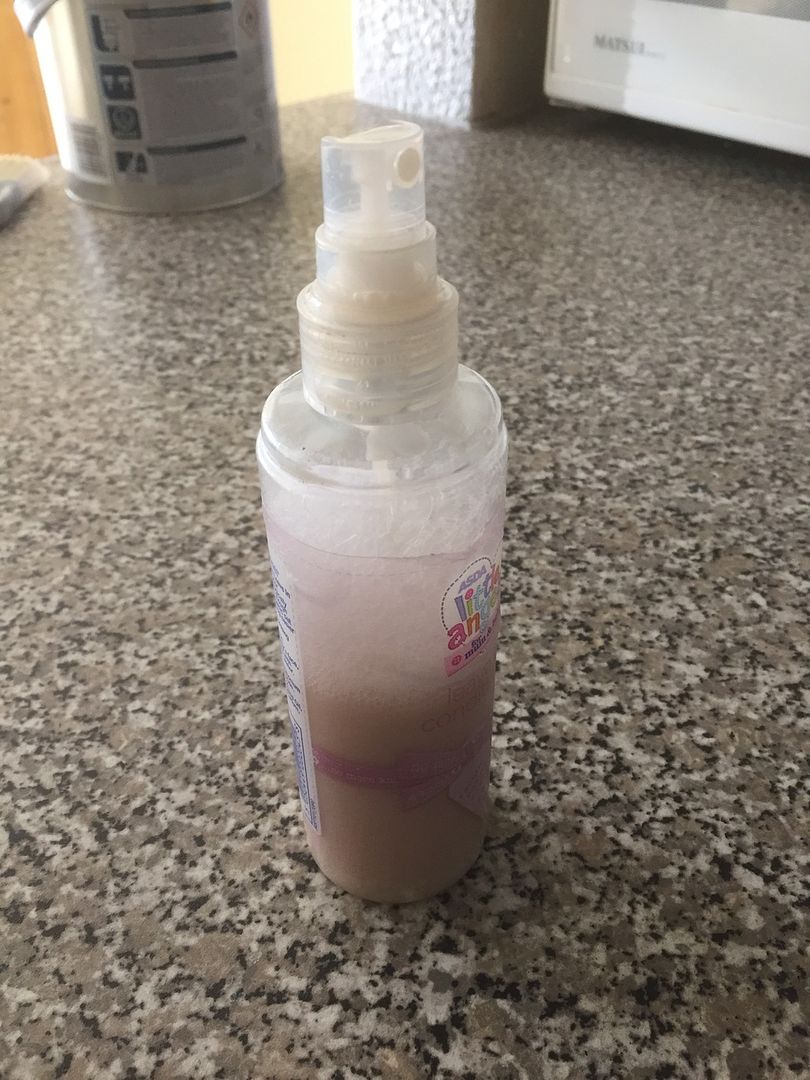
guide, but with the new experimental addition of mixing the pva/water/brown acrylic and some washing up liquid into one of my daughter's used de-tangle spray bottle and then spraying this solution on to each layer (rather than brushing) to quicken the process. It also acts as a nice sealer at the end of the entire process so none of the flock or dried leaves fall of:


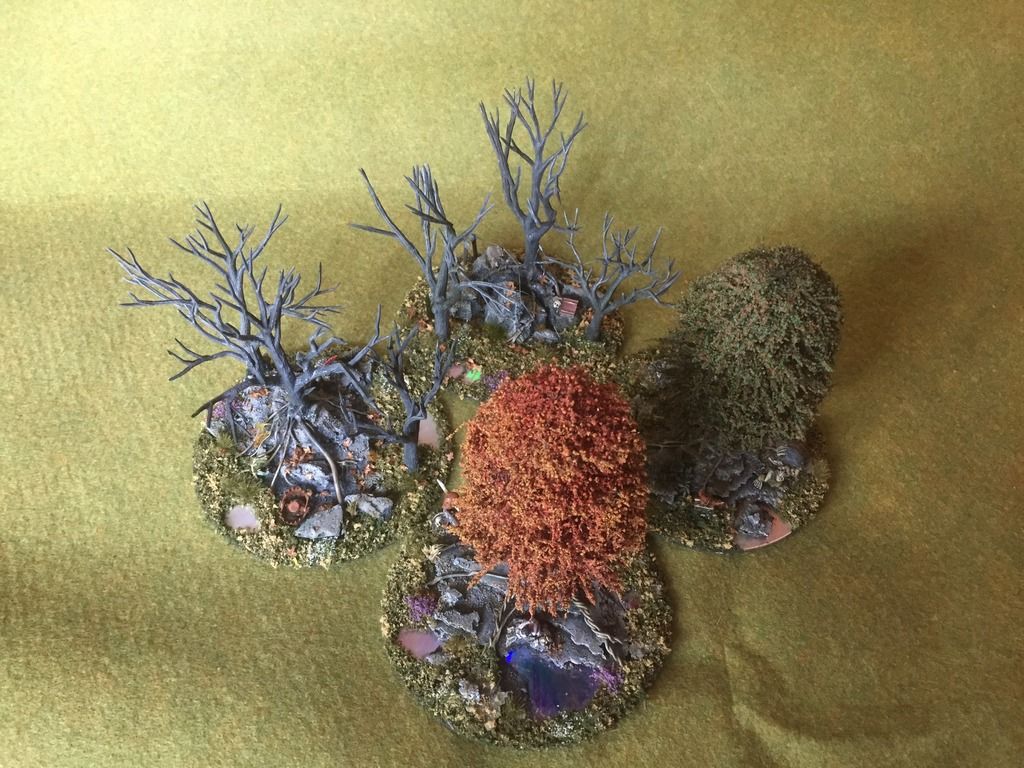
And here are the final outcomes, including some close-ups of the detail, enjoy:


Many thanks for looking and please ask if you have any questions (I forgot to take photos at different stages of the process).