A very delayed follow up to all of those readers who were interested in how I made my
first scratchbuilt modular tile, I've created a step-by-step photo tutorial for your enjoyment!
First up, materials you'll need.
- Wooden base. I used some MDF cut into squares of 60cm squared.
- Extruded polystyrene. (I bought a massive pack of it from an online retailer - there are lots on ebay). 2 different thicknesses if possible, one for the base board and one thinner one for the raised paths.
- Outdoor varnish
- No More Nails
- Hot Glue Gun
- Flat head screwdriver
- Cocktail sticks
- Stanley Knife
- Circular cutter (optional)
- Textured plasticard (optional)
- Ball of tin foil
- Pen
- Black, grey, white, green and brown acrylic paint (or house paint)
- Scatter foliage (I use birch leaves and some grass tufts).
- PVA. Thick and dilute
Step 1.
Cut your baseboard to the right dimensions (often your DIY store will do this for you). Then varnish your board on both sides. This helps prevent warping as a moisture barrier.
Step 2.
Cut your extruded polystyrene to size with your stanley knife. No More Nails it to your baseboard. It will take some time to dry, but will eventually adhere.
Step 3.
Step 4.
Collect your engraving tools; flat head screwdriver, knife, cocktail sticks and punches. [Edit: having completed this laborious stage, I have now invested in some Greenstuff World textured rolling pins - I will try them out and post the results here....]
Press down with one of the punches to create a gutter along the street edge.
Start scoring lines to illustrate the outline of the street.
Cut small incisions at right angles to begin your curb/gutter edge.
Apply a range of pressures to your flathead screwdriver to indent a random selection of individual cobbles. This creates a great variety of raised and lowered areas that is accentuated by the painting stage.
Use a cocktail stick to widen the score marks and create a less clinical line.
Step 5.
For the manhole covers I used some textured plasticard and cut them with a circular cutter.
Pressed them into position so as to create an indent.
Glue gun them down and create circular cobblestones around them.
Step 6.
I wanted to create a roundabout in the center of the junction (eventually there will be a fountain/statue to go in the middle). For this I again used my circular cutter, widening the distance for each circle.
Again using the cocktail stick to widen the incisions.
Step 7.
This is the time consuming bit.... Score horizontal lines across your street sections.
Use your screwdriver or a cocktail stick to create cobble shapes
And then use your screwdriver to assert pressure on random cobbles to lower them. This is probably the most important step in creating a realistic piece of street terrain as it adds a great texture that is emphasised during the painting stage. It takes time, but of course creates much better results.
Step 8.
With the road sections complete, move onto the paved areas. I use a biro for this to engrave a random collection of paving stones. Again I'm hopeful that the Greenstuff textured roller will speed this stage up no end.
Step 9.
Using a ball of crumpled up tin foil, roll it over the surface applying different pressures to texture up all the work you have done so far.
The making is now complete, onto some painting (this bit is really quick).
Step 10.
I use some house paint that I picked up for next to nothing; who'd want this grey on their walls? The unmixed paint is my mid tone, so stage one is to mix it with some black acrylic and some water to create a dark base coat.
Don't worry if you cant' mix up exactly the same tone, in fact I'd encourage you to use a variety of dark tones for your base colour.
Leave it to dry and you should have something like this:
Drybrush the fuck out of it. First coat should be your mid-tone, ie straight out of the pot. When dry add at least two lighter drybrushes by adding larger quantities of white to your mid-tone. Careful not to get too much on your brush.
Until you have something that looks like this. You can see that I haven't consistently applied the lightest drybrushes, they are down the center of the street and in "patches" on the pavement. It just breaks up the shapes and areas.
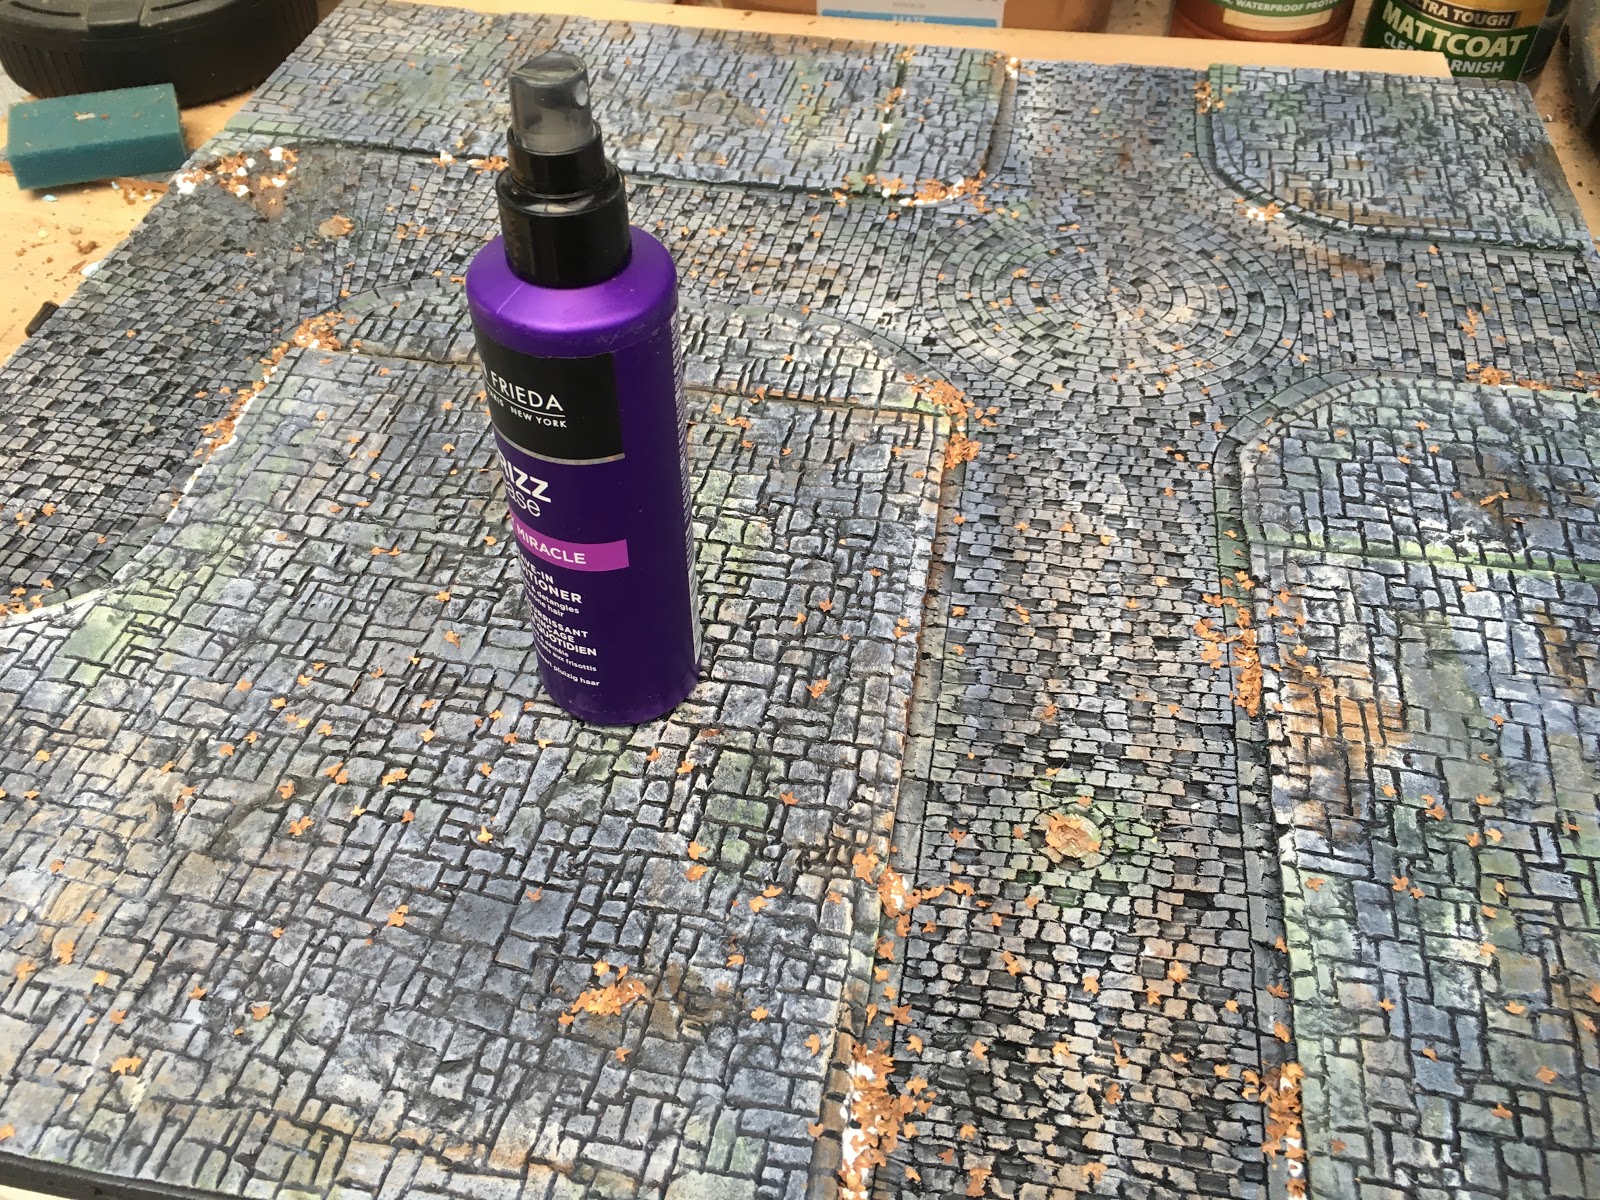
Finally, apply some washes. A bit of green and a bit of brown and varying amounts of water to create a wash. I always start off very dilute and then use slightly bolder colours as I progress:
Until you have something like this. I tend to apply my less dilute and bolder colours to specific areas (gutters, corners etc) where you are more likely to get a build up of dirt and moss (which is basically what these colours represent).
Step 11.
Applying some details. I rusted up the manhole covers with some oranges and browns and then used some thick pva glue to apply scatter such as the bird seeds. I've also experimented in using dilute pva in a spray bottle to help keep any errant leaves fixed. I also added a few self-adhesive tufts of grass to the areas where I would expect them to grow (corners and edges mainly).
And joined together with my first board and populated with a few pieces of scenery.