Showing posts with label troll. Show all posts

Tuesday, 7 February 2017

A mutated troll for Frostgrave

This conversion was originally made for a warband rolled up on the Realm of Chaos charts (I think for the old PapaNurgle forum competition). It's a LotR troll with a sculpted Fimir face and sculpted tentacles (using small beads as the suckers). The axe head is from a Shaggoth and I also sculpted the haft and the breastplate (loosely based upon Fimir / Celtic designs). I wish I had a wip photo to show..

So he's been re-purposed to be used as a (chaotic/mutated) troll for my games of Frostgrave and therefore another one ticked off from my bestiary challenge. 


It's quite a good feeling to go through some old, incomplete and unassigned models and find a purpose for them; he feels loved again (and after all that sculpting I couldn't just let him go to waste).


Tuesday, 22 November 2016

BitzBox Warband - the troll and the centaur

Just over a year ago, I started on a Bitzbox Warband which followed these simple rules:
  1. Every model must be converted / kitbashed to hell (and therefore unique)
  2. I must use only currently owned bitz (no buying more stuff!)
  3. I must not use more than two parts from the same kit on one model
  4. If using Realm of Chaos, then rolls must be adhered to or complete the conversion and then find attributes to match (I did the latter here).
And as a reminder (to me and you) that this is what I "rolled up" on the Lost and the Damned retinue table:

  • Seth Spawnbloat. Level 10 Human. Champion of Nurgle. Infestation of Nurlings. Atrophied Arm, Enormously Fat. Palanquin, Shield, Warhammer
  • Darn the Veiled. Chaos Marauder. Mark of Nurgle, Horns, Heavy Armour Shield.
  • 5 Beastmen. Standard. I decided to create a Beastman champion to lead these; 
  • Araf. Level 5 Beastman. Mark of Nurgle. Bestial Face (Dog), Limb Loss (leg), Demonic Steed (Skull Face, Horn)
  • Chaos Centaur


The last model on the list is shown here and whilst working on it, I also found a partly converted stone troll from my old bitz box that was just screaming at me to be completed - I've painted a lot of stone trolls in my time and they always provide a treat for the brush. So I've added him to the group and in doing so have broken my own rule 4, but for completions sake, here's the new addition:


  • Troll. Pinhead, Horns


Hands up like you just don't care. The score sheet is based upon "When The Saints Go Marching In". Imagine him banging that out on his drums as the warband approaches....

The parts used for the conversion are pretty diverse, Orc drums, Horror torso and arms, flagellant boards, plastic dragons(?) tail, plastic cold one body. I deliberately painted him pretty Tzeentch like with yellows, blues and purples, but the addition of a greenstuffed gut, gave him a slightly Nurgle look.

The troll is a very straightforward conversion; a plastic chaos warrior head applied and greenstuffed around the neck and a ForgeWorld GUO horn added to his shoulder with some sculpted flesh around it. I wanted to create an albino feel to this chap, working with cool pinks and a cool blue for the scales, contrasting with the more solid colours of the wood, metal, axe and base. Always a pleasure to paint these though.


Moving onto the 4 Beastmen next, maybe.


Wednesday, 16 December 2015

Dungeon tiles: submerged room


I've been wanting to start on a new dungeon tile where I get to use some coloured water effects. Every dungeon crawl needs a room like this, with the mystery of what lurks beneath or what the murky liquid actually is... In the back of my mind I had this scene as I started work on it (I wish I had added an eye or tentacle poking out now in hindsight):

Here's a few work in progress photos:

Here you can see I've added some cut up felt tip pen lids for pipes, a piece of plastic tubing for a rogue metal pole and some twigs and seed pods for alien like swamp fauna.


Just before the painting stage I also added some Mantic skeleton bits and a mushroom, all of which I thought would look quite cool partly submerged. For the painting I used my usual technique of a dark grey household paint (it's in a huge tub) then drybrush/highlight up with added white, wash down with a very dark grey and add some final glazes of green/brown to dirty up the stone.

It was the next stage that gave me the most trepidation, pouring the Woodlands Scenic Realistic water onto my polystyrene tile... After some research, experiments and remembering my past attempt here, I realised that I would have to properly seal my tile. For this I was instructed to use Polyeurathane Interior varnish, which I brushed on liberally over the areas which would receive water. One this was dry I mixed the Realistic Water with a very small amount of green ink added and a very thin amount was poured in. Of course the liquid found a very small gap in the construction of the tile and seeped out, but I remedied this with a glue gun dam and re-poured:

You may also wonder what the velcro strips are for, well I'm experimenting with detachable walls that can be used on the dungeon tiles and some Frostgrave ruins I've got in mind...... More to follow...

And here's the finished water effect, pretty happy with it!


And here's some photos with models involved, you can add your own narrative:


A partly submerged GW troll that  converted and painted some time ago

The first Reaper Bones miniatures I have ever painted, decent sculpts and detail for a bargain price.

Here's another source for my inspiration which is from SaintJG at DevantArt:


Many thanks for looking.

Monday, 15 December 2014

Back catalogue - a swamp troll


A little while back I got my hands on a sole plastic troll, it looked kinda cool from what I'd seen on the Internet, however the heads always looked a bit strange. So a quick conversion by adding the plastic Giant head and then removing the weapon and replacing it with a branch. To add some character there's a bit of greenstuff in his mouth to mimic some troll vomit:


To help with the illusion of him standing in a shallow swamp I didn't apply the feet and I then added some mushrooms, a rat and a floating body, all filed flat to sit flush on the base.
The base itself was then sanded smooth to remove the texture you get on them and when the miniature was completed I applied several coats of gloss varnish to get the final swamp appearance. For the branch I also added small bits of moss and I also used a Tamiya Mud weathering stick, which is basically a brown oil pastel.
Anyway I'm really happy with this figure and would like to make two more to create a unit of them.

Tuesday, 2 September 2014

Retinue Table; A troll


Hi all; a bit of a hiatus on the blog over the past few weeks (and a short post today), as I have been relaxing on holiday in Crete and obviously had little desire or opportunity to do anything hobby related. In fact I barely had access to the internet for the fortnight which meant I got to spend much more uninterrupted time with my wife and kids; which was a struggle at first! My return has left me with a lot of blogs to read and catch up on and I've looked at my pile of unpainted miniatures in a refreshed light only to find it even more daunting.... However I'm up for the challenge even though time will be precious again with the school term starting today (a tedious Inset day).

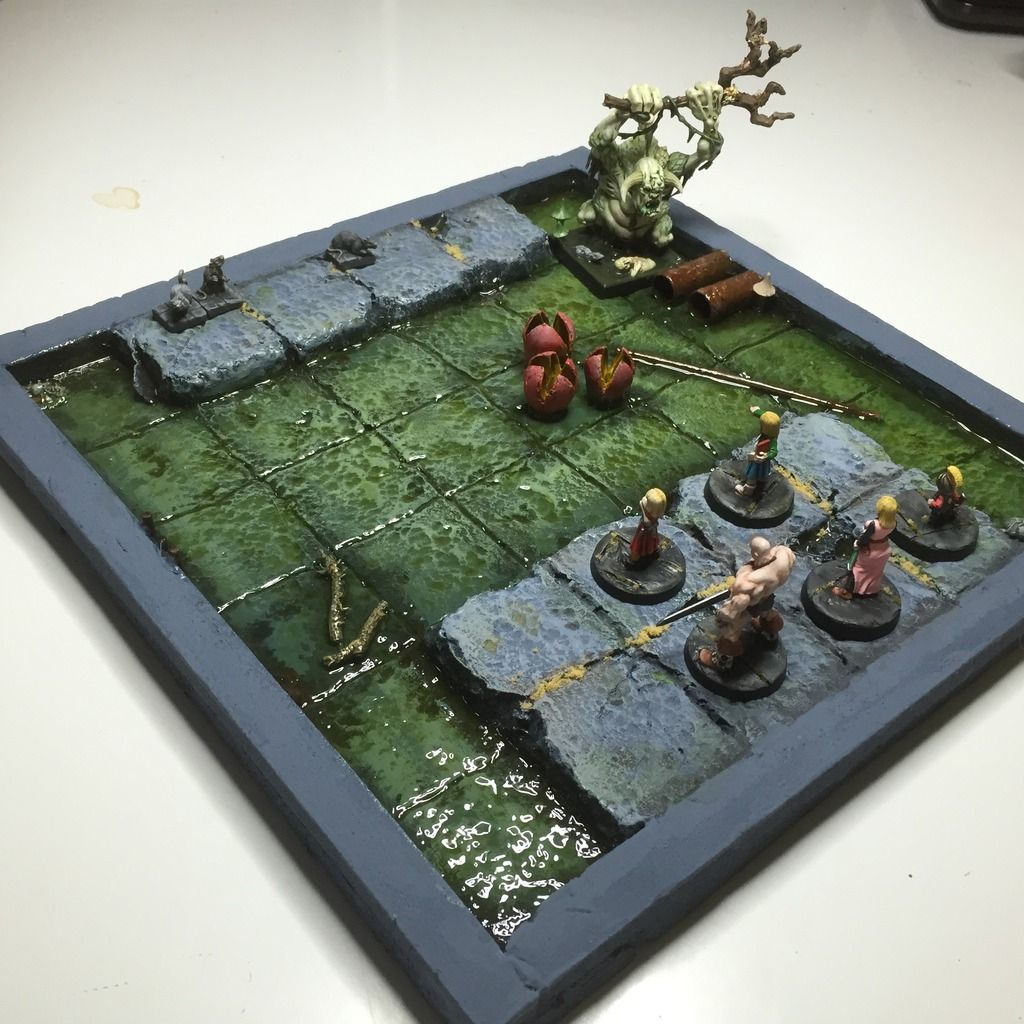
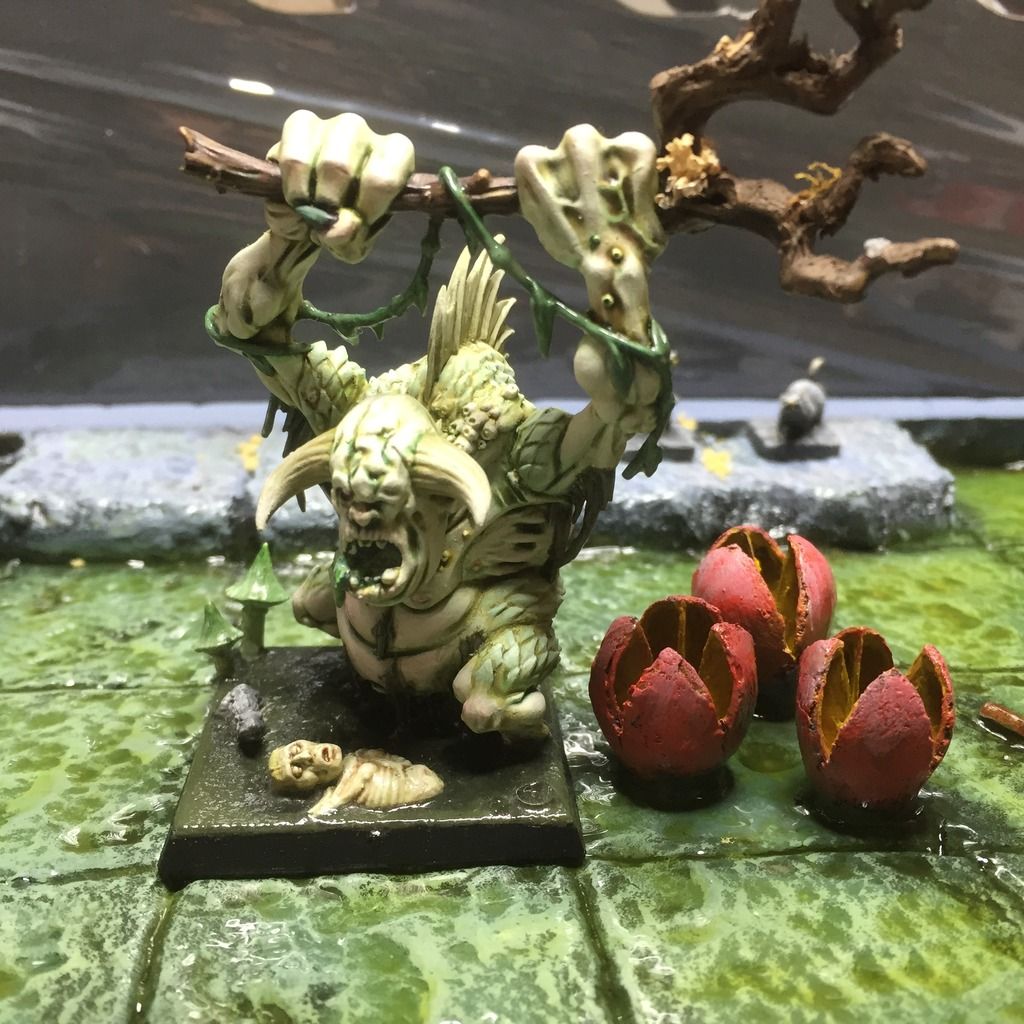
So just prior to my holiday I did manage to paint this old troll for my retinue table challenge (and for my scenario at the BOYL weekend). I've painted the skin in my usual pale pastelle pallette but wanted to set myself a challenge for the fur. I completed some research on the internet into different animal furs and decided to go for a tiger pattern:


The first thing I learnt was that the sides of the fur are very pale, almost up to white and the second thing I struggled with was the painting of the black line pattern accurately onto a sculpt that is heavily textured - I ended up using a precise dilution of paint that flowed well without running down the model.

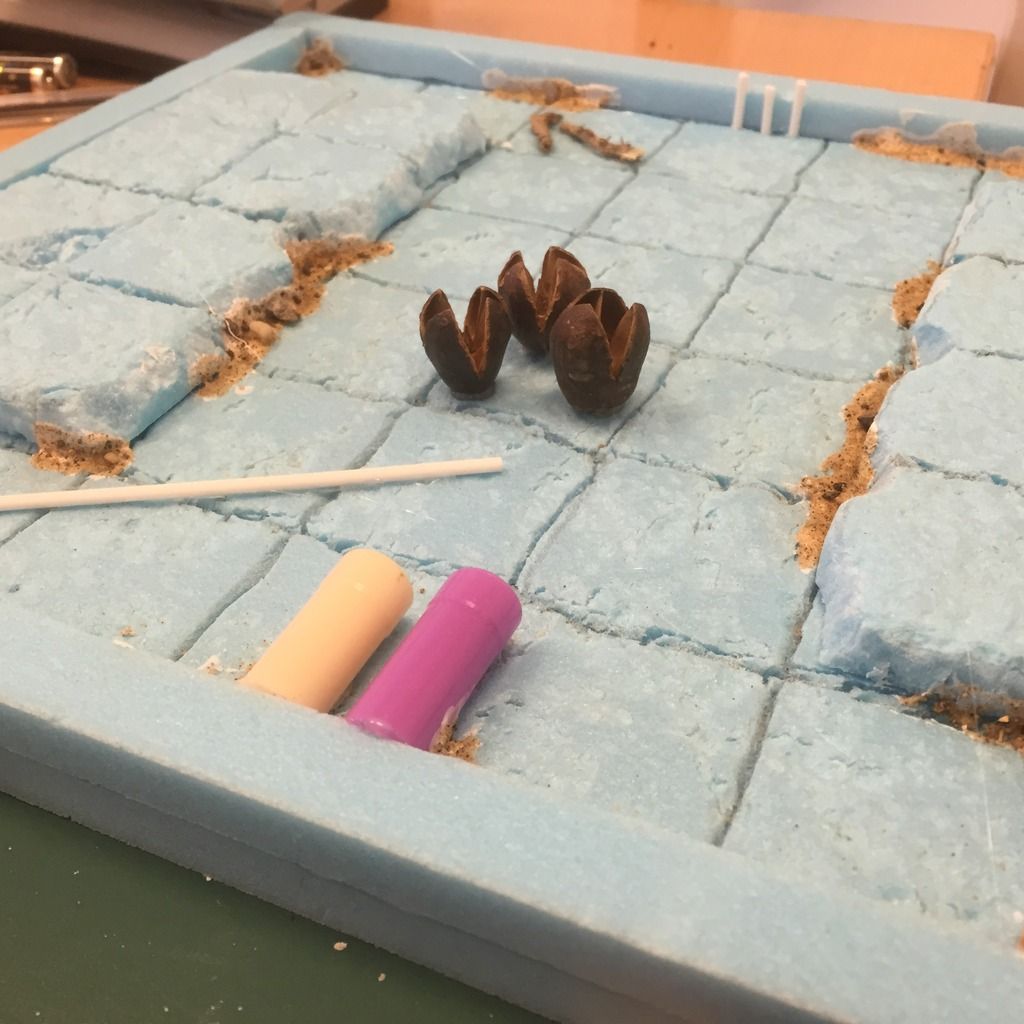
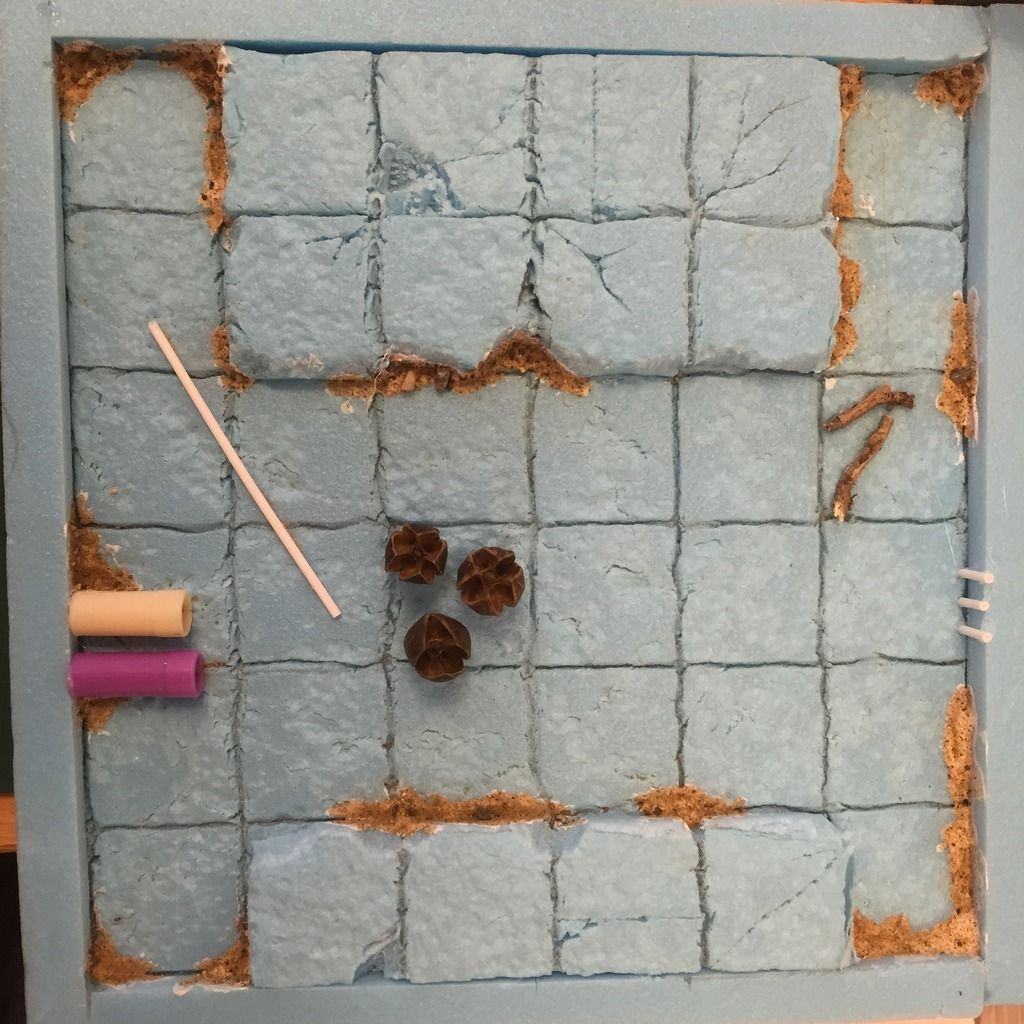
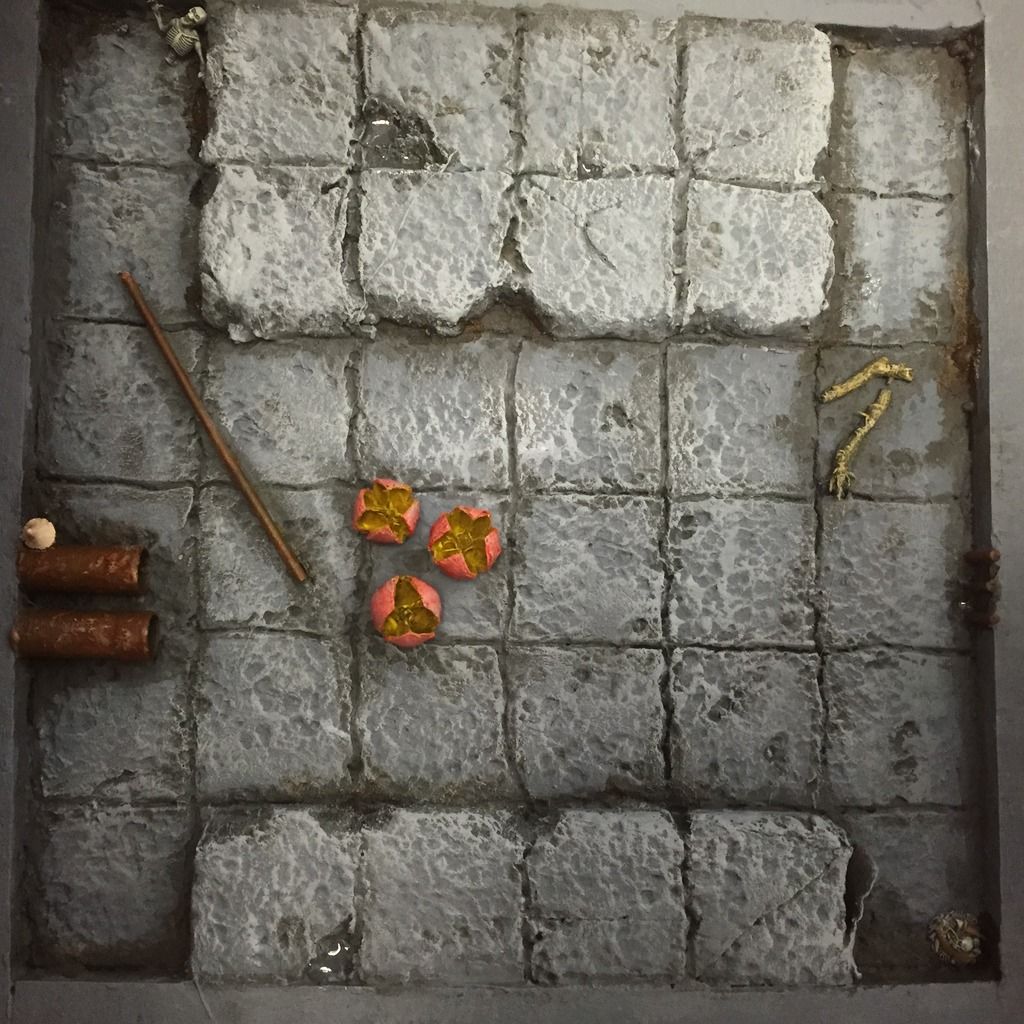
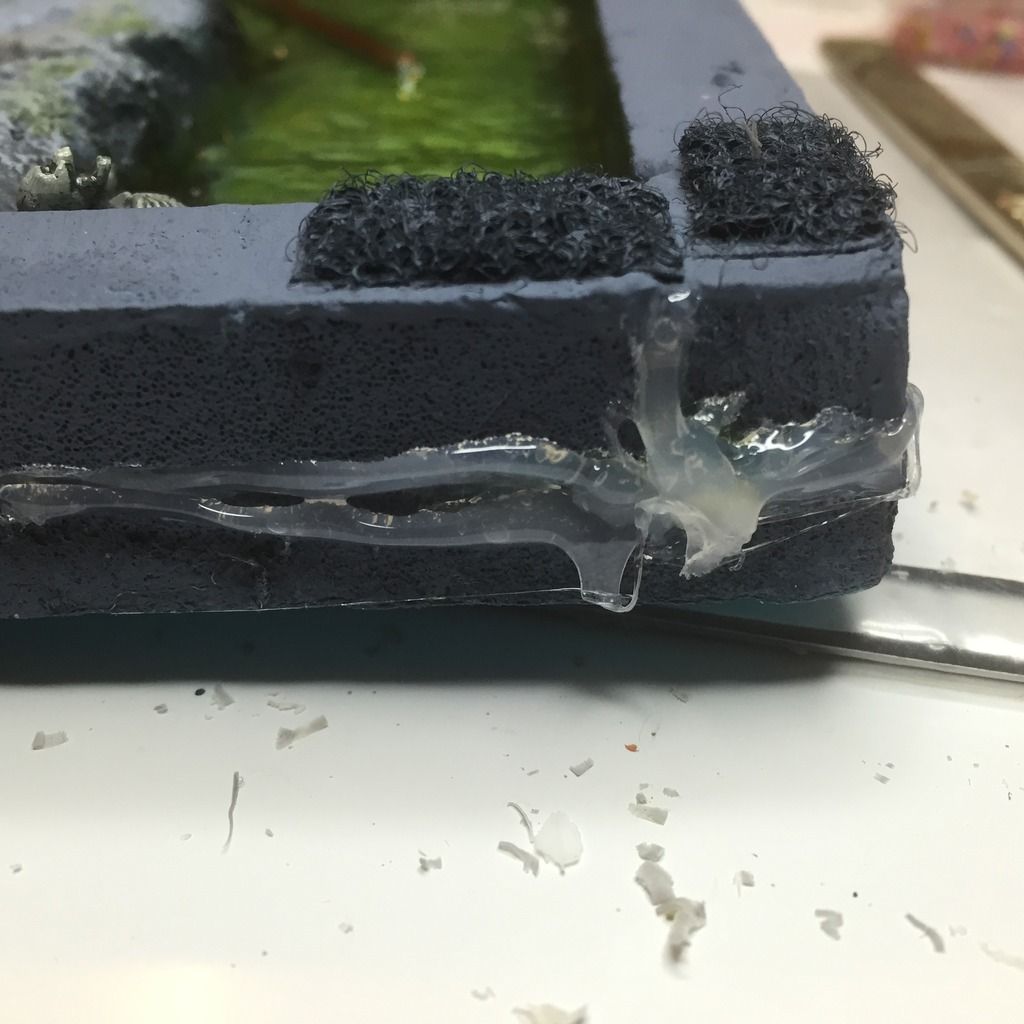
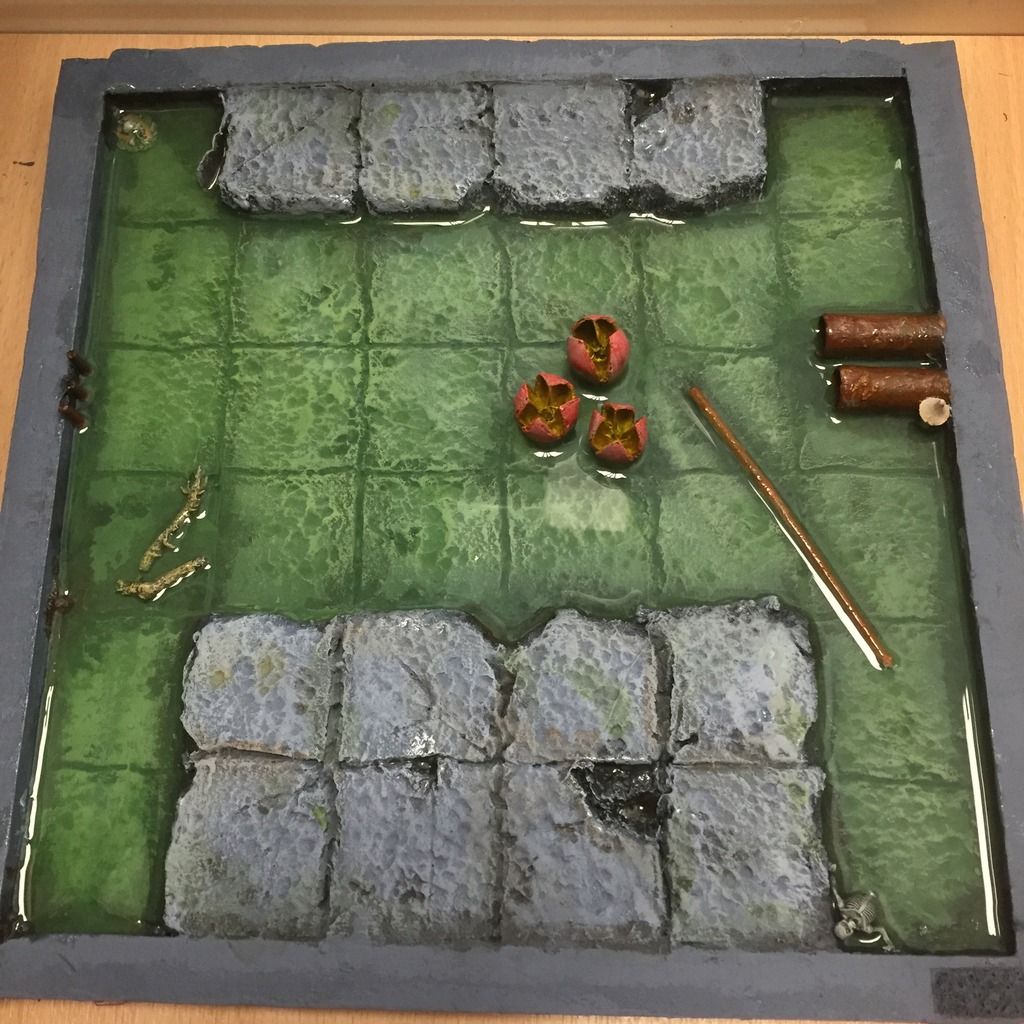
 I've also gone for a swampy base by sanding the texture off of the 40mm base to make it smooth; raising the model up onto several layers of cork; created bubbles by adding some cut in half balls of silicone gel that you find in small packets with your newly purchased trainers and then applying a range of green paints followed finally by several coats of gloss varnish over the swamp areas.

The vegetation base (and on top of the rock he is holding) is my usual technique that I will show a step by step of in a future post. Hope you like it!