Showing posts with label movement trays. Show all posts

Thursday, 17 December 2020

My Magnetised Movement Trays/Display base (a tutorial)

 For some time now I've been making my own magnetised movement trays/display bases for my Lost and the Damned army, and as I was making one for my unit of 49 Diseased Flagellants I thought it would be a good opportunity to do a quick tutorial of what works for me. 


I magnetise both the top and bottom of my movement trays, the top obviously so that the models stay in place, the bottom so that all my movement trays can be safe in a large storage box and don't move about when in transit. Photos of that arrangement at the end. Now I realise that I could have saved a lot of time if I had made the tray out of steel and just applied magnets to the models and to the base of my storage box, but I went this way first and besides, steel is more difficult to work with.

Below you can see the tools and materials you will need for the basic construction of the movement tray:


From left to right: self-adhesive magnetic paper (thick), steel paper, balsa wood, 3mm plywood, thin polystyrene, pva glue, superglue, pencil, scalpel, metal ruler and scissors.


The first step is to cut the plywood to size. I used plywood as unlike card, it doesn't really warp and is easier to cut than steel. For this task, I knew that my unit was to be made up of 49 models (ranked 7x7), each on a 1 inch base, so the first dimensions drawn on were 7"x7". However you need to leave space for the movement tray edge, so here I added a 1/4" all around. So the overall size of the tray is 7 1/2" square.

Once the plywood was cut with a saw, I then measured (7.5" square) of the self-adhesive steel paper, sufficient to cover the bottom of the entire movement tray. This was drawn out and cut with scissors.


Back on top of the tray I then measured and cut a 7" square piece of the self-adhesive steel paper. This leaves a border for the balsa edges to be added. I find that balsa's ease of cutting is perfect for this. I use balsa that is slightly thicker than a warhammer base, which compensates for the raised height of the steel paper. Below you can see my measured and cut edges. 


These are simply glued in place with PVA and a stack of books added for weight to ensure a strong bond. Choose your books carefully and never use your best book at the bottom for fear of seeping pva! I used some of my wife's hardbacks at the bottom!


Here's the finished construction:


For the miniatures themselves, it is just a case of magnetising them. However the 25mm (1") bases are hollow, so they need filling. This is where the foam/polystyrene is great. I just superglue it in place:


And then cover it with an inch square of magnetic paper.


Here you can see the models on their movement tray and held at an angle. I could probably hold them upside down with the strength of the magnets:


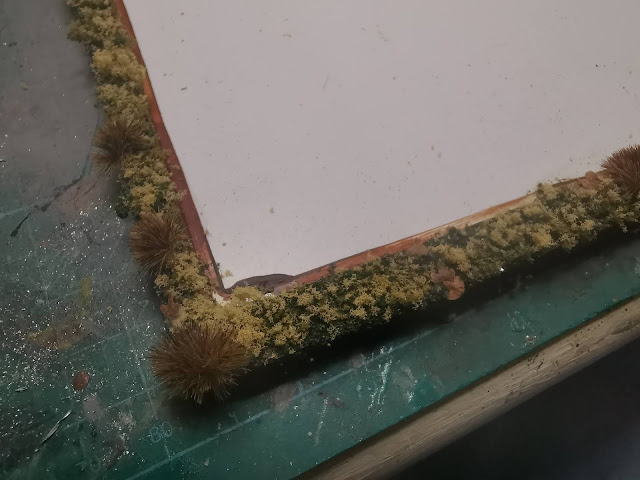
Finally the movement tray is based to match my Lost and the Damned army bases. 
1. Paint the base colour brown (earthy colours as sometimes you can see this through the yet to be added foliage)


2. Then a dark green Woodlands Scenics is pva glued into place:


3. For the two subsequent layers of lighter green foliage, the pva glue is diluted with warm water and a few drops of washing up liquid and applied using a dropper bottle so as to not disturb the layer that is already glued in place:


4. The two lighter shades of green are sprinkled on, avoiding any large clumping:


5. The final movement tray with scatter leaves and clump foliage:


And a close up shot:


Can’t wait to fill this with all the flagellants I’m currently kitbashing (I’ll share these in my next post).

Thursday, 14 May 2020

14 Chaos Warriors of Nurgle (1120pts)

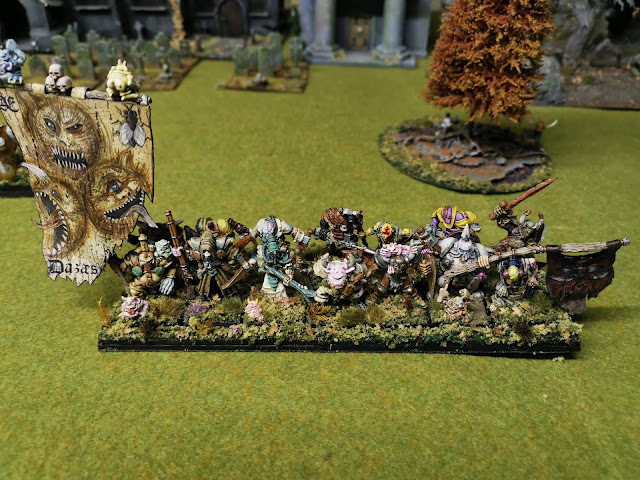
You may have seen these before, as a previous blog post showed how I had finished painting all 11 of the original Citadel Nurgle Warriors well there's now another 3 models added to make it up to the magical number 14, in two ranks, with a standard. That's a hefty 1120points right there in 3rd Edition Lost and the Damned numbers.

Add caption


As you can see, I’ve re-set up my attic scenery space, as I had to pack it all away when the builders were here. It’s so much better for taking decent photographs of wide units.

So these and the Beastmen give me a grand total of 1270pts thus far, I think this army is going to be a lot of points! 

Wednesday, 22 March 2017

Magnetic movement trays and storage

I started doing this after a "prompt" from my missus: "Your models and little men are starting to take up too much room under the bed; I'd like to get some space back for my shoes". Now I was quite happy to be given a hobby related task by my lovely wife and of course I really wanted to ensure she has enough shoe space, so last night I set about trying to rectify the problem.

A lot of my models are in those sponge GW cases which whilst protecting well, do take up a lot of space for a small number of models. Also when they are stored in them, I can't see them and glance over my handy work. I tested the waters with view on getting a Display Glass Cabinet, but it was not met with much enthusiasm - and she does have a point, we don't really have anywhere to put it, certainly not until I get my man shed...

So I got hold of some big plastic storage boxes, found my old bits of sheet and strip magnets as well as my paper steel and set about making some magnetised movement trays that would then in turn be magnetised to the bottom of the storage boxes. Below you can see me working on my ogre unit as an example:

The thin steel paper has a self adhesive layer and was trimmed to fit inside the movement tray which I had already made. Thankfully (from experience) I had the foresight to make the lip of the tray higher than necessary so that the additional layers and bulk of magnet and steel wouldn't leave the models higher than the tray's lip.

Self-adhesive magnets were cut and applied to the bottom of the base.


Some steel paper was then applied to the bottom of the movement tray. In future I would consider actually making the entire movement tray out of steel, so as to skip two of these steps, but for now I'm adjusting what I already have.


The finished, fully magnetised unit.

And in the storage box. I've used strips of magnetic tape across the width of the bottom of the box, again self-adhesive and the movement tray is now firmly positioned in the box. 


Here you can see some further progress with other units. This is box 1 of 2. This box is my "Allied/Mercenary Factions" box; Chaos Allies with Centaurs, Minotaurs, Chaos Dwarves and of course the Ogres. I'll be adding Orcs and Goblins, a Giant and a Dragon to this box.


Next up is my Lost and the Damned Nurgle Army, containing all the units that are represented in the army list from that tome. (Hence why Centaurs and Minotaurs have become Allies). Some Plague Knights, Skeletons, Diseased Flagellants a War Altar and a Plague Cart all need to be added to this box.
So magnetising all of this will take some more evenings, but hey, I was asked to do it! 

(ps. it hasn't saved a great deal of space under the bed, perhaps enough for two extra pairs of shoes, but it is certainly tidier and allows me to take out the box and have a look over my creations...). Win win!