Saturday 26 December 2015

Sanity Claws; Happy Christmas fellow bloggers (and 100 posts!)

A while ago, to celebrate the anniversary of this blog, I asked if any of my readers would like me to paint a model of theirs for them; well two were done and a third was waiting for JB of Leadplague to send me something through. He decided he wanted me to paint Sanity Claws, which I'm sure was a ruse to ensure I painted it before Christmas, well I managed it, just:


I put a lot of thought into this paint scheme (believe it or not!) It's hard to stray from the traditional colours of Santa Claus, or as the Dutch settled in America called him "Sinterklaas" and I was hoping a bit of research into the original St. Nicholas would provide me with an alternative colour scheme. Alas nothing struck me as better than the expected, so I decided to stick with the red cloak in the end. But this model was a complete bitch to paint. The sculpt is very characterful, but quite hard to interpret some of the details (there's obviously a spanner in his bag and I think the other item is a wrench but it looked way too much like a robot dinosaur and I was very close to painting it with green scales). I painted the elongated shape next to the manacles(?) as a Christmas cracker and the slightly bizarre bell/axe was confusing too. On top of this there are some quite fiddly areas to get my brush into too.

I went for a pale green skin tone to complement the red cloak and added a touch of blue to the white fur to create a cooler feel to the warm red. In hindsight I wish I had added some pale red or black rings around his eye to make it stand out further.

The base is created with a few bristles from a paint brush as reeds and the snow is baking soda sprinkled onto some pva. I hope it yellows over time!

Well I tried my best, better than I usually do on such challenging models as it is for someone else, I only hope JB likes it enough...

So finally from me I wish all my readers a Happy Christmas even if it may be a bit tainted by Chaos.... which is as it should be,

Sunday 20 December 2015

Frostgrave / Dungeon Tiles: Mausoleum


Frostgrave has grabbed my attention and shaken my hobby plans right up into the air. So I'm trying to ensure anything that I now make for Frostgrave can be multi-used for my dungeon/ Heroquest project as well and "multi-purpose" has become my new hobby catchphrase. So having bought the Frostgrave rulebook (it's a lovely piece of work; the rules seem simple and straightforward to pick up and there is a real old school Oldhammer flavour with the inherent need to create terrain, use your favourite models to create warbands and to play to a narrative/campaign with the chance of advancing your character - exactly what I have strived for ever since I came across GW's Realm of Chaos). There are a lot of similarities between the two systems which I may go into further in a future post...

The Mausoleum scenario describes the terrain set up as :

"A small or rectangular building.....The sides should be at least 6". Each side of the building has a door in the middle of the wall (this doesn't need to be depicted on the terrain)."

So with that in mind and having conducted my usual image research for inspiration (both real and modelled mausoleums), I dived in by carefully measuring everything out! 6" is the equivalent of four squares on one of my dungeon tiles, so it fitted perfectly with the measuring system I already had in place:

All the parts laid out after careful measuring and cutting. The building is constructed from foamcard, with a couple of plaster of paris cake decoration pillars and a bit of plasticard. At this stage I was torn between a wooden curtain rail pole end and a Christmas bauble for the domed roof.


Detail of the door. Four rectangles are cut out to add depth, four small rivets punched out of some plasticard and a push-tack with a cool star emblem in the middle pushed through.


Gluing the walls together with pva and a trusty elastic band to keep the pressure on so I can keep my hands free and move on to the next part.


Scraps of right-angled foamcard are used to strengthen the corners

Smaller construction of the pitched roof for the entrance. Foamcard walls and thin plasticard for the roof. A piece of plastic piping to cover the join at the apex. An old Bretonnian shield from my bitz box was added to create a piece of history/narrative for the occupant of the mausoleum.
Putting the roof on and gluing the pillars into their place. Lots of careful measuring to ensure everything is central and symmetrical (and the correct height). At the front of the flat roof you can see the scored card I used to cover the edges of the exposed foamcard.
The final raised roof with the wooden pole end used. Finding the central point from corner to corner is useful for this additon.


The completed structure. I quite like the contrast of very angular lines with the curved dome.

To create the stone effect, the entire structure was coated in a thinned layer of Polyfilla. It creates a nice texture to paint onto and was used to fill any tiny gaps between different panels. Obviously my measuring and cutting was so precise to not worry about this!


A last minute addition. After the building had been painted dark grey and drybrushed with successive lighter tones, I found some old  Letraset letter rubbing sheets. I fancied some Latin inscription and went for "Dead Lead" which translates to Plumbum Mortuis. (I now know why lead is labelled Pb in the periodic table..)
All the stonework is finished, just a corroded door to add


Some weathering with thin glazes of greens and browns

And the final piece. For the dungeon tile itself I quite simply painted a white, yellow orange  mix of acylic colour, with the lightest colour emanating from the center of the tile. When this was dry I then drybrushed my usual dark grey (but covering most of the tile away from the middle and less in the middle) and then drybrushed lighter tones of grey as normal. It didn't take very long to get quite a cool (or warm) glowing effect.

And finally these sarcophogi are from Dark Art Studios and were painted really quickly to add to the narrative of the dead being awoken. I have a bunch of Heresy Ghouls which I would like to add to this idea...
So I intend to use this for either my Family Heroquesting/Dungeoneering or for some Frostgrave once I've finished my numerous, nearly completed warbands...

Wednesday 16 December 2015

Dungeon tiles: submerged room


I've been wanting to start on a new dungeon tile where I get to use some coloured water effects. Every dungeon crawl needs a room like this, with the mystery of what lurks beneath or what the murky liquid actually is... In the back of my mind I had this scene as I started work on it (I wish I had added an eye or tentacle poking out now in hindsight):

Here's a few work in progress photos:

Here you can see I've added some cut up felt tip pen lids for pipes, a piece of plastic tubing for a rogue metal pole and some twigs and seed pods for alien like swamp fauna.


Just before the painting stage I also added some Mantic skeleton bits and a mushroom, all of which I thought would look quite cool partly submerged. For the painting I used my usual technique of a dark grey household paint (it's in a huge tub) then drybrush/highlight up with added white, wash down with a very dark grey and add some final glazes of green/brown to dirty up the stone.

It was the next stage that gave me the most trepidation, pouring the Woodlands Scenic Realistic water onto my polystyrene tile... After some research, experiments and remembering my past attempt here, I realised that I would have to properly seal my tile. For this I was instructed to use Polyeurathane Interior varnish, which I brushed on liberally over the areas which would receive water. One this was dry I mixed the Realistic Water with a very small amount of green ink added and a very thin amount was poured in. Of course the liquid found a very small gap in the construction of the tile and seeped out, but I remedied this with a glue gun dam and re-poured:

You may also wonder what the velcro strips are for, well I'm experimenting with detachable walls that can be used on the dungeon tiles and some Frostgrave ruins I've got in mind...... More to follow...

And here's the finished water effect, pretty happy with it!


And here's some photos with models involved, you can add your own narrative:


A partly submerged GW troll that  converted and painted some time ago

The first Reaper Bones miniatures I have ever painted, decent sculpts and detail for a bargain price.

Here's another source for my inspiration which is from SaintJG at DevantArt:


Many thanks for looking.

Sunday 6 December 2015

Oldhammer and Fighting Fantasy

For me there is an intrinsic link between the Oldhammer movement, Citadel Miniatures and Fighting Fantasy. Regular readers may have noticed it in other posts, but specifically my last one on painting banners for my miniatures.


As a kid my entry to all things Fantasy were the brilliant and unique books by Ian Livingstone and Steve Jackson. I cannot recall how I first stumbled upon the series, but I do remember going to the public library after school (the school library did not stock them for whatever reason - perhaps they were not deemed "real" books, or perhaps the Fantasy genre was frowned upon) and loaning out 6 different Fighting Fantasy books at a time. The maximum number of books I could have on loan was 7, so to appease my parents and also my desire to read other things, my final book was some sort of novel. Eager to devour these Choose Your Own Adventure Books, I would leg it home, the Sainsbury's plastic carrier bag containing the books banging against my legs, eventually getting home and composing myself to start the process. I nicked two dice out of some old Snakes and Ladders board game (always returning them to the tatty box), and grabbed a pencil (with rubber on the end) and some paper. I realised soon into my Fighting Fantasy journey that I would have to draw out maps to help me, but also I also enjoyed doing it too. And what a joy that experience was. Hours and hours and hours with fingers aching from being used as temporary bookmarks at those important decisions/crossroads, whilst at the same time trying to turn the pages, draw an accurate map and write down my collection of found objects. It very rarely became tedious. And I would return to the library a few weeks later to return my books and head over to the section which housed those distinctive green spined, Fighting Fantasy tomes. When I had read (but not always completed - I especially remember Creature of Havoc being a bitch and becoming my nemesis) the library's entire stock, I would ask for them to have others delivered from another branch. Not all the books were great and I would soon work out which were a bit duff. Interestingly the internet now agrees with those adolescent opinions of mine.

Back in the late 80's I remember telling my mates about these books and we started to share our books, our journeys and decisions and soon we were all hooked on them and forming some sort of club at school lunch times. I remember myself and two mates also tried writing our own version - we started off drawing out a large map of the city our story was played out in (I cannot remember it's name now, but it was a very detailed map). We actually began the process of writing the book and allocating passages of text to different numbers and I even completed a few little sketches to break up the passages of words in the manner of the originals; but something stopped us from going much further - the discovery of Games Workshop. Oh and a "grown up" book called Lord of the Rings that also helped shape my love of Fantasy.

After my early days of FF came my first planned visit to GW. I had a chance meeting with one prior to this when I was about 10 (1986) and on a school trip to learn about the Vikings in York. During an excursion into the city center to spend some of our pocket money, a fellow schoolboy saw the GW shopfront and told us how cool they were as his brother had some of their models. In we went and straight away I was in awe of the extent of models on display. I had messed around with Airfix models and plastic glue and enamels, so I was already into model making, but I had never been into a shop that was so entirely dedicated to models and an entire miniature world. After much searching around I bought my first ever blister pack - some Slaan troglydytes, my purchase decision being based purely upon models that looked evil and monster like (and within my limited budget):


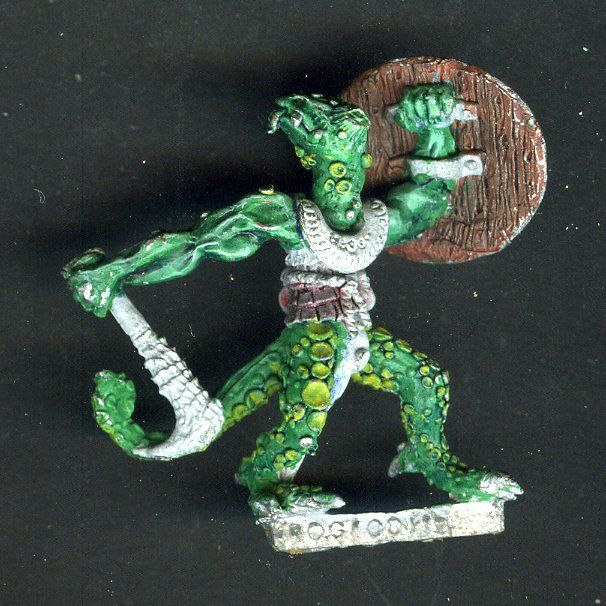
I had no idea at the time of what they were, but when I got home I opened them up, affixed them to their slotta bases and slathered them in a range of wonderfully smelling, glossy enamel paints. They were soon forgotten though and lost in the mists of time. I digress.

It was all about this first planned trip with a fellow Fighting Fantasy fanatic, on the train to GW Reading, where it all began - the devouring of White Dwarf magazines, the endless lists of what I would purchase on my next excursion, the slowly growing collection of Orc and Goblin models, paints, primers, scenery etc. It became obsessive. There are great similarities now. I was soon hooked; here were models that were full of character, that resembled the descriptions of monsters and adventurers as written by JRR Tolkien, they were familiar in pose and dynamism from the illustrations of the various Fighting Fantasy illustrators AND I could play with them to recreate scenes and narratives from Fighting Fantasy and on a larger scale, always the hope that I could scale up to army size in the style of Lord of the Rings. It was a perfect collaboration and still, to this day is.

All of the above still apply, I love FF and if not so much the GW of now, then certainly their elder, distant relative. Now as a 39 year old bloke, this is in large parts, evidence of misty nostalgia, but they do remain excellent books, that engage me through the writing, the story and my involvement in making decisions. I can't wait to share them with my son and I hope he becomes an avid reader too and that he can appreciate a good illustration. Because they are wonderfully illustrated by a range of artists, their styles becoming synonymous to the artist chosen to illustrate and those styles became more and more familiar as I thumbed through the pages of different books as a teenager. The the cover art too being iconic, but to a greater degree the illustrations of the monsters, the scenes and those lovely little motifs which interspersed the chunks of texts.

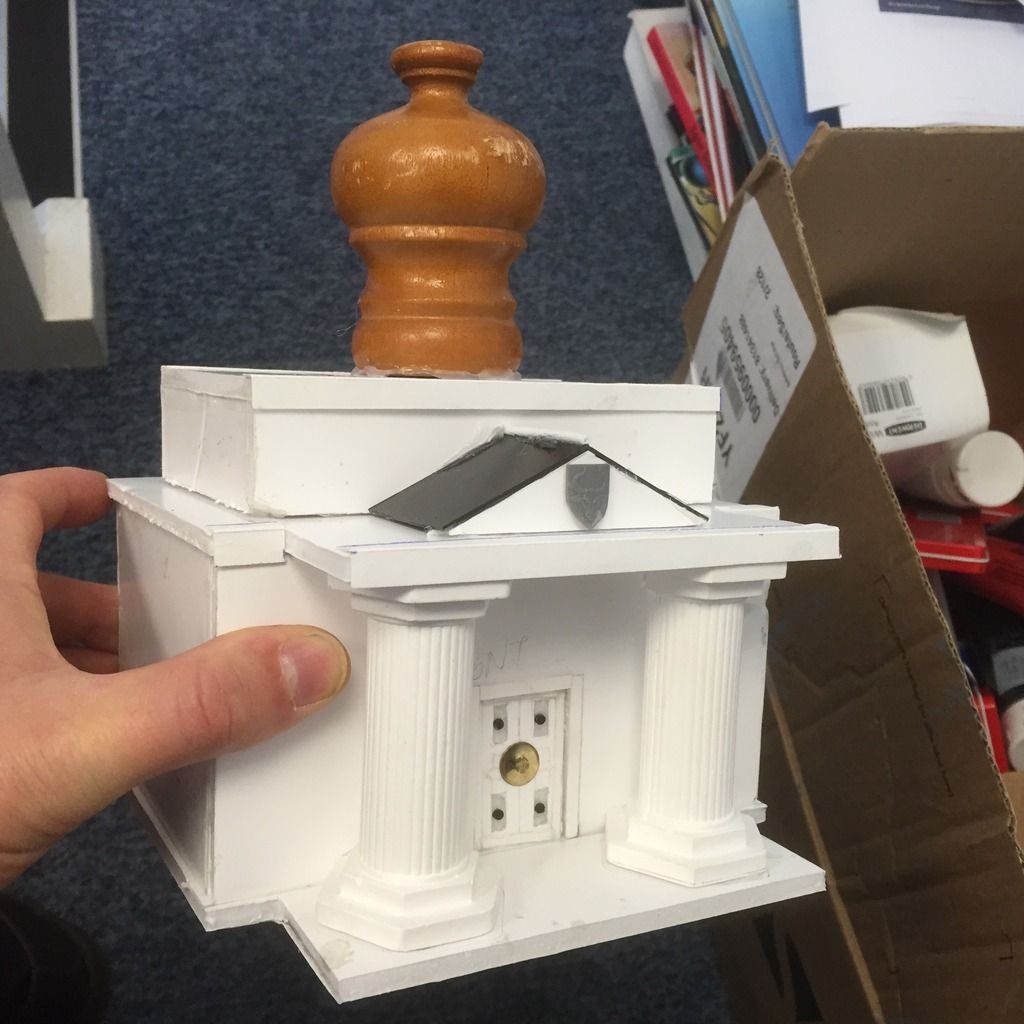
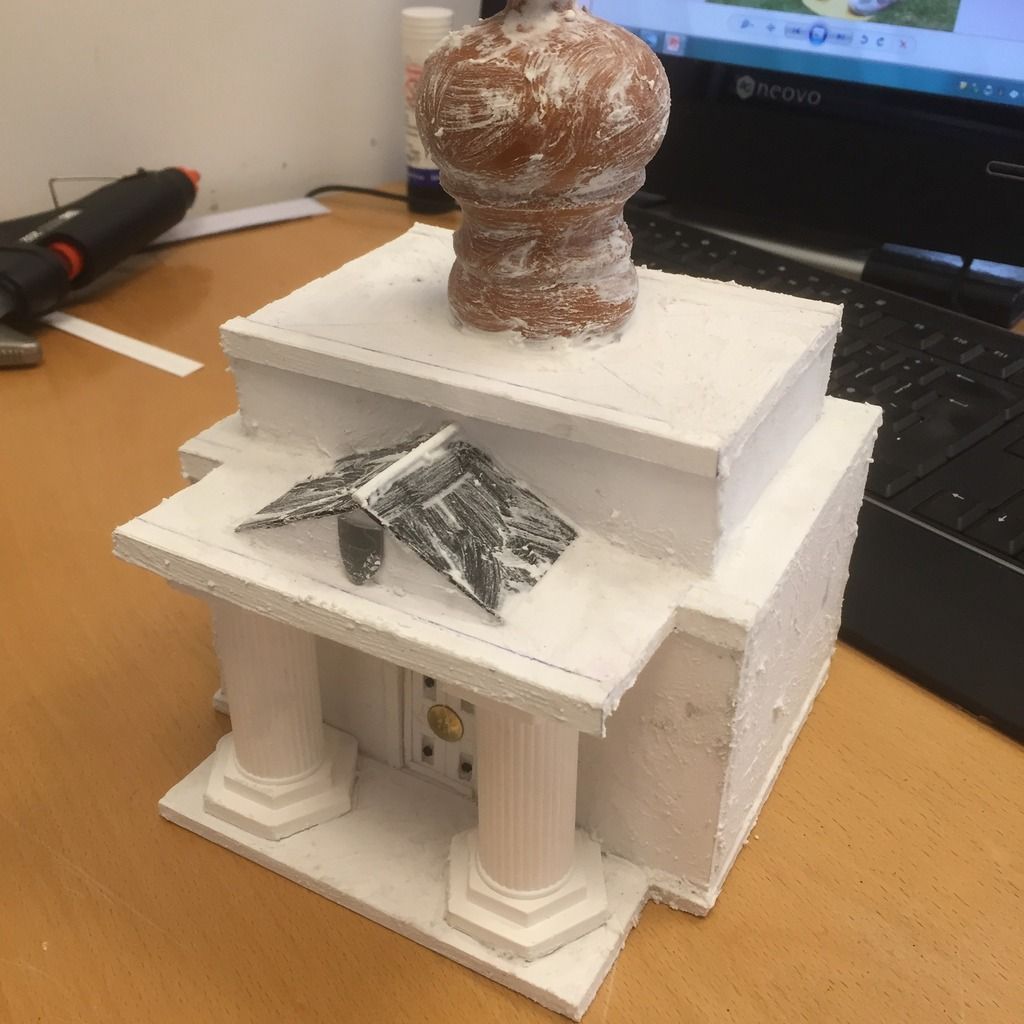
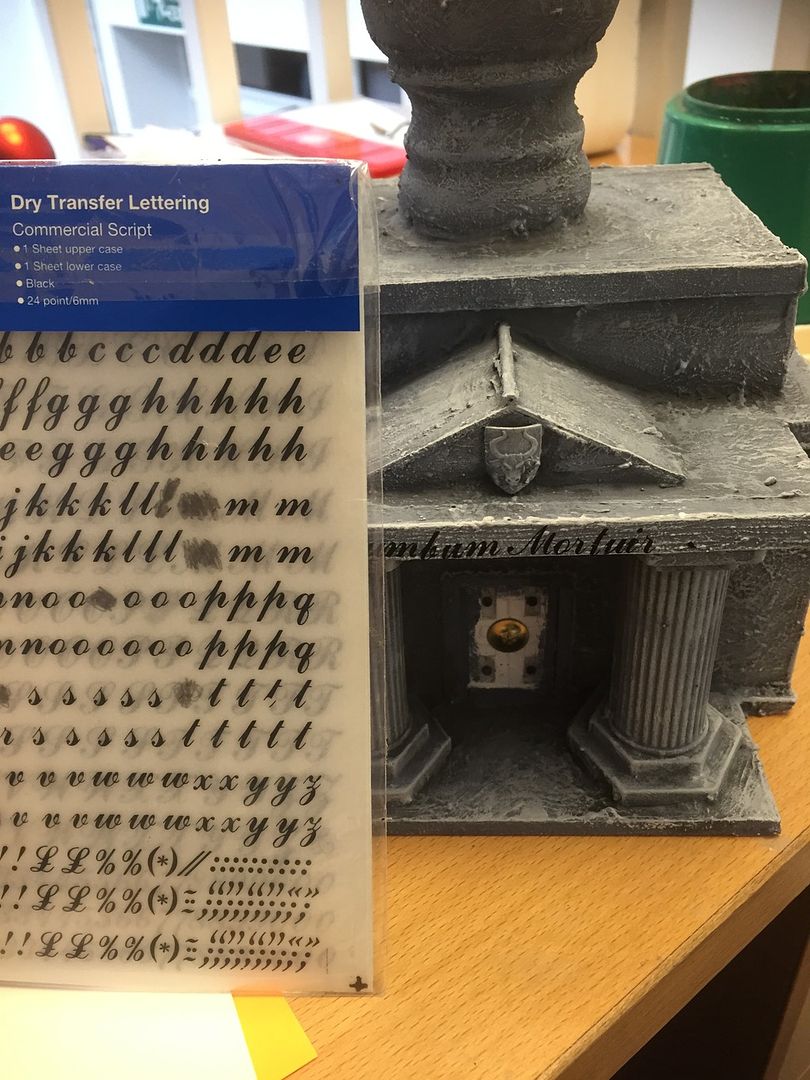
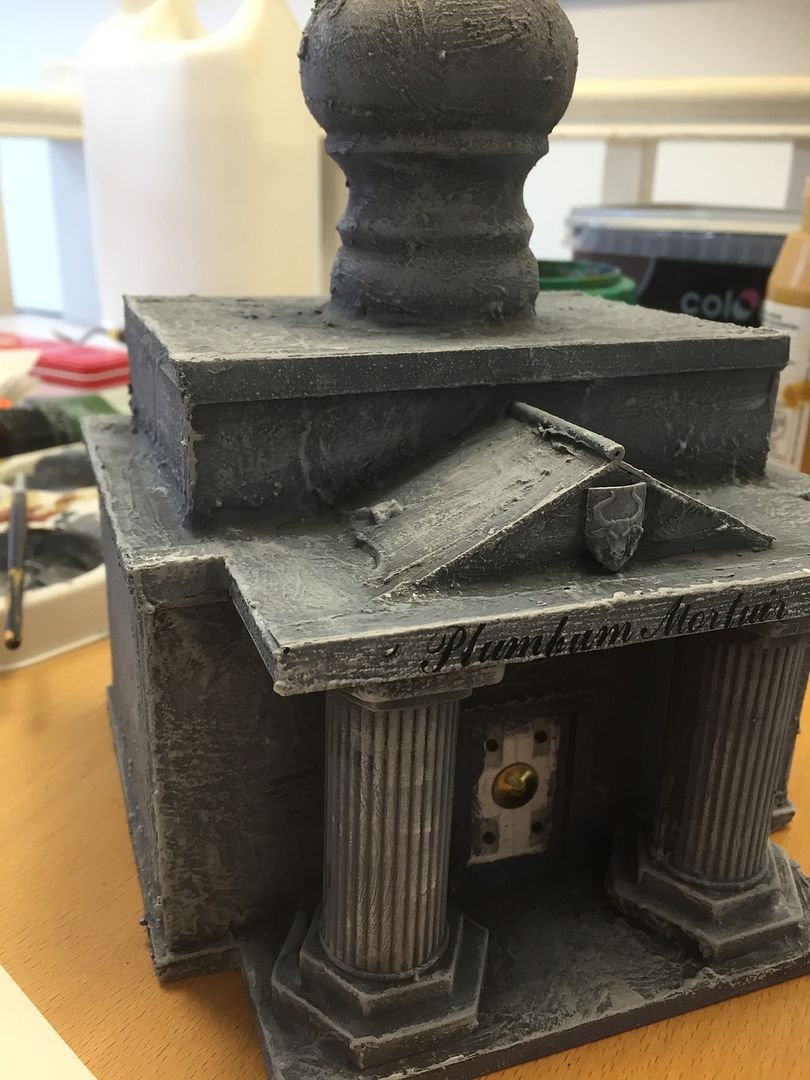
Which brings me to the crux of this ramble. I now combine these two inspirations of mine (Fighting Fantasy and Citadel miniatures) to create an Oldhammer vibe and this is largley through recreating miniature versions of Fighting Fantasy illustrations using, on the whole old GW miniatures. I see this as my more mature relationship with the hobby, I certainly have more developed ideas as to what I want to do with my models and my more evolved modelling/painting skills! So here's an overview of how I've combined these influences over the past 18 months:


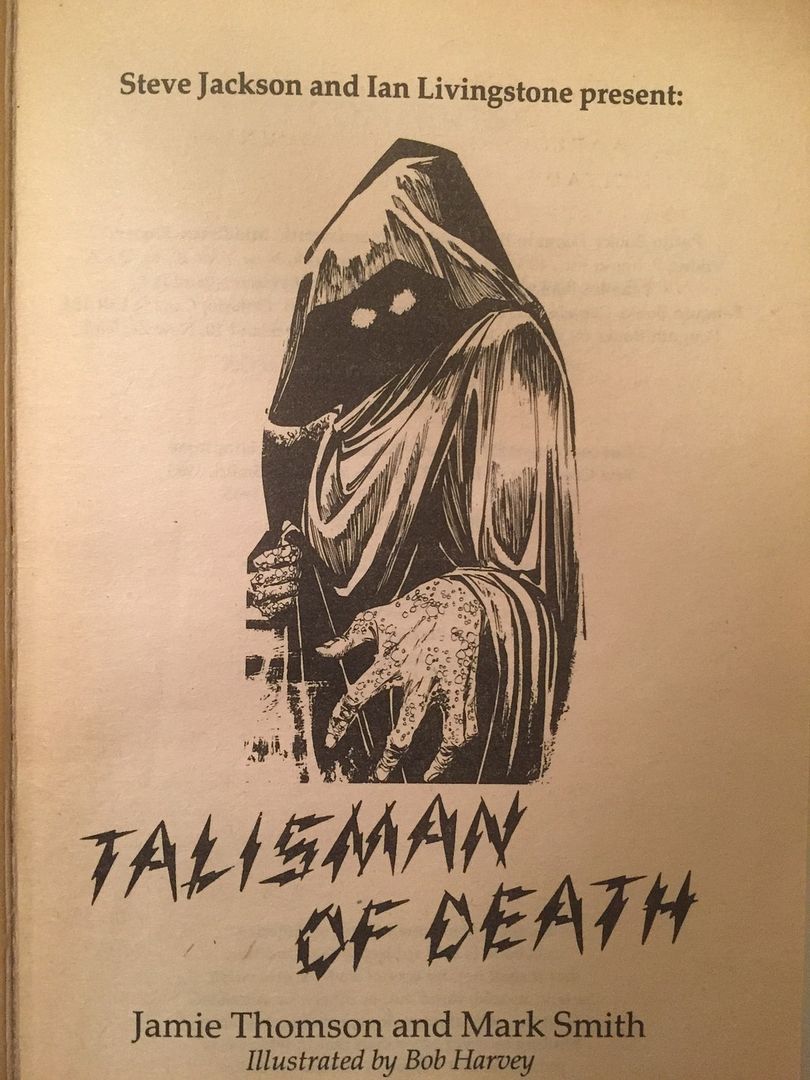
Bob Harvey's great inside cover illustration for Talisman of Death.
Which I used for the banner on my Cultists.


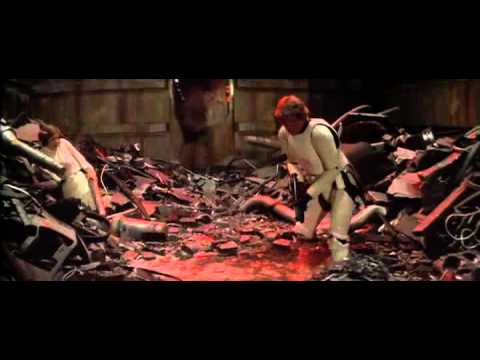
Ian Millar's iconic cover  illustration for Freeway Fighter
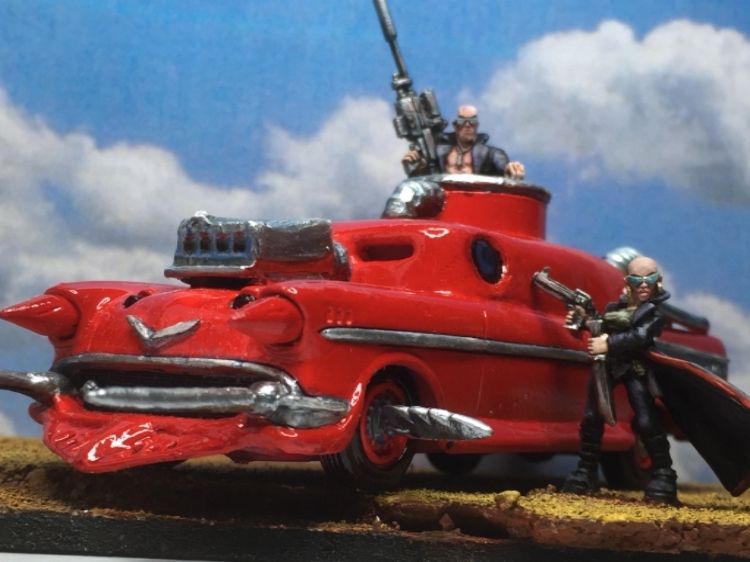
And here's my recreation using an 1;43 model car and some Heresy miniatures

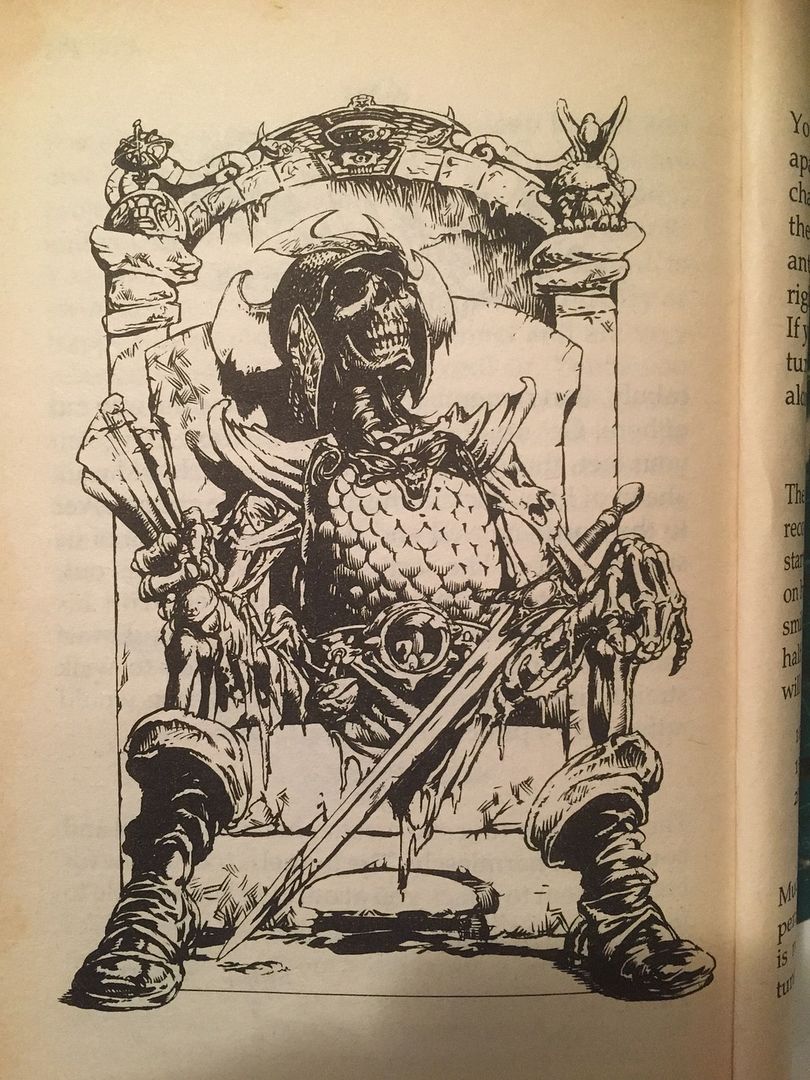
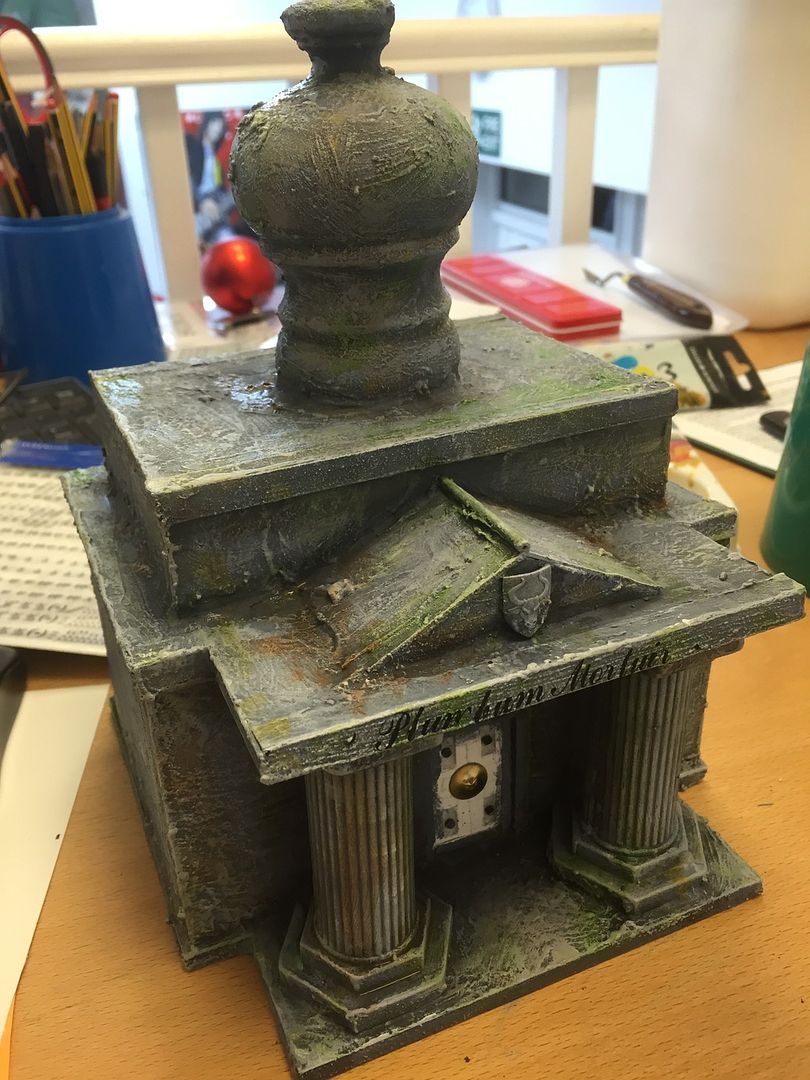
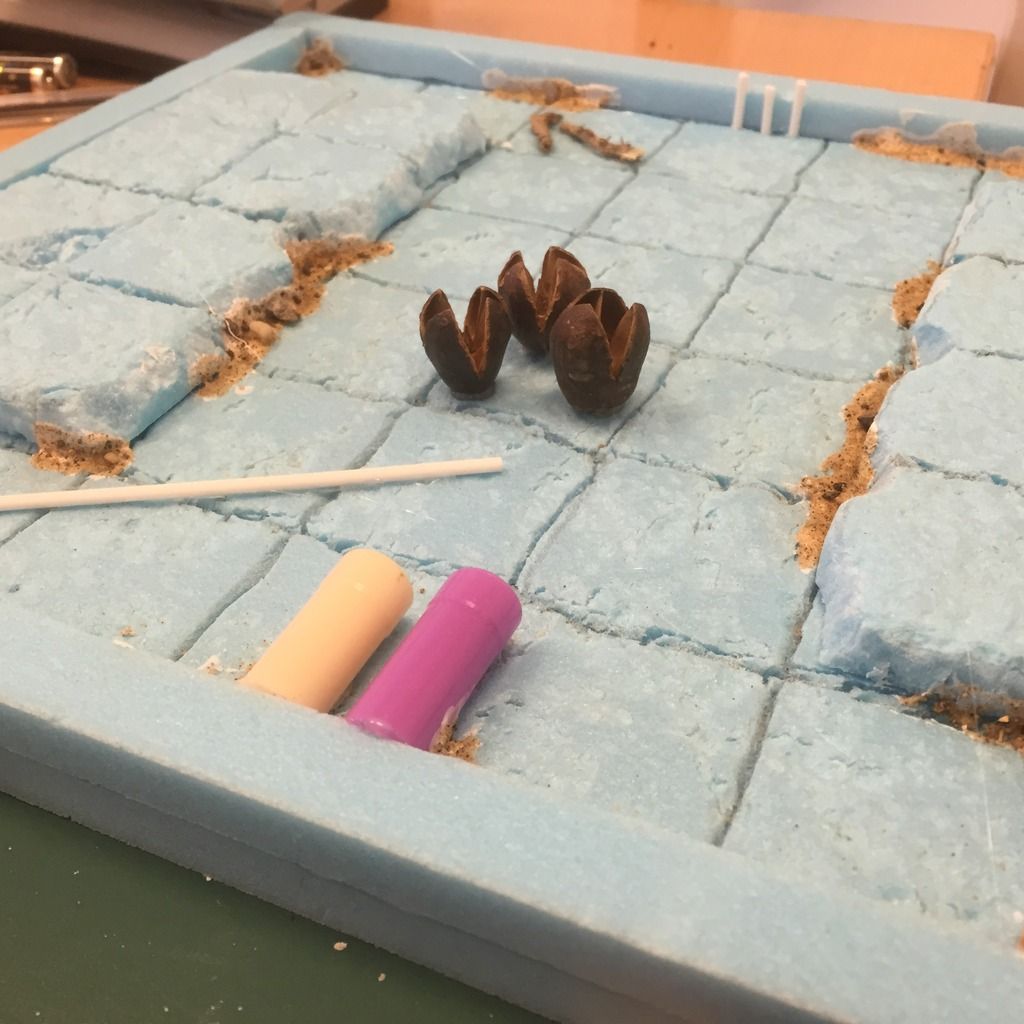
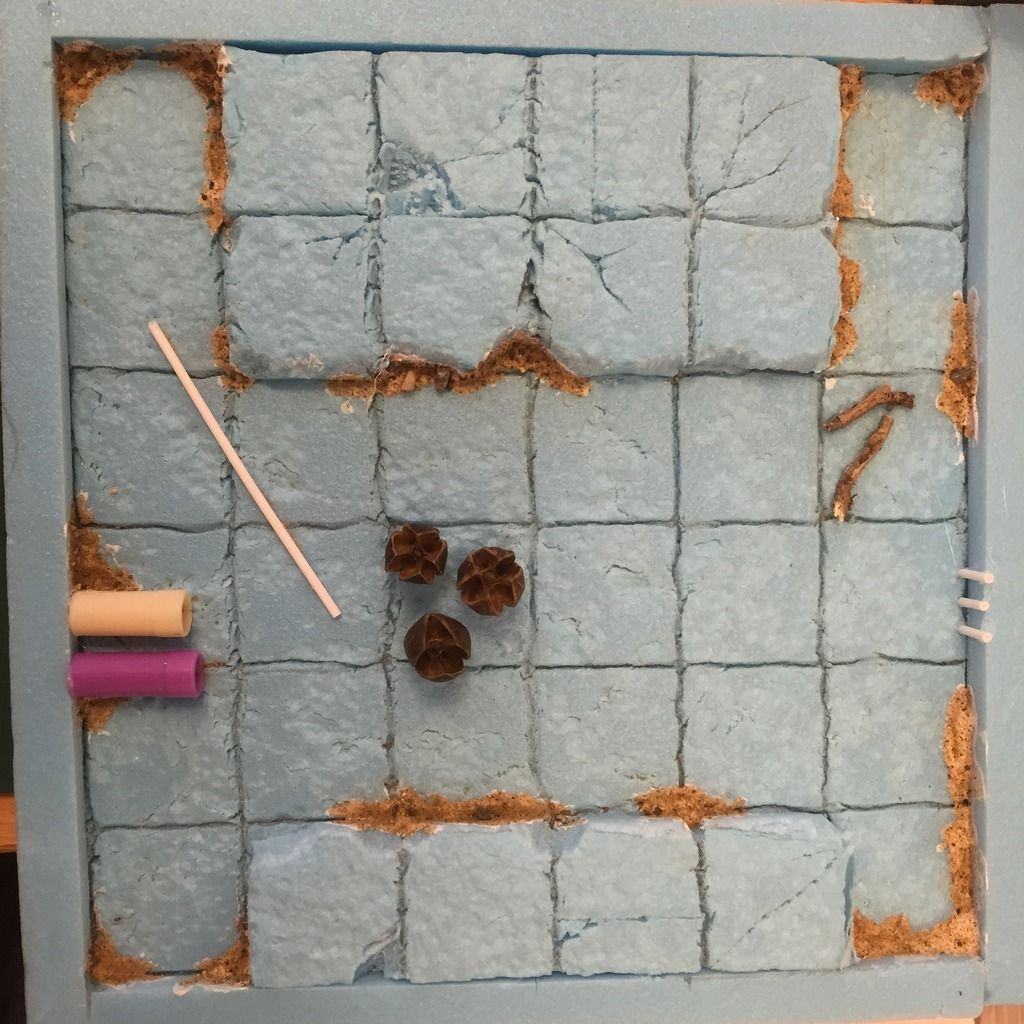
Ian McCaig's classic illustration from Deathtrap Dungeon.
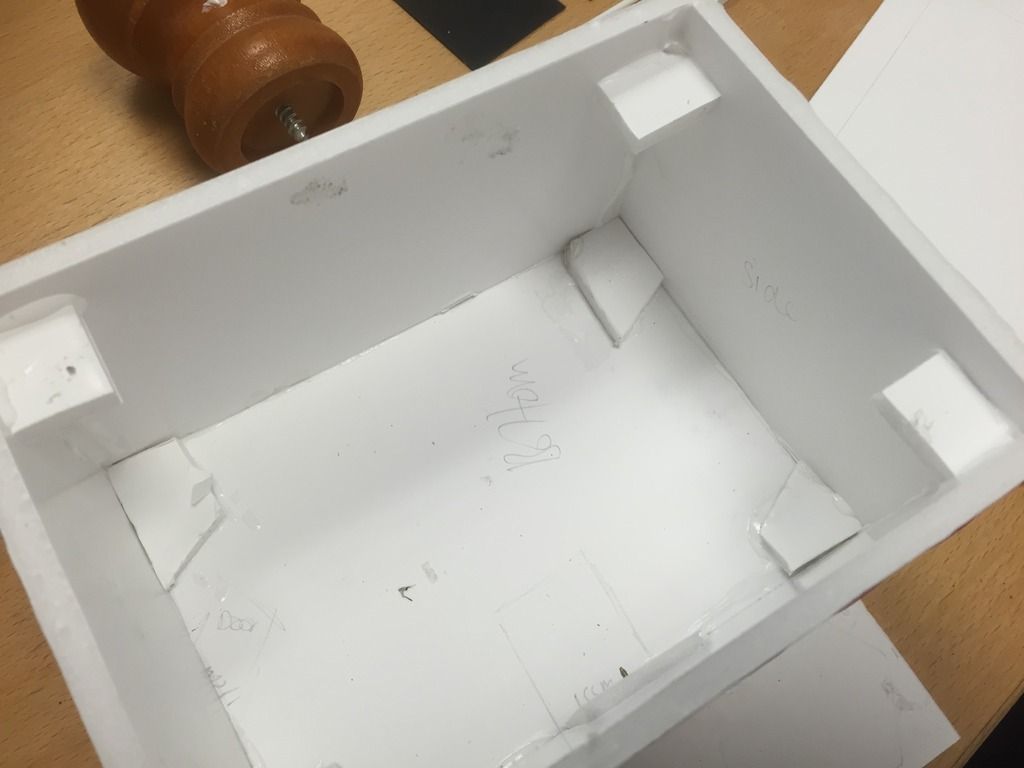
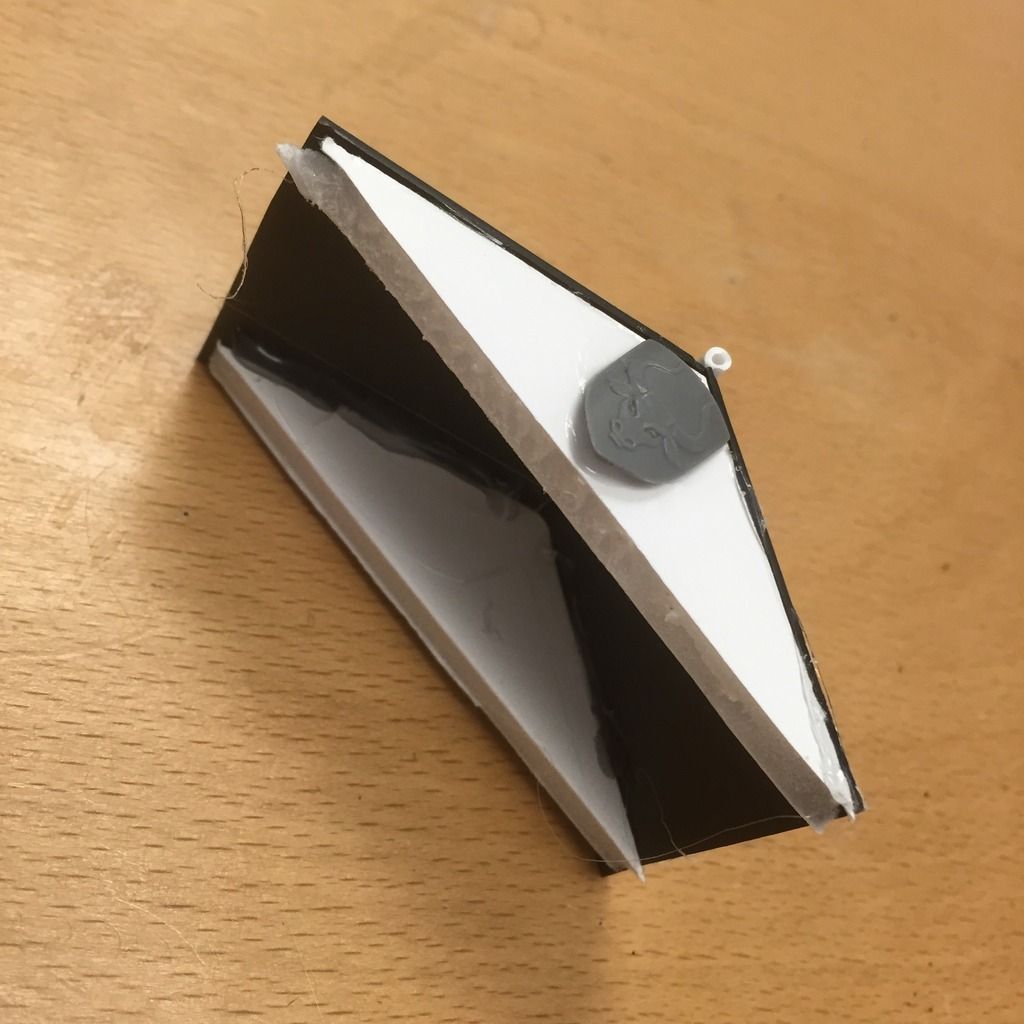
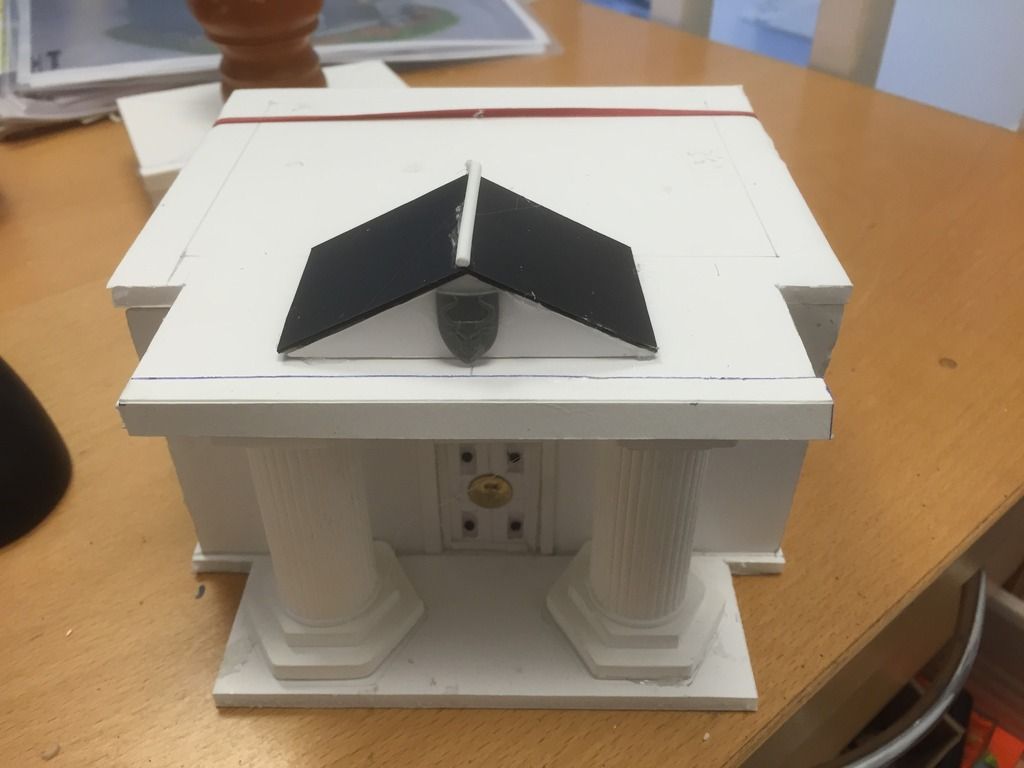
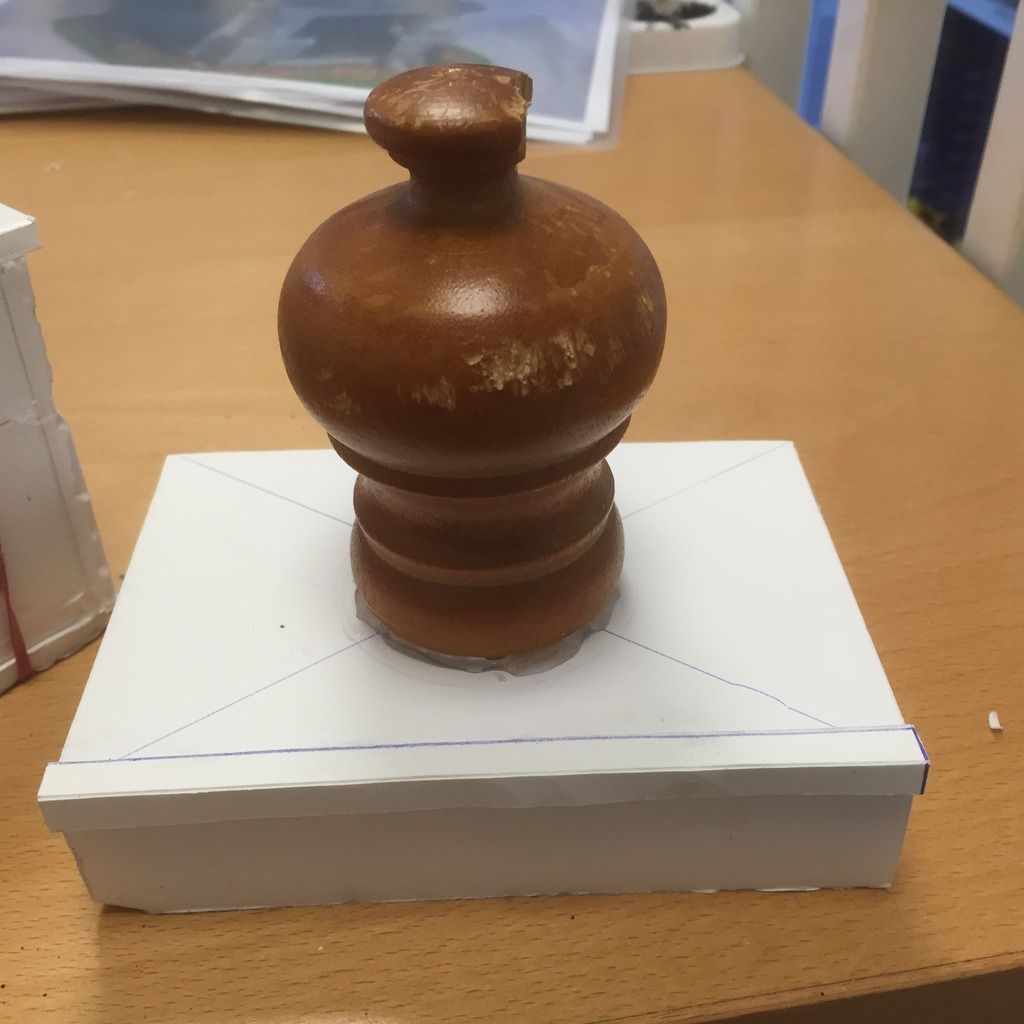
And here's what I created with a Mantic skeleton and some balsa wood
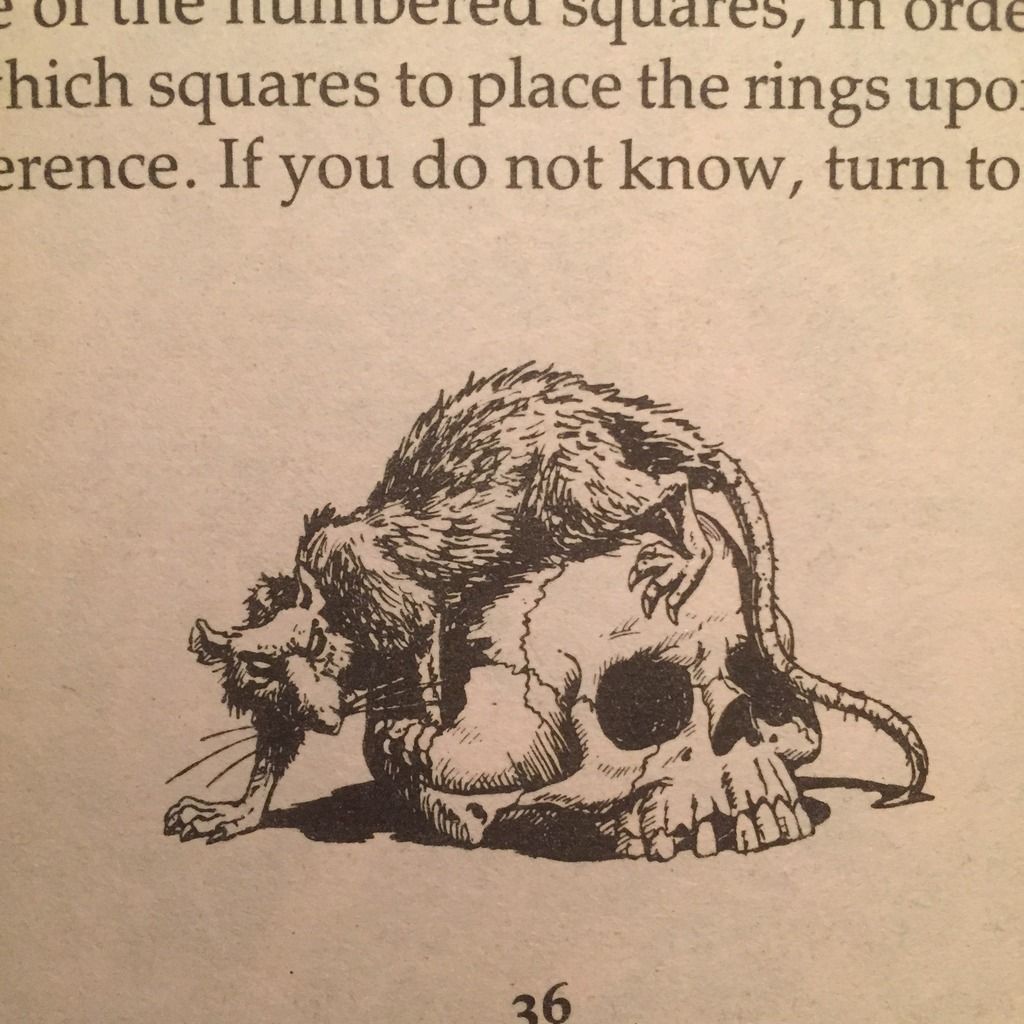
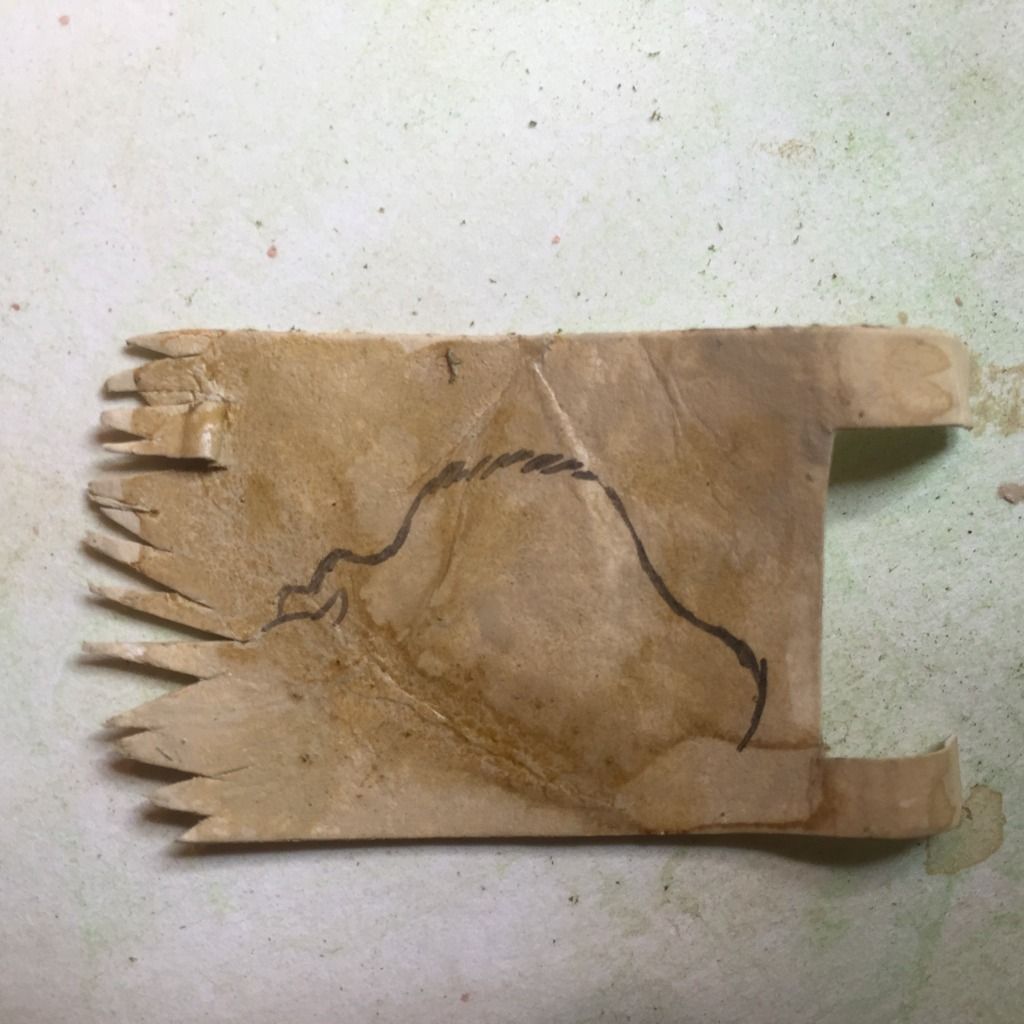
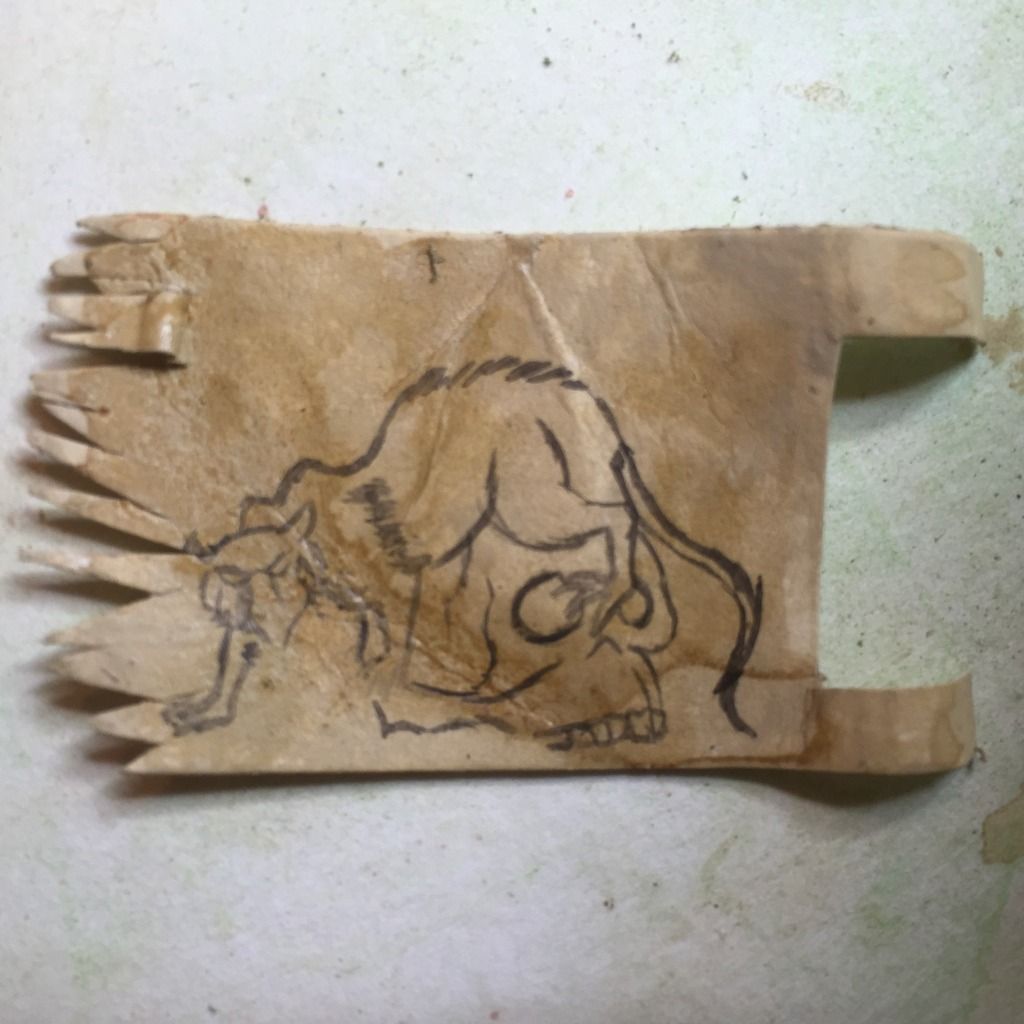
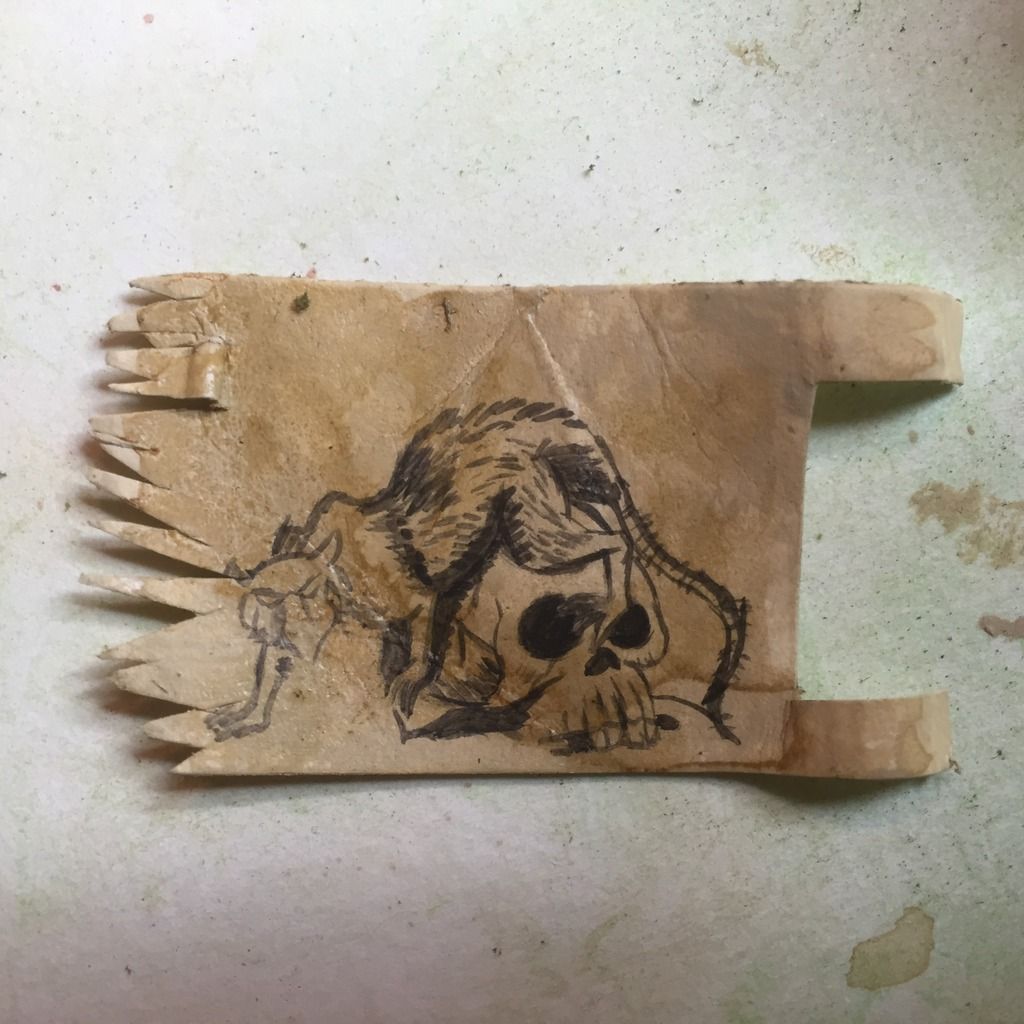
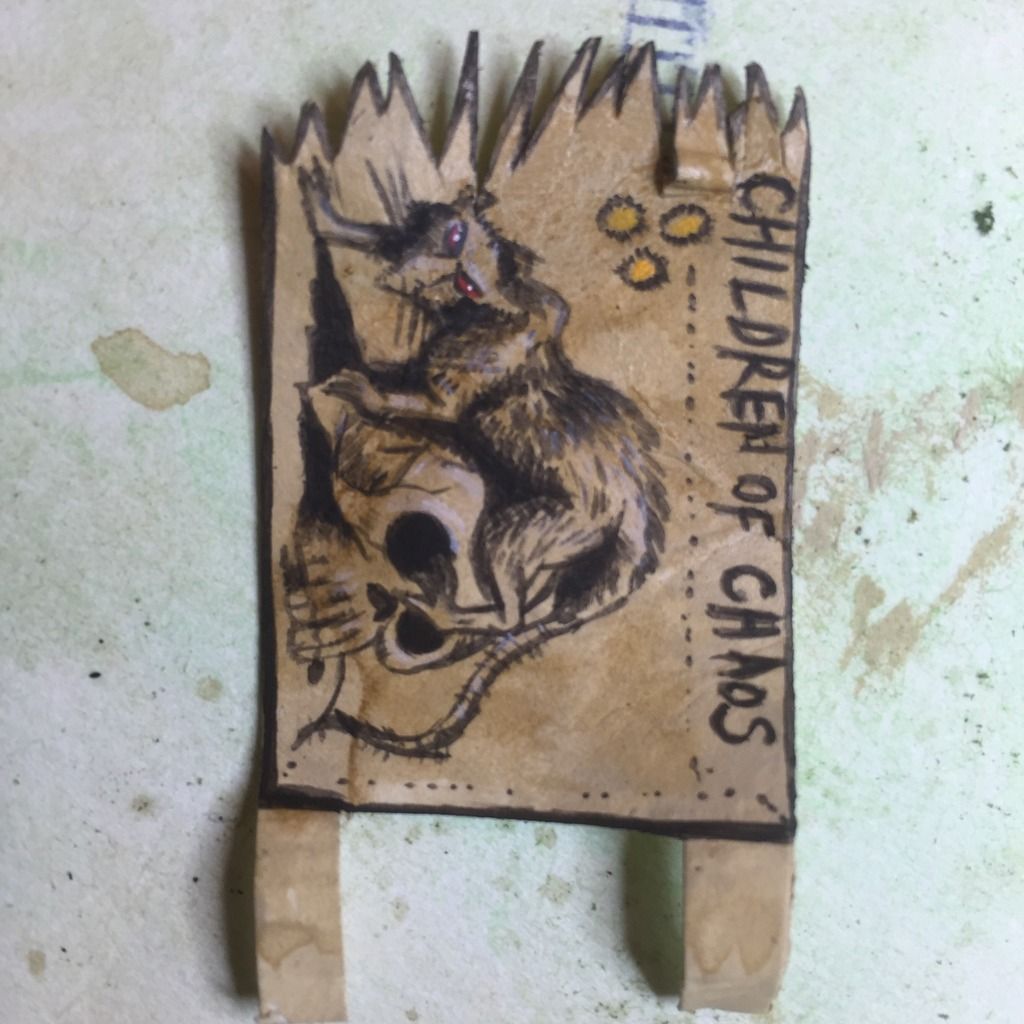
Brian William's lovely little illustration that is found on multiple pages of the Trial of Champions, breaking up the text


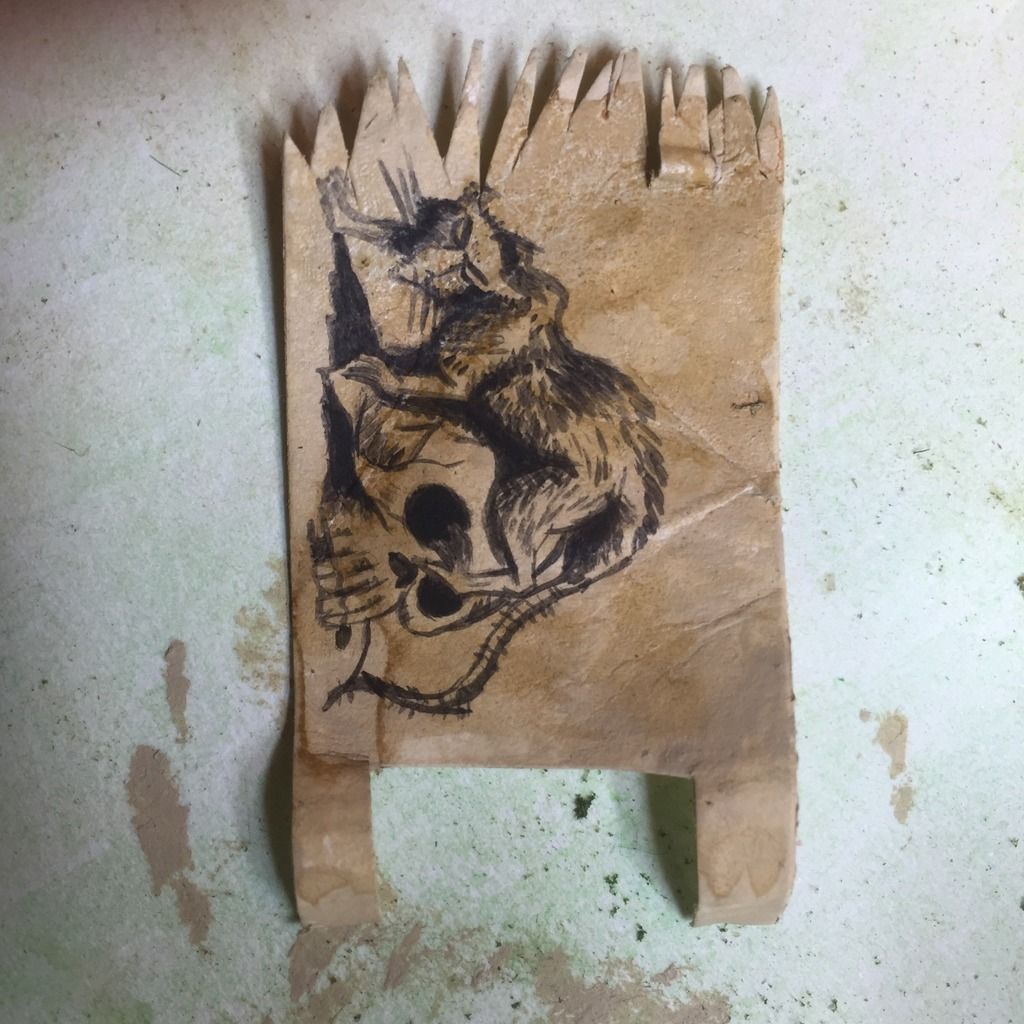
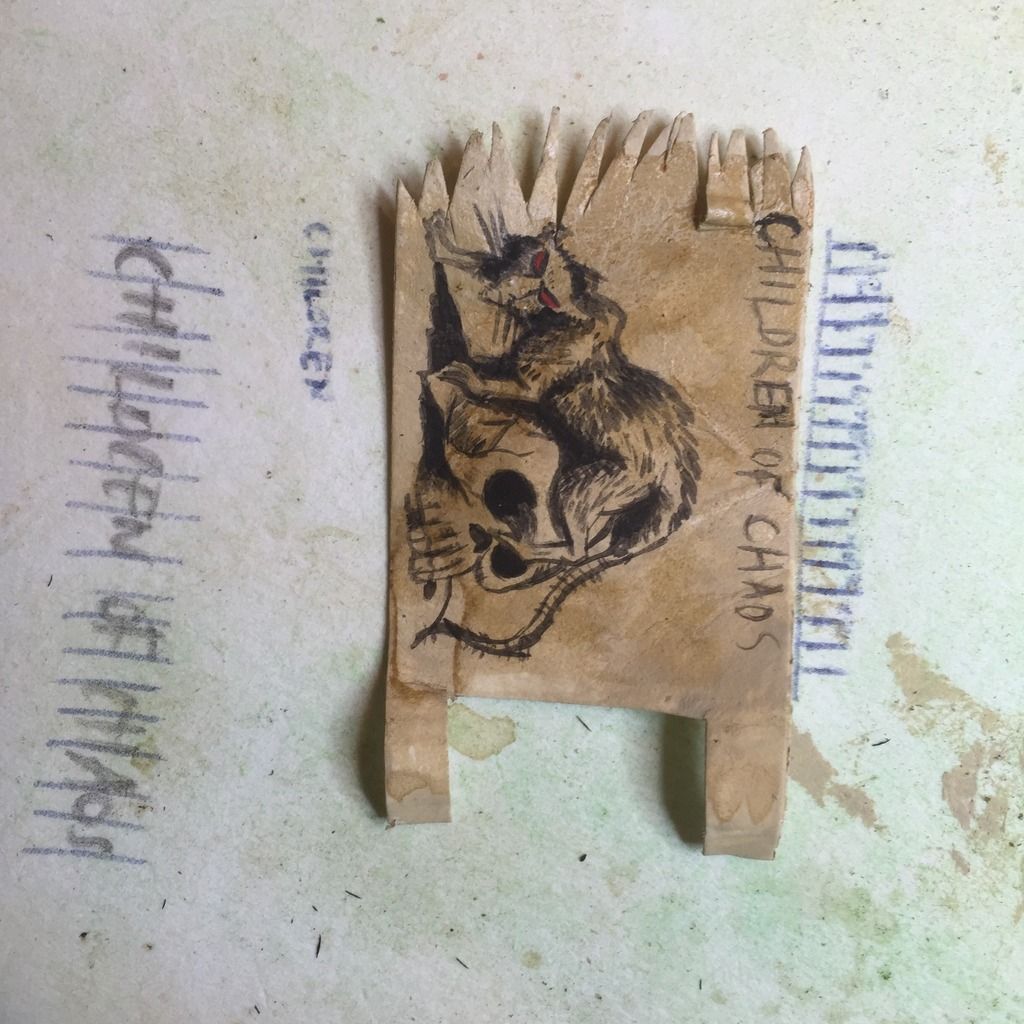
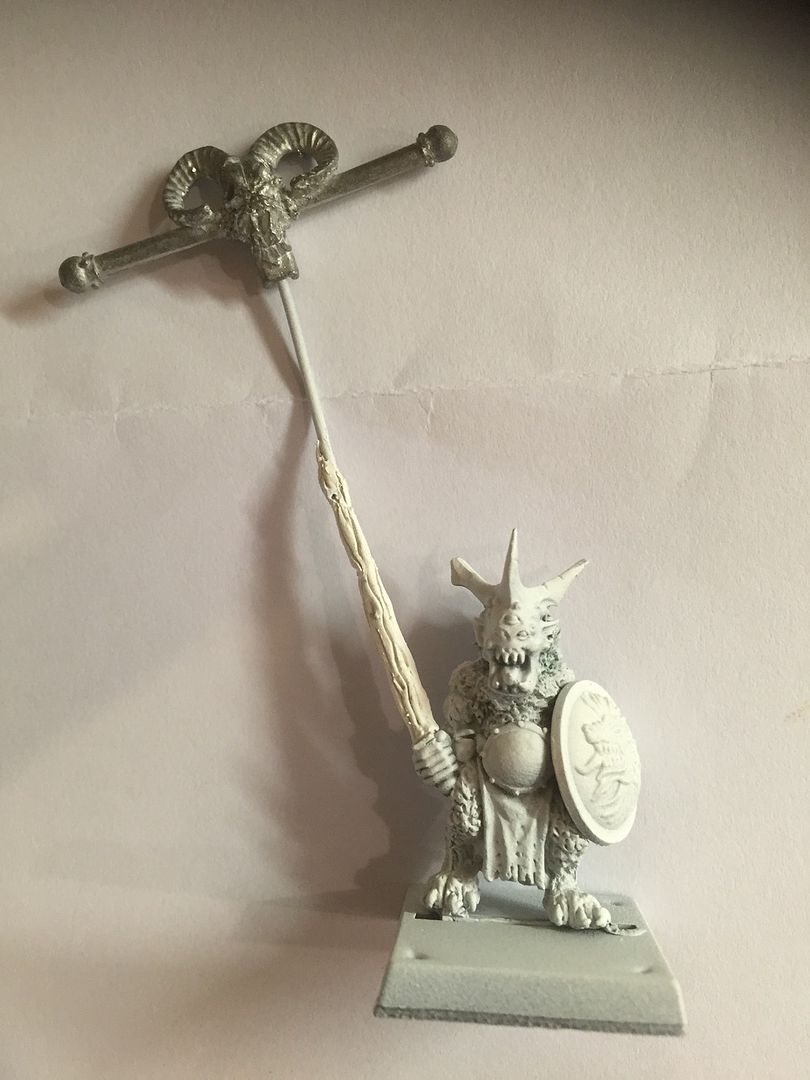
And here's where I used it on the banner for my bitzbox warband
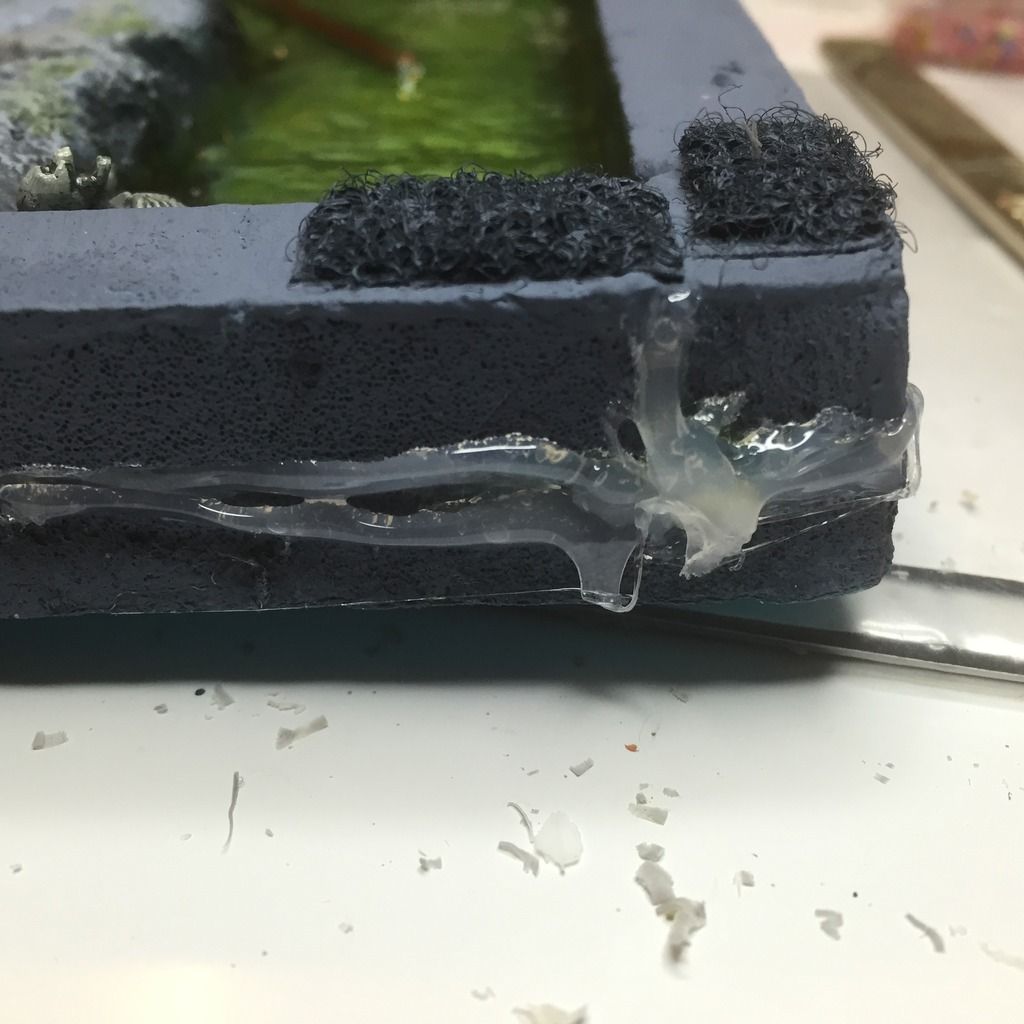
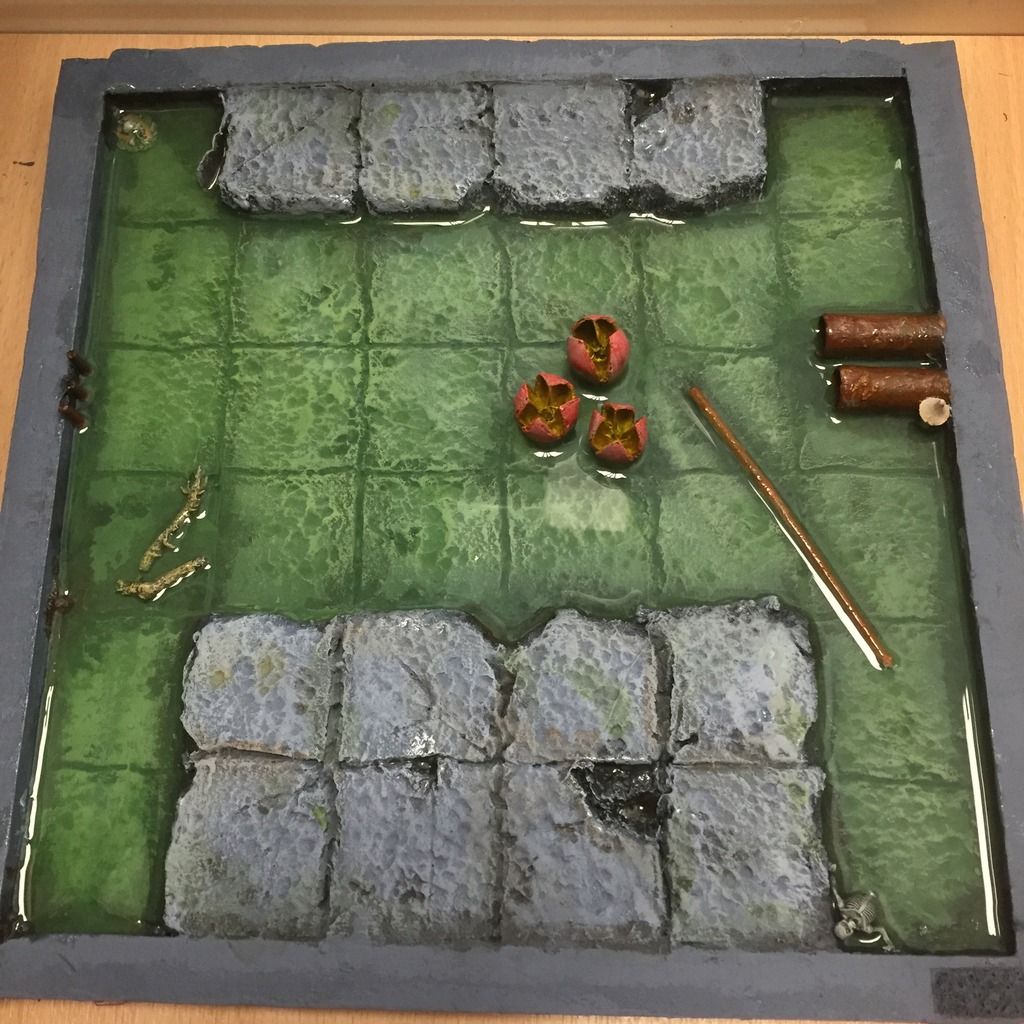
And some WIP's:

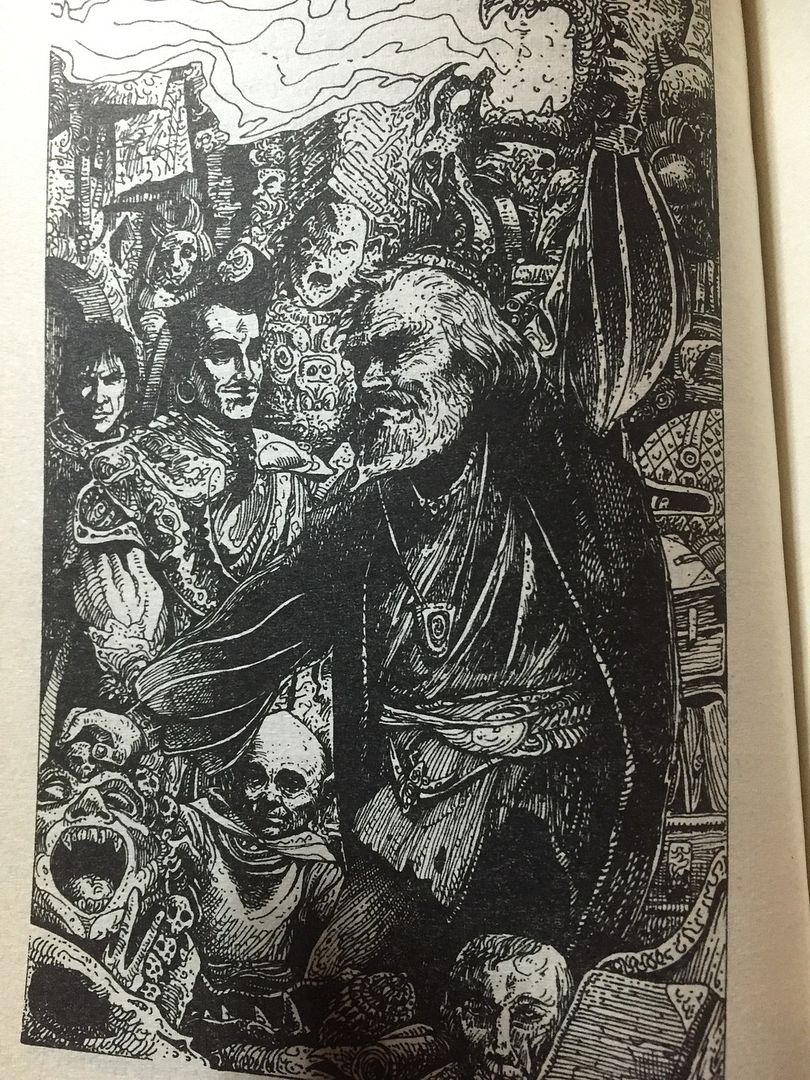
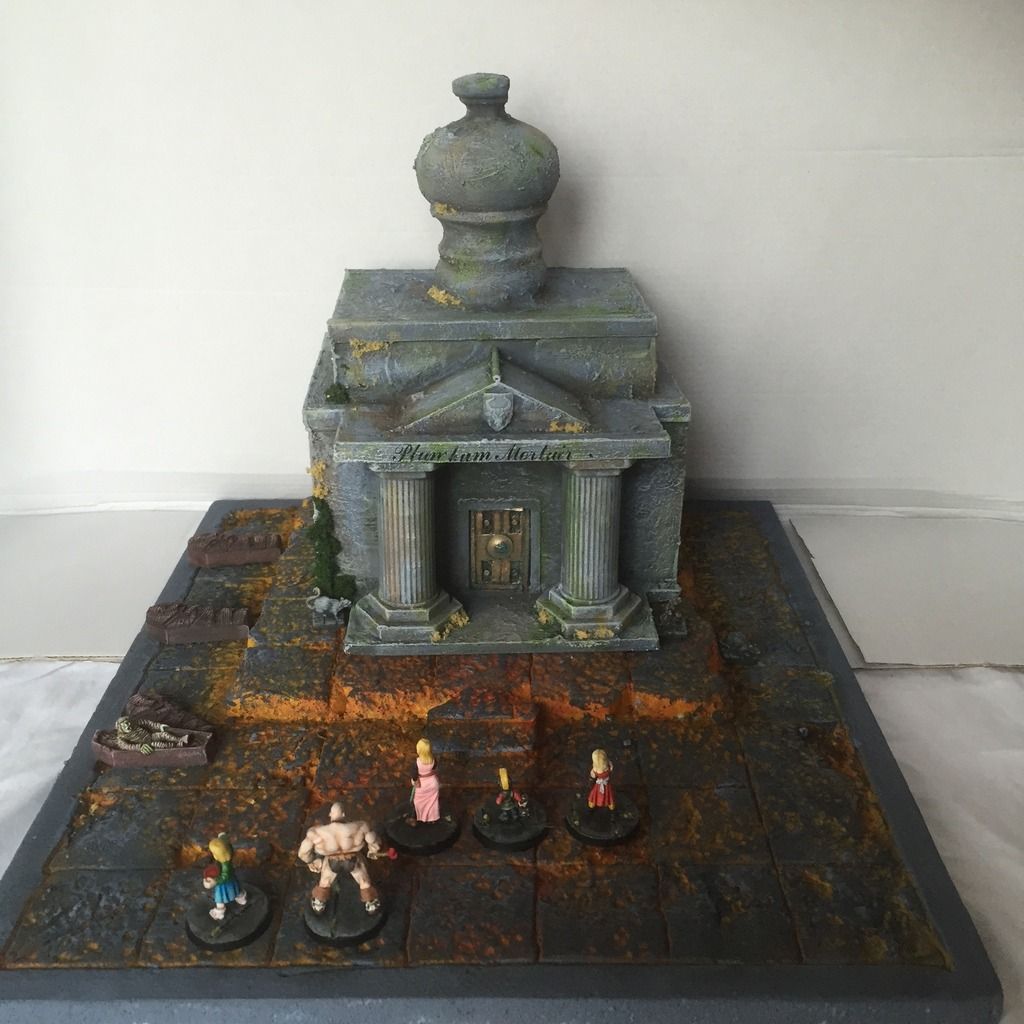
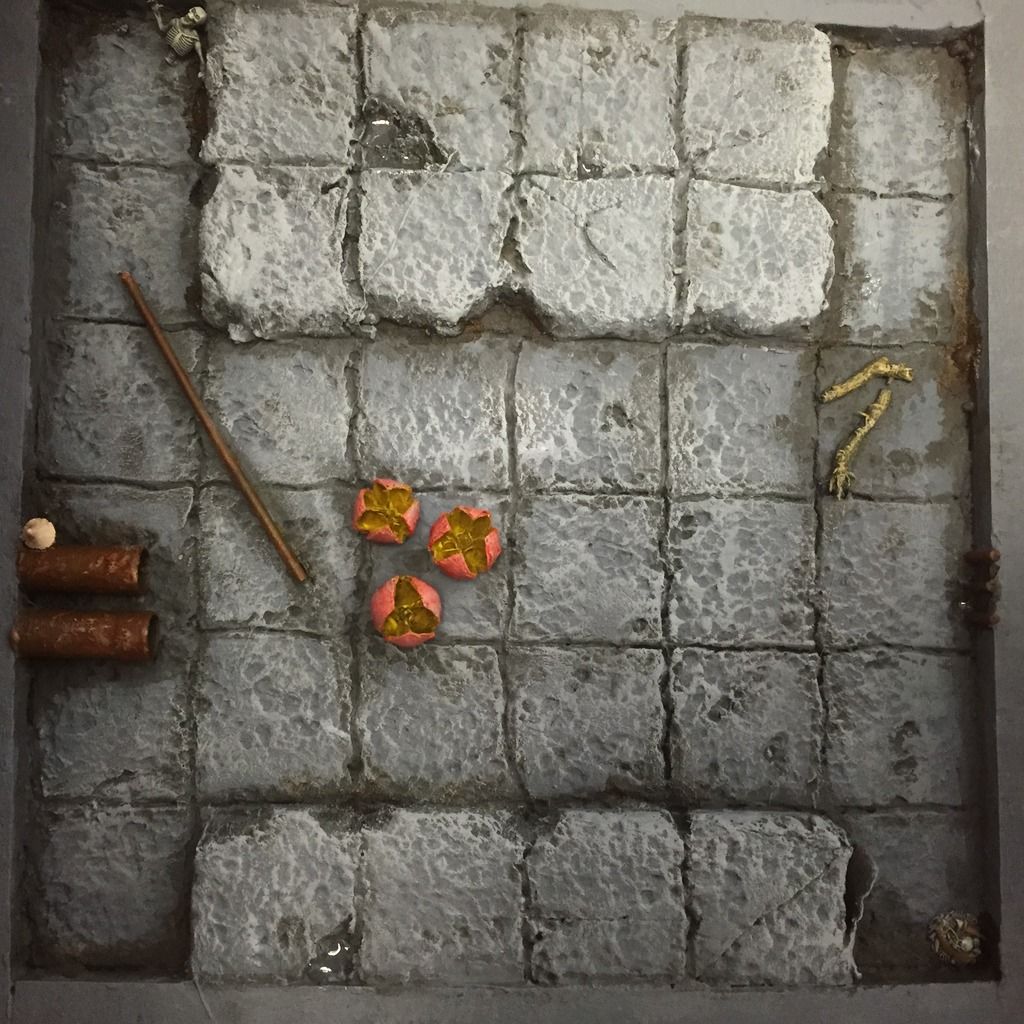
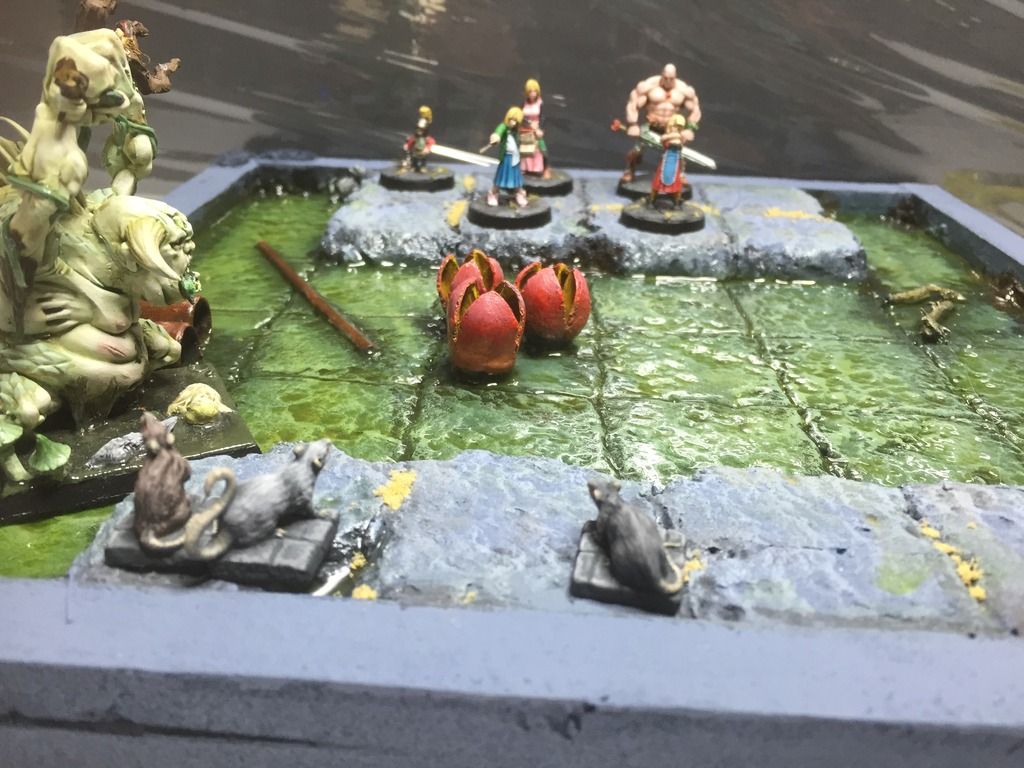
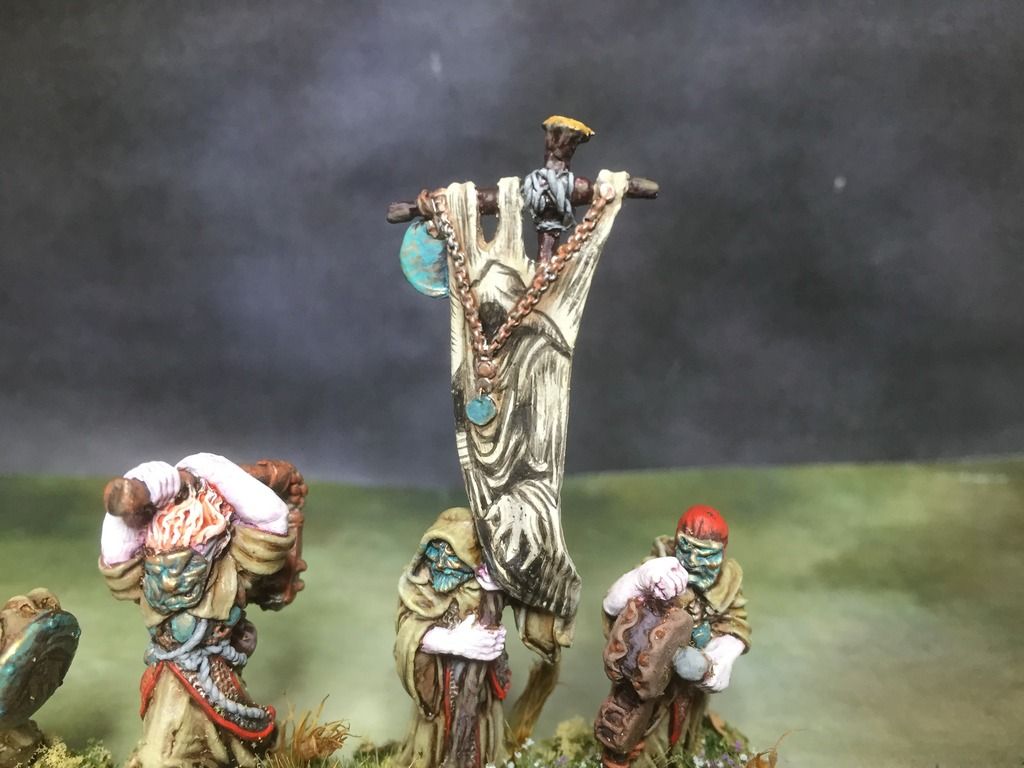
Russ Nicholson illustrated the FF novel, The Trolltooth Wars and here you can see the main characters from the story.


The five figures I'll be using to create the main characters from the story, plus beast of burden. These will be used for both Dungeon exploring and then expanded into a Frostgrave warband. 

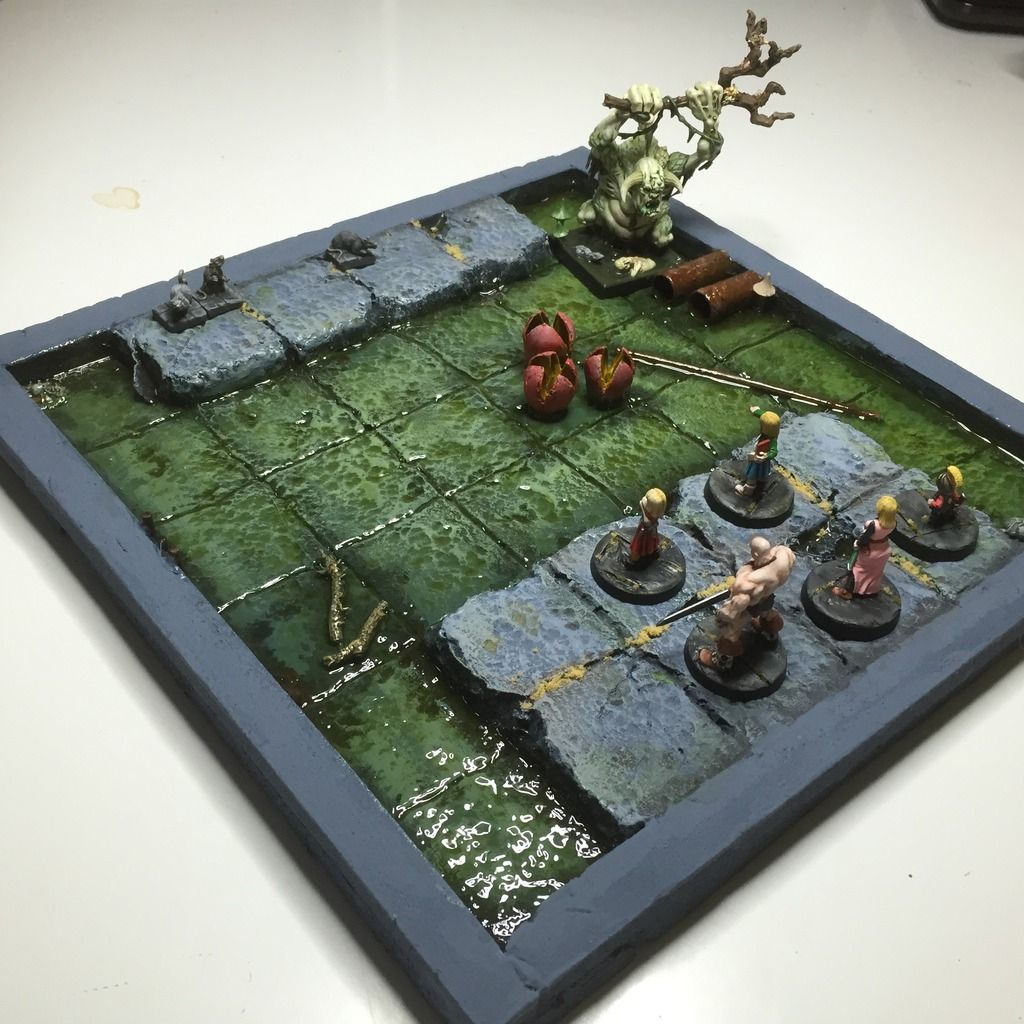
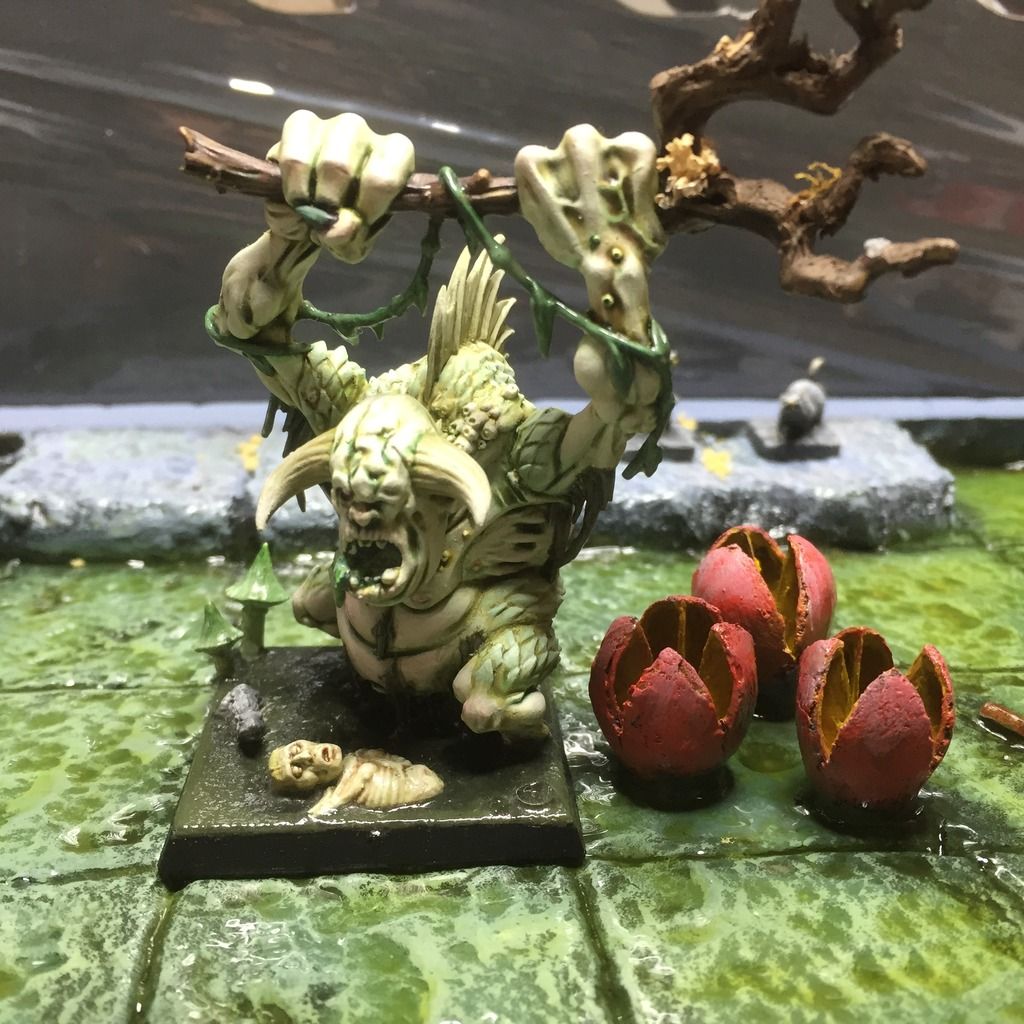
Ian Millar's familiar style (and of course a tree) which was the cover art for House of Hell

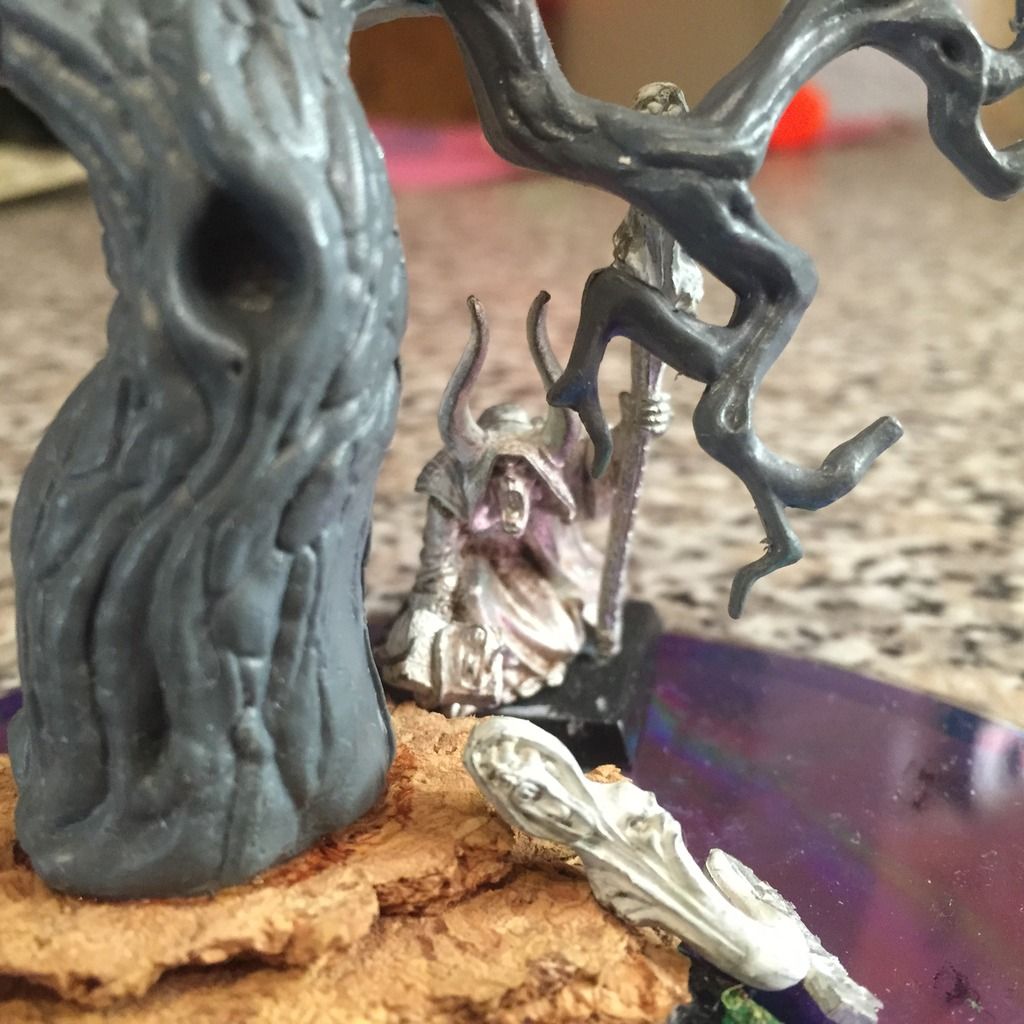
And here's the start I've made on recreating it, with a GW plastic tree (to be heavily converted with plastic bitz) and the sorcerer model which I think bares a passing resemblance to the creature in the illustration...

I've seen lots of people discuss what Oldhammer is and some people becoming quite protective and defensive about their opinions. Ultimately we all have a different perspective, for me it's quite simple. I have a hobby which  I love (it takes up way too much of my thinking time - for example I was thinking about this post soon after I was awake this morning and whilst my wife was going through some early morning logistics with me - no that's not a euphemism!) and never enough actual, practical, making and painting time. It's fun, it's nostalgic and it helps me connect with others through the amazing Blogging/Facebook Oldhammer community. I'm not great at that in real life. In fact you guys know more about this passion than anyone else - it's become a bit of a secret affair. My wife's aware but not in any way interested and my current friends have very little knowledge of it at all. The friends I shared my hobby with as a kid - well we've lost touch. So the point of this post? Well I came to a realisation that my passion for this hobby is deep-rooted in my youth and has been re-awakened in my late 30's. The things I've been creating have been deeply inspired by my love of the Fighting Fantasy books, and the Oldhammer community's love of using our favourite models from back in the day to capture that zeitgeist. And of course, in all honesty it's also a chance to create another blog post to show off my achievements with lead, plastic, glue, paints and whatever other bitz and pieces I've needed to create the images of my younger and current imagination and maybe inspire some others too.

Tuesday 1 December 2015

Freehand banners, my collection so far (plus a tutorial)

Here's my latest freehand banner, the first model for my Bitzbox Warband, a cowman, carrying an image borrowed directly from Fighting Fantasy's Trial of Champions (Illustrated by Brian Williams):


Here's the illustration which I copied, I found it quite appropriate for a beastman unit and this standard bearer also has a Skaven head at the top of the pole to re-emphasise the rat-theme.
So here's a short step-by-step of how I created this banner, which is pretty much the same technique I use for all my freehand banners:

The piece of cartridge paper was drawn to size (based on the size of the space on the banner pole) and two lengths kept at the banner end for attachment. This was then cut to size with a scalpel. It was painted with bleached bone on both sides and washed with a sepia mix to exaggerate the creases I had already added.

At this point you can see a very fine ink outline being applied, taking care to ensure accuracy.
Most of the outline has now been applied and some detail and tone can be added.
By adding a touch less water to the ink, it becomes more opaque and I can build up some darker tones and marks, while still leaving the lighter mars as they are.
At least three tones have been added. dark, medium and light.  The composition/placement of the image was a bit unsatisfactory as it left too much space at the top of the banner, so I decided to add some lettering. Partly inspired by the banners of Bryan Ansell's Chaos Army from Warhammer Armies and from the Beastman description in the Lost and the Damned, I decided upon "Children of Chaos".
Here you can see how I worked out the spacing for the lettering, 17 digits (including spaces) were drawn onto the paper next to the banner and then the letters were painted on within that space. I wish I had placed them a few millimeters lower..
The final stage was to add a frame around the banner to give it a bold edge and keep the image grounded and then some red to the eyes of the rat, a yellow Nurgle emblem in the space to the left of the design and finally some very pale white washes in the areas of highlight on the rat and skull. I just find this helps make it "pop".
So there you go. All that was left was to attach the banner to the pole with some superglue and when dried I then tweaked, teased, bent the banner to give it a sense of movement. Ideally the banner should have come off the pole at a greater angle, closer to horizonal, to capture the sense of movement as the beastman runs, but I had to settle for the appearance of it being caught in a breeze across the model.

Having completed this model I realised that I was quite proud of the numerous freehand banners I have created in my collection, so I thought I'd put them all into one post for you to see (and for me to do some sort of geeky cataloging):

From my small Chaos Cultist warband, based on an illustration by Bob Harvey.
From my Rensburg (wip) army 
My deamonic banner for the plaguebearers, Very similar to my cultist banner I realised as I documented these!
The banner for my mercenary ogres, the Rusty Flails. This illustration was from the Warhammer Armies book
For my small Orc Warband I used this illustration by John Blanche which I found in the 3rd Edition rulebook.

I wonder which your favourite is?

And here's the next standard bearer which I'll attempt, for my Beastman unit, but I'd like one of you to suggest an image for me to use here, ideally based upon oldschool gaming, so from one of GW's early (3rd edition or earlier) publications or from the Fighting Fantasy oeuvre:


Please post your ideas below, thanks in advance!