Showing posts with label Rogue Trader. Show all posts

Saturday, 7 November 2020

The Glass Cabinet

For my birthday a few months ago, I was kindly given a glass cabinet by my wife, in another new display of her accepting my hobby and giving it some space to be shown in the house. This is quite a momentous occasion for me too, having not really publicly shown my hobby off before. It is in the downstairs bathroom though..

So here it is now mounted on the wall and starting to be filled with some of my smaller projects:

Blood bowl Orcs and a couple of Fighting Fantasy tributes:


Gaslands at the top, Buried Giant tribute and a human warband


More Fighting Fantasy tributes along the top (characters from the novels and choose your own adventure series) and of course the Freeway Fighter. Wood Elf blood bowl team beneath:


A barbarian warband based on Frank Frazetta's art and some (unfinished) Star Wars miniatures. 


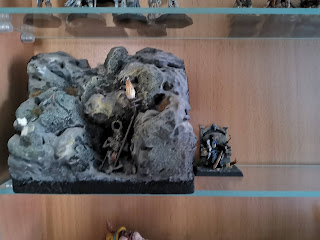
Some 40k Rogue Trader along the top:


Thursday, 26 September 2019

Bob Olley's wrinkly warband

Bob Olley has the most identifiable style of sculpting. I didn't appreciate that quite so much when I was painting models as a teen in the 80's, but I recall finding them fun to paint. I remember thinking that the faces were kind of goofy with the poorly aligned teeth and wrinkly skin, but that they also made painting easier because there is so much depth in his sculpts. Those wrinkles across the model are perfect for applying deep shadows and pronounced highlights. Even with enamel paints.

A lifetime later and I further appreciate his models even more. A #paintabob challenge on the Oldhammer Facebook page inspired me to rummage around for my handful of unpainted Olley miniatures that I had lying around. It just so happenned that they had been primed and lined up for completion this year (having just returned to this post I notice that I had 6 Olley's but I only managed to find 5 for this task, never mind). His sculpting style really is unique and still really fun to paint; those flared nostrils, wide, open-rimmed boots, quirky details such as a fluttering flap on a satchel or an intricate head-dress and frowning foreheads to name but a few, remind me of why I love the old Citadel classics so much. The sculpting style of the sculptor provides character in the model. And this makes painting them such fun; in my approach I cannot take anything for granted, I have to look closely at the model to identify what is what before I start painting and I certainly don't have to worry about large areas of flat colour! In fact those wrinkles are perfect for my diluted wash/washing up liquid/layering technique over white primer; it's quick and easy to achieve great depth and contrast in with these washes and layered highlights because that depth is already there in physical form.

So here are the 5 Olley Rogue Trader models that I painted up for this months challenge:


First up was the Ogryn, painted first for the only reason that I wanted to start large, as it's been a while since I've had such a chunk of lead in my hand and also because it's size gave me ample opportunity to get stuck into painting his surface textures:


I used a multitude of washes here to start defining all the textures. I then built up my lighter layers of highlights over the top of this. The biggest decisions were what colour to paint the goggles (I went multi-coloured, green and purple ski-mask) and then an attempt at grey camo on his trousers.


Next up was a Squat, mostly because I just liked the contrast in size with the Ogryn. So many great little details on this fella; including the extravagant headset, buttons on his weapons and of course the protruding tongue. He needed a purple beard.


Following on from him was a more exotic creature, the face is pure Olley which of course poses it's own challenges. Is that hair or a partly revealed brain? How do I tackle that elongated mouth/tooth combo? I deliberately left them both ambiguous and instead turned my attention to a striking orange jumpsuit with a pale blue stripe. He deserves it.


I then moved onto Lorrita, who seems to be something of a cult sculpt of Olleys. Check out those flared boots, iron clawed gloves and cyborg-esque face mask. She was given a limited palette treatment to partly contrast with the vibrant colours of her peers but also because she seemed to me to be quite a darker sculpt. 


Looking at this large photo, I may have missed a bit of her facemask that follows the contour of her jawline. 


And finally I finished this one last night. I decided to go subdued again with the palette, staying with colours that blended in with the bland, desert basing, that kind of desert camo effect. Of course the visor/shades required a touch of colour:


So that was a fun month of painting. It's always easier to stay on task and motivated when there is a specific focus and deadline and I thoroughly enjoyed my month of painting Bob Olley's iconic miniatures. 

Next month: Orctober and I'm considering aiming to batch paint my unit of Ruglud's Armoured Orcs...



Tuesday, 17 September 2019

Trash Bash Bits Pringles Competition

Last month I entered the Trash Bash Bits Facebook Group page's competition build. The task was to create something on the theme of "Defender" using a Pringles tube plus whatever trash bits you could add. This is what I made:


And this is what I made it from:


In addition to the Pringles tube, you can see a variety of pens for the gun, a CD for the base, fabric conditioner lid and yoghurt lids for the top of the turret, circuit board for the circuit board, bits of Lego, sprue and bits from an old computer for the interior and details, some lids (superglue and drink bottle) for the power generator and a contact lens case for the hatch. And some Plasticard/rods for decoration. 

As always with these kind of builds, the problem solving aspects of the task are what excite me. For example, below you can see me breaking up the surface of the tube with some incisions to represent panels and then using the small balls from a water softener embedded into pre-drilled holes for the rivets. Other plastic shapes and strips were added to create extra visual interest:


The next challenge was to keep the tower firmly based. The plastic yoghurt lid which was the perfect circumference for the size of the Pringles tube was too flimsy to support the structure. So I filled it with some resin!


The fit of the fabric conditioner lid was slightly too tight, but I managed to find another yoghurt lid that was perfect and when combined together in fact meant that I was able to retain the screw mechanism of the conditioner lid so that the turret could actually rotate. The gun was made by stacking lots of different diameter of pen lid together to create the effect of a multi layered extending gun:


From the outset I decided that i wanted to be able to see the interior of the tower too as this gave me an opportunity to use further bits of trash to make some internal computers and power generators etc. I like the idea that the exterior circuit board had been blown and that the doors had been forced open to reveal the inner workings. This involved making some steps from textured Plasticard and some computer terminals from a wire lighting connector and some old computer components


Here you can see the completed build:


The easy bit was the painting. The model was primed grey and then a series of dark washes were applied to create shadow around and in the details. The second series of acrylic washes were with a range of diluted red/browns applied in a vertical streak fashion and finally some very dilute green washes to complete the weathering effect.


The last aspect of the competition was to create a backstory and take some atmospheric photographs to accompany the narrative:


Abdul Goldberg spotted the derelict defense tower first across the debris strewn desert that is Helsreach. "That's our target" he pointed for the benefit of the gang. Nikosai inspected the rusted door system and quickly hot-wired the circuit board and with the help of the Pursuader, managed to prise open the doors. "We get this gun functional, the turret still works but we find some ammo and set up camp here. This is from where we dominate, a good mile range, before enforcement get here. I reckon we have 48 hours. Let's get it done" said Abdul.


And amazingly I was lucky enough to win the competition against some really stellar entries and was further privileged to receive some wonderful goodies for some future builds:


Wednesday, 11 September 2019

Rogue Trader Bestiary: Cyborg Dinosaur

My son loves his dinosaurs and regularly plays with them out in the garden, the long grass being a perfect environment for him to create his own little world to play with them in. He wasn't happy with me though a few months ago; one because I cut the grass and two because one of his dinosaurs had been left out there and lost the bottom of a leg in the process of mowing. It could have been worse. So I calmed him down by suggesting I can make his dinosaur a new, robotic leg, which placating him and excited him. The injured Dinosaur was moved to my workbench and stayed there for a while untouched. My son and I having forgotten about it. And then I noticed that there's a competition over on The Emporium of Rogue Dream:Old School Gaming Facebook group to create an entry for the Rogue Trader Bestiary. I don't have much Sci-Fi stuff, but somehow my mind linked the two together and over the past few weekends I started rummaging in my bits box, researching "cyborg dinosaur" and imagining what I could make. Eventually I made this:


This was my first time working with a toy. A couple of things to note. Mold lines are always a pain in the arse, but on these they were even worse to remove, partly because of all the textured wrinkles on the skin but also because of the rubbery plastic material it is made from, not easy to cut off. It took a lot of patience with my scalpel. I also invested in a new tool specifically for this project (I hope to use it again though) - the Greenstuff World putty roller which helped me make all of the cables seen here. A joy! 
For the Cyborg components I used a lot of Necron bits that I had accumulated from somewhere, a few Ork bits (jaw guard/claw), a bit of Lego, circuit-board and some styrene tubing. This is how it looked mid-conversion:


And then with all the greenstuff applied:


The painting stage was quick and nasty. Primed grey, flesh washes applied to the undercarriage, blended into some green and then that blended into some darker green the further up the creature. All of this was done wet-in-wet on the model with the help of a bit of acrylic retarder. The rusty areas were completed with my usual approach of metal, multiple washes of browns and oranges and then a final, textured application of red earth pigment in some matt medium. Possibly no more than an hour solid painting. The base looks a bit small, but that's all I had.

Now he's been photographed, he's gone back to my son and takes pride of place amongst his dinosaur friends!


Friday, 22 February 2019

Fusion Taxi Services


Gillette's packaging for it's Fusion razor blades is completely over the top. Each razor blade given it's own little plastic compartment trying to tell the consumer that THIS IS A LUXURY ITEM. Well, Gillette, I've trash-bashed your packaging into something a damn site better than for what you intended, a Rogue Trader hover taxi!


This was inspired by the current competition on The Emporium of Rogue Dreams: Old School Gaming Facebook page, where a skiff-bash challenge is underway. I had the competition in mind as I was about to throw away the aforementioned packaging and it struck me just how interesting the shapes actually were; the curved front, the hollowed out areas with slanting backs... what else could come into my mind except a hover car with lots of seats. And what vehicle needs lots of seats? Well a automated taxi service of course!

So from here I scrounged together a few other pieces, the family craft cardboard is a place I rarely venture in (it's a mess of felt, string, glitter glue and felt tips) but I vaguely recalled the interesting shapes of felt tip pen lids in that they may correspond to a kind of propeller shape. In the big box of shit that holds felt tip pens (many dried up without their lids), I scrambled to the bottom of the box to find those missing lids. I found a perfect one (with a kind of interior compartment shape that looked sexy and propeller like) but of course not a second one. So I just pilfered one from a perfectly healthy felt tip pen which is now dried up and useless. I should have used this as an opportunity to clear out the box, but did not want to disrupt my creative energy and stall my momentum. One of the kids can do it and anyway the referee in our house, doesn't know. The felt tip lids were filed flat on one side (deliberately roughly) and then superglued to the side rear of the hover craft.

I then dug out a few miscast sci-fi bits I was gifted at an event, dual exhausts, double lights and single lights and glued these in the appropriate places (after a bit of playing with their positions) on to the front and rear and was then ready to go and paint. Well not quite, to capture the hover aspect of the vehicle I built a hidden stand out of the end of a pen, inserted a rare earth magnet into the top of it and then drilled a corresponding hole to the underside of the hovercraft to accommodate the other magnet. The craft could now be removed from it's base (which helped for painting and can be removed and replaced by another vehicle if I ever get around to making another). Oh and it makes it look like it hovers too.


The painting stage was relatively straightforward. Black primer for the inside, masked this off and white primer on the outside. I added a few blended, vertical dark grey stripes to the seats to give them a textured fabric feel and then dabbed on a variety of rust colours onto the outside. Around these I added a range of silvers to show scratch marks and the revealed metal of the vehicle where the yellow paint and rust had de-laminated. The yellow layers were then blended in, black taxi details applied and finally I went back to the rust areas and textured them with some weathering pigments and then weathered the entire vehicle with some thinned washes.