Showing posts with label post-apocalyptic. Show all posts

Wednesday, 15 January 2020

Gaslands!

It was only a matter of time before I started a new project and that may as well be at the beginning of the year. Cheetor's excellent blog introduced me to the game Gaslands! and I particularly liked how he had used the contents of the Hot Wheels advent calendar as a starting point for a load of 1:65 car converting craziness.

So I'm in. Up to my neck. I love converting and kit-bashing and trash-bashing so this is right up my desolate, post-apocalyptic highway. First of all I've already got a couple of 1:43 cars that would work for the game on a larger-than-Hotwheels-scale, namely my Fighting Fantasy Freeway Fighter and Helsreach Arrabella projects:


And for Christmas I received a 1:35 Tamiya half-track:


Which I've built:

And which is now in the process of getting a sci-fi/apocalyptic makeover. This will join the two previous vehicles to make my 28mm Gaslands team.

Of course I'm not stopping there. I found a bunch of my son's Hotwheels cars and I've started building another team in 1:65 scale, using some 40k bits and the excellent Implements of Carnage from NorthStar Figures. My first two cars:


Primed:


And undercoated in rust colours:


Oh and it won't stop there, here's the other cars I've collected to transform into post-apocalyptic Gaslands machines (you may notice a familiar looking orange car there...):


I shall keep you posted....

Saturday, 4 June 2016

Arrabella - Mad Max style car WIP


Here she is (sans paint and headlights)! 

I love model making and the aspect I enjoy the most of a project like this, is the problem solving. When I was a kid making models for the first time (largely Airfix), the problems were just in following the instructions and putting the correct bits in the correct places without swamping the model in glue. Lego was actually the big step for me, moving away from following instructions that came with boxed sets, to using my imagination and creativity to make my own space ships from a massive pile of different shaped and coloured plastic blocks, all he time ensuring functionality. In the case of spaceship Lego, it was often symmetry; ie: "Do I have enough pieces to construct two of and those fuselage's?" and/or "Will that opening gangway ramp actually fit over the size of the entrance I've made?". As an adult these type of questions and experiments to find the solution keep me happy and take up a lot of my thinking time. Thinking time easily out-weighs my making time.

So with this build, over the past month or so, a lot of time has been spent thinking about how this is going to work. 

1. Research. Find images that inspire. Obviously MadMax was a huge inspiration but I needed plausible builds that have already been built and accomplished by model-makers to give me some reality inspiration:


Thanks to all the modellers who made these, sorry I have not given you credit by name, but rest assured you have completely inspired and reassured me.  

All of these show the sort of thing I wanted to achieve, looking especially at wheels, suspension, exhausts and post-apocalyptic additions. Further research into reality showed me that most of these are modeled at a 1:35 scale, which in my experience is just too large for 28mm sci-fi. So I resumed my search for 1:43 plastic kits, rather than die-cast, the latter being much more difficult to model and convert as I discovered with my Freeway Fighter model

2. Scavenge and purchase parts. I plumped for this Heller plastic kit, it cost me about 7 quid from ebay, the sprues have lots of pieces (40) which means I have more control over what I include and exclude during the build. I liked the aesthetics of the car too, the curves and character of the car fit in with the Mad Max vibe as well as just being quite pleasant to look at. 
I decided that I wanted bigger wheels and raised suspension so as to fit into a desert environment as well as a raised engine and side exhausts to give the appearance of a suped-up version. For this to happen I had to go and scavenge some bits:


  • Wire gauze from Halfords for the windows.
  • Plastic off road wheels from the Ork bike kit
  • Plasticard (plain and the double diamond tread plate kind)
  • Jewellers chain so equipment can be secured to the vehicle
  • Plastic piping of a variety of radii for exhausts and roll cages etc
  • Springs from a pen for the suspension
  • Guitar wire for tubed pipes
  • Computer circuit board parts for engines and other machinery parts
  • The only purchases were from Zinge Industries for fuel tanks, spotlights, and other equipment a post-apocalyptic car might be carrying

3. Making

Having made the brave decision to cut the back of the roof off (I spent a lot of time considering the pros and cons of this and the ideal position to cut), I could start constructing the car. I cut out a space for the raised engine in the bonnet, which is made from a part of a computer circuit board and glued all the seats, steering wheel and dashboard together. I used some embossed plasticard for the floor which attached to the underneath of the drivers seat - it would be visible in the back of the trunk. 

I remember reading an article from a very early White Dwarf, by John Blanche I believe, about keeping a tidy workspace. I don't adhere to that philosophy and have grown fond of such games as: "where the fuck is that drill bit" or "I had that bit perfect length of paperclip in my hand just now", or the dreaded: "bollocks" as the tiny spotlight slips out of my fingers, bounces onto the table and either silently settles on the carpet ("fuck") or nestles amongst the general mess ("for fuck's sake").


I added the roof's spotlights to a bent paperclip. Gluing the wire mesh into the window space was a proper pain in the arse. I ended up using some Uhu thick glue as superglue did not work (bizarrely), and it was, as you can imagine, quite messy and imprecise.

Here you can see the backboard made of the textured plasticard. Really hard to measure the right shape prior to cutting.


 When putting it all together I discovered  an unforeseen problem: two interior wheel arches needed to be made to cover the space where the wheels will show. I've also added some guitar wire as a flexible piping from the engine.

Biggest problems: cutting plastic the correct shape to fit into weird and impossible to get to shapes and using the right type and amount of glue for the right materials. 


Next problem: Making the exhaust. Just bending plastic tubing invariably makes it snap or flatten out. So I had to introduce some heat from a lighter. But just the right amount or else it melts obviously. I found the best way to do this was to rotate the tubing 360 as it is exposed to heat, use tweezers to manipulate the required bend and then run it under cold water immediately. This took quite a few attempts.
Using a range of different radius meant I could insert one inside the other to make a more interesting shape, breaking up the long tubes into smaller sections. I added an Ork bike exhaust for the end piece and used a lot of precision plastic glue..
You can also see the jewellers chain that's been added with the help of some superglue to the spare tyre and sleeping bag etc. The grey resin bits are all from Zinge Industries.


Raising the suspension of the car was the biggest problem of all. I had to make some plasticard supports, seen here in black (the back two being slightly smaller than the front two) with holes drilled in to support the thick paperclip axle. Springs from a couple of pens were used for the actual suspension and were superglued over a plastic rod.

Blu-tac is your closest friend when model-making, perfect for doing that dry run (at least three times) before you break out the finality of the glue..

Here's a closer picture of the front two suspension columns.

And another dry run with the blu-tac helping me out.
4. Complete the build. When the functional side of the build is complete, there's usually some aesthetic improvements to add. In reality I added most of the additions during the functional build, but a few adjustments were made when it was all put together.
The frontof the car needed something extra, to make it have more of a Mad Max appearance, so a bumper with spikes and a skull were added. It helped elongate the car shape too.

Space for a passenger (with gun) was created and a hole drilled into the back for later addition (a Copplestone miniature).


The chassis was raised slightly higher than I had anticipated, so I needed to add some bulk to the undercarriage to reduce the gap to the floor and to break up the very flat line of the bottom of the car. So Arrabella (so I've named her) was given some addiional barrels, which are actually fuses and other barell shaped objects from a computer circuit board (as you can gather there's some great shapes on these for miniature model making).


And here's Abdul Goldberg getting excited about his new ride. It's been pimped.
Right I'm off to spray the bastard, wish me luck because I'll be gutted if I fuck it up now!


Tuesday, 31 May 2016

Helsreach Mercenaries - Abdul Goldberg


"I was just minding my own shit, taking my sweet time over my warm milkshake, just feeling the vibe of the tunes playing from the kitchen of Greasy Kim's Bar and Diner. I'd been on the drugs for a while so I was feelin' pretty spaced out and fluffy, not really sure how long I'd been there, or even why I was there. And then "boom!", I nearly shit meself. Not expecting that. Out of the smoke arrives this crew of tough guys, guns out, shouting all loud like. They rough me up asking where some guy called Abdul Goldberg's at. It's a name I'm only just familiar with, maybe a few weeks ago, he's been winning gambles with the best of 'em here and fleecing some of the town's tough guys. They've been looking for him. It's a name you can't forget once you've heard it. He's got a rep now. Anyway I tell these guys that I've never met the fella, no idea what he looks like; not sure why they're bugging me about it, all I'm doing is just tryin' to chill. Apparently he was here earlier, relaxing with his crew. I tell 'em that I kinda remember a group relaxin' and chattin' in the corner,, looking all smug like, but I don't know when they left or where they went. I get a smack in the face for that honest information. Fuckers. I'm pleading with this big thug, sayin I know nuthin and then out of knowhere this crew comes in and shoots the place up, all these thugs around me now slumped over, blood everywhere. No idea how I got missed by all that shootin. And then through the carnage steps this fella, he was the fella I saw earlier in the Diner. I'm focused now. He's all calm and serene like in his movements, real elegant with his long coat swishing behind him. I look into his eyes as he approaches me and somehow his eyes flicker between  hard arse, piercing like and then like the whole things a joke, I didn't know how to read him. Shit meself properly this time. Anyway he comes up to me, pats me on the back, slurps my milkshake and yells out to the kitchen that I need a new, cold one. One of the thugs groans and he sticks him in his gut with his sword, not even looking at the guy, but looking at me. I swear he made it look like the whole thing was one big joke. He clicks his fingers and he and his crew walk out all silent like. I promise this is the truth, exactly what happened, no bullshit. This happened. Who is he then, this Goldburg, really, I wanna know?"


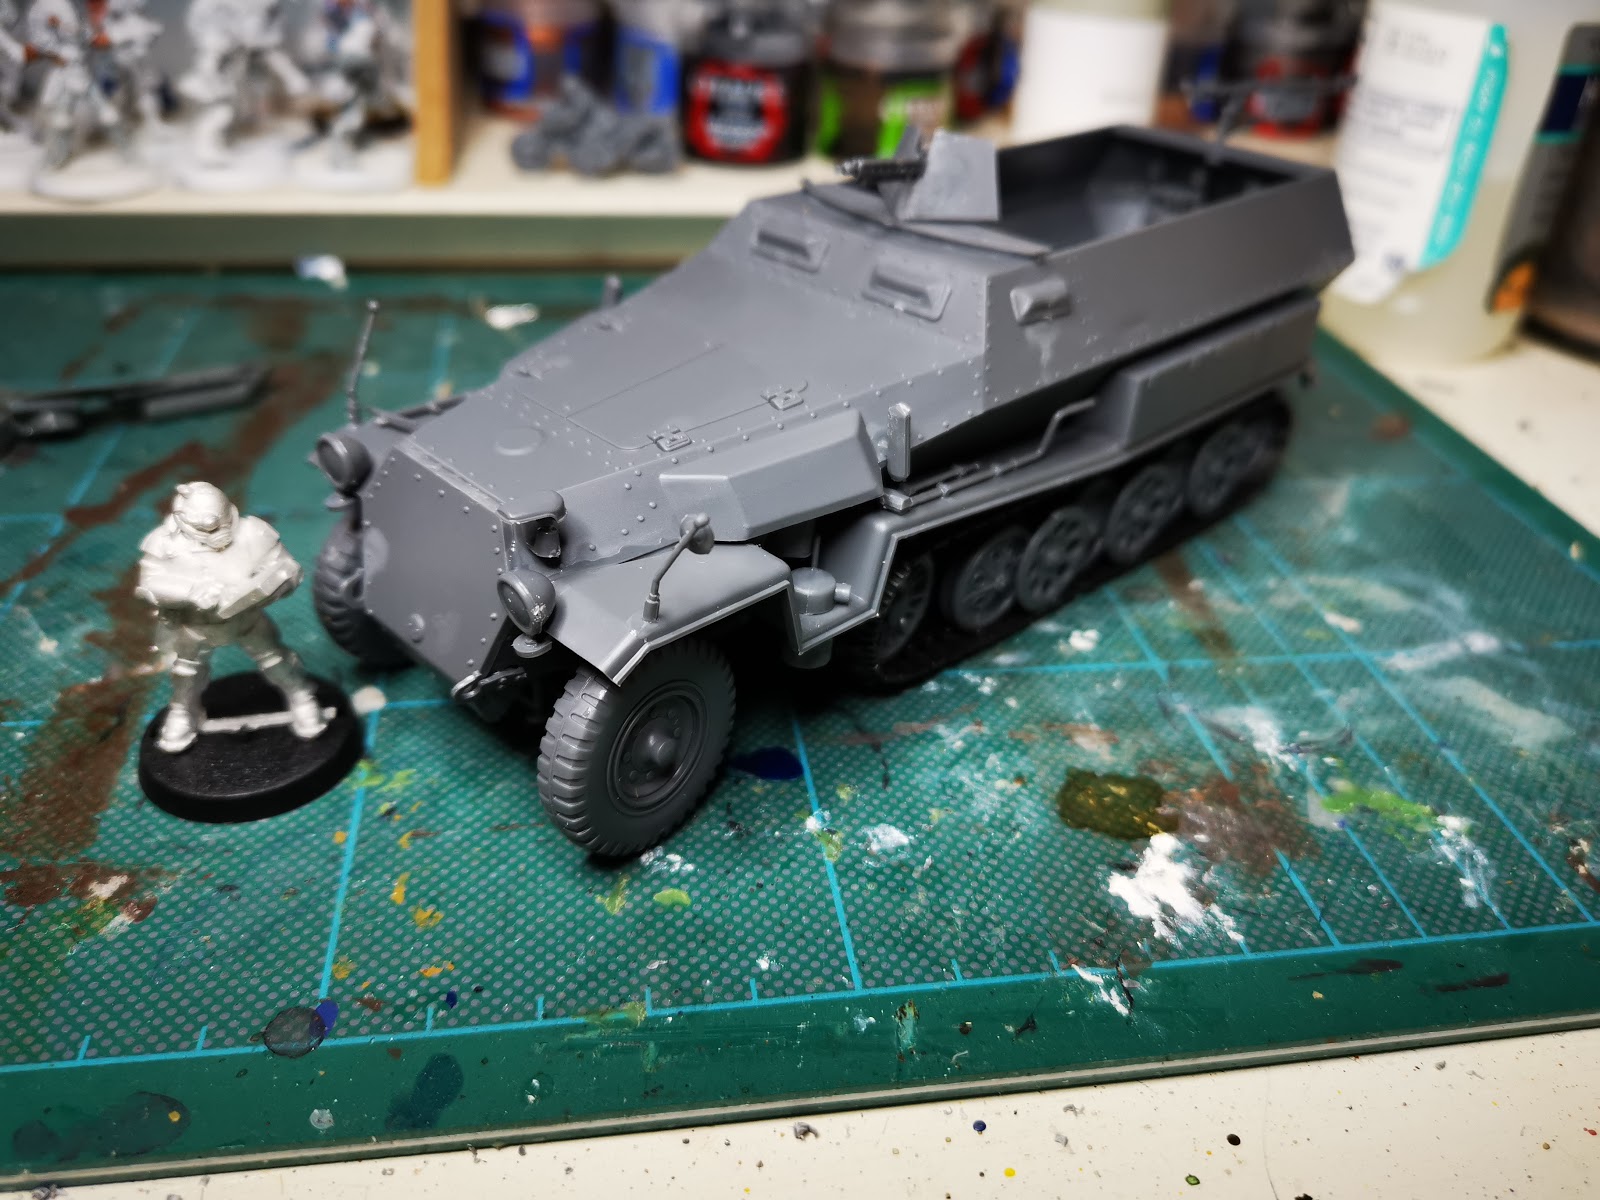
My version of Abdul Goldberg, using a very cool Hasslefree miniature. I'm not sure that he entirely fits my imagination of what Goldberg looks like (based upon the cant information in the Rogue Trader rulebook), I imagined a slightly portly, fun loving gangster with a hard edge. I've caught the hard edge with this mini, but didn't have time to sculpt a belly onto him that would have made him perhaps slightly more jovial.. I was tempted to add some blood and gore onto the sword, but decided he was already tough enough looking and was worried it might go over the top.


The backstory is based on the information given in on pages 243-244 of the Rogue Trader rulebook, where the sub-plot generator is located. This is the excerpt I used to give me some context:


"Abdul Goldberg has crossed you for the last time - it was pure luck that your paths should cross on this isolated planet outside of imperial control. He and his crew are relaxing down at Greasy Kim's Bar and Diner, unaware that you and your crew are ready to pounce. The diner is mostly deserted, with only a few lonely vac-heads and spacers to witness the fight."


Obviously I chose one of the vac-heads/spacers to give his account and changed the outcome slightly, imagining Goldburg to be way too savvy to be caught in a diner by a group of thugs..


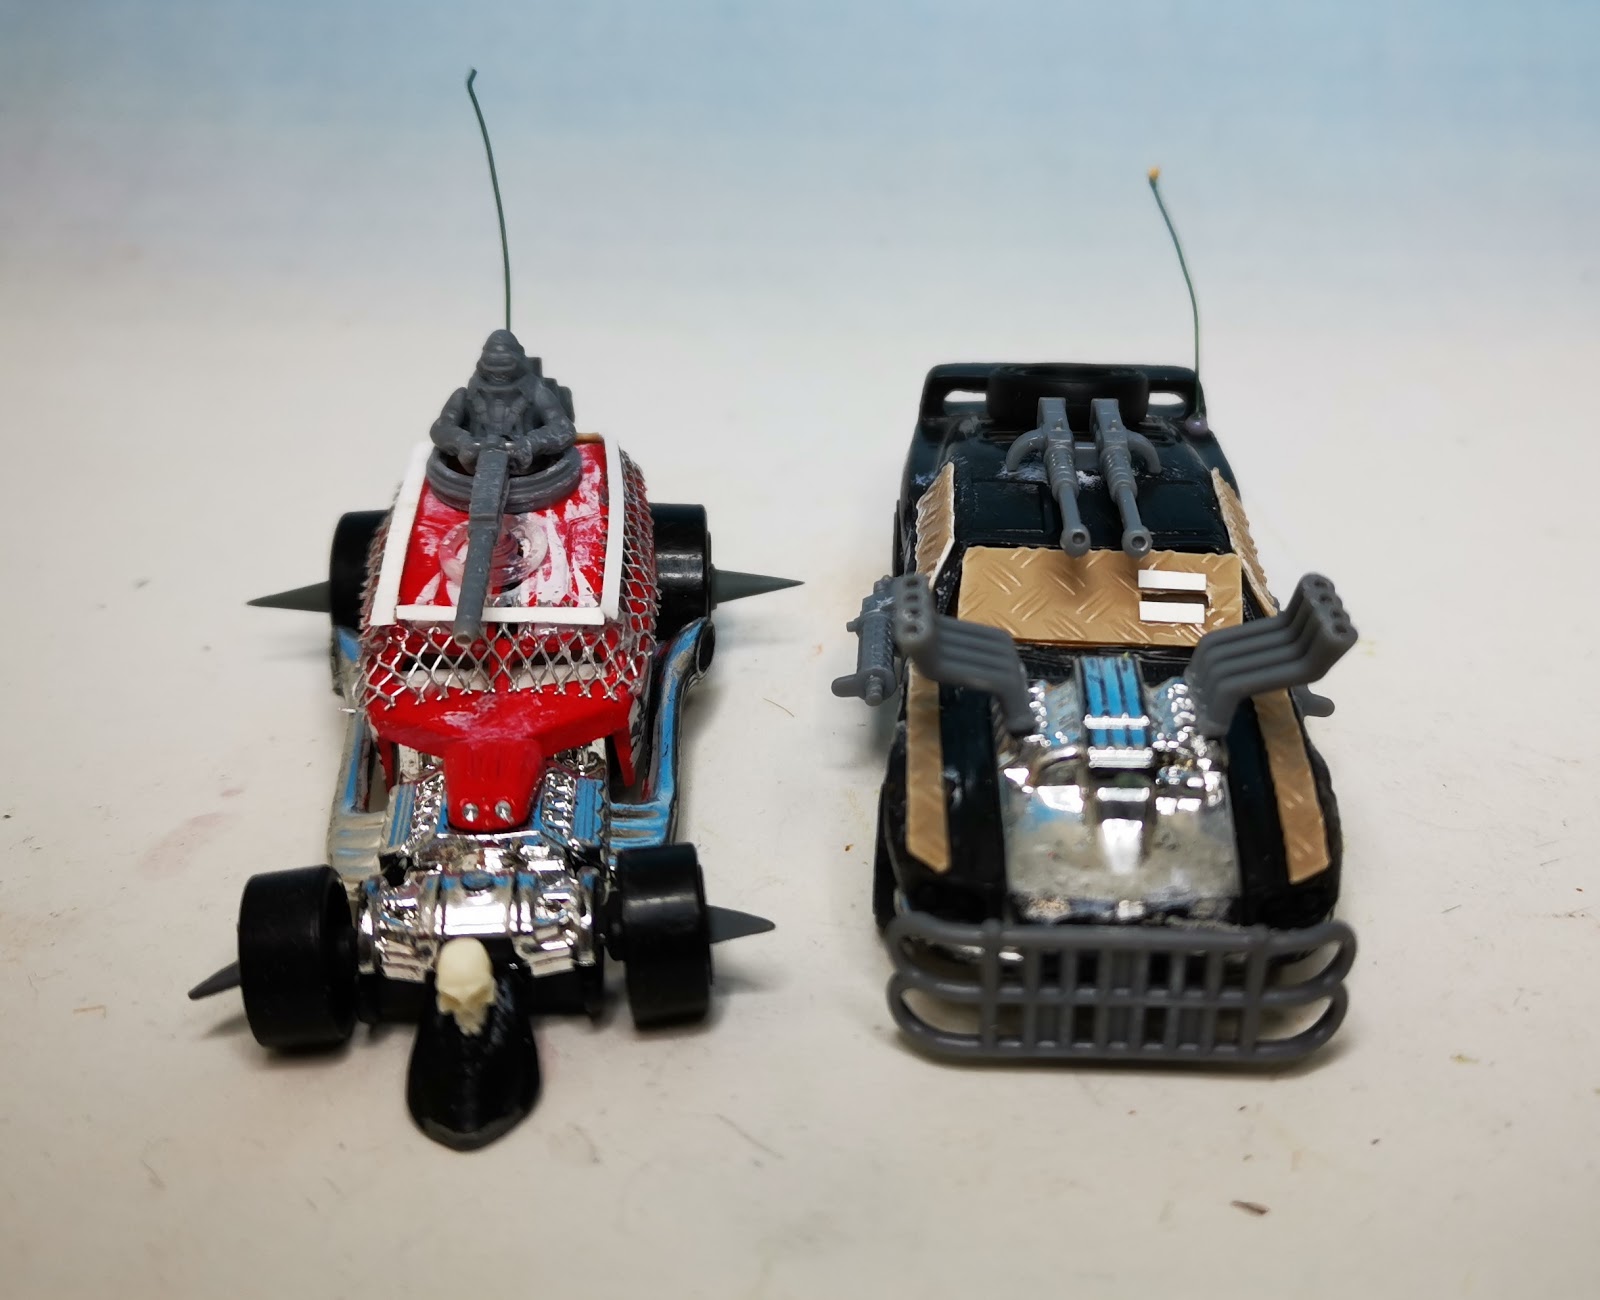
Here you can see Goldburg with his crew, post diner chillax, a proper bunch of rogues.