Showing posts with label Modelling Workshop. Show all posts

Tuesday, 13 November 2018

My little world (wip)

Following on from my last post about my new cemetery, I thought it was time to try and get some decent photos of my current tabletop set up. It's not a very accessible site (the corner of a low attic) but it gives me an opportunity to set up my stuff without any hassle from the wife or kids! I can just look and admire my handiwork up here, which is all very lovely until I smack my head on a low beam.

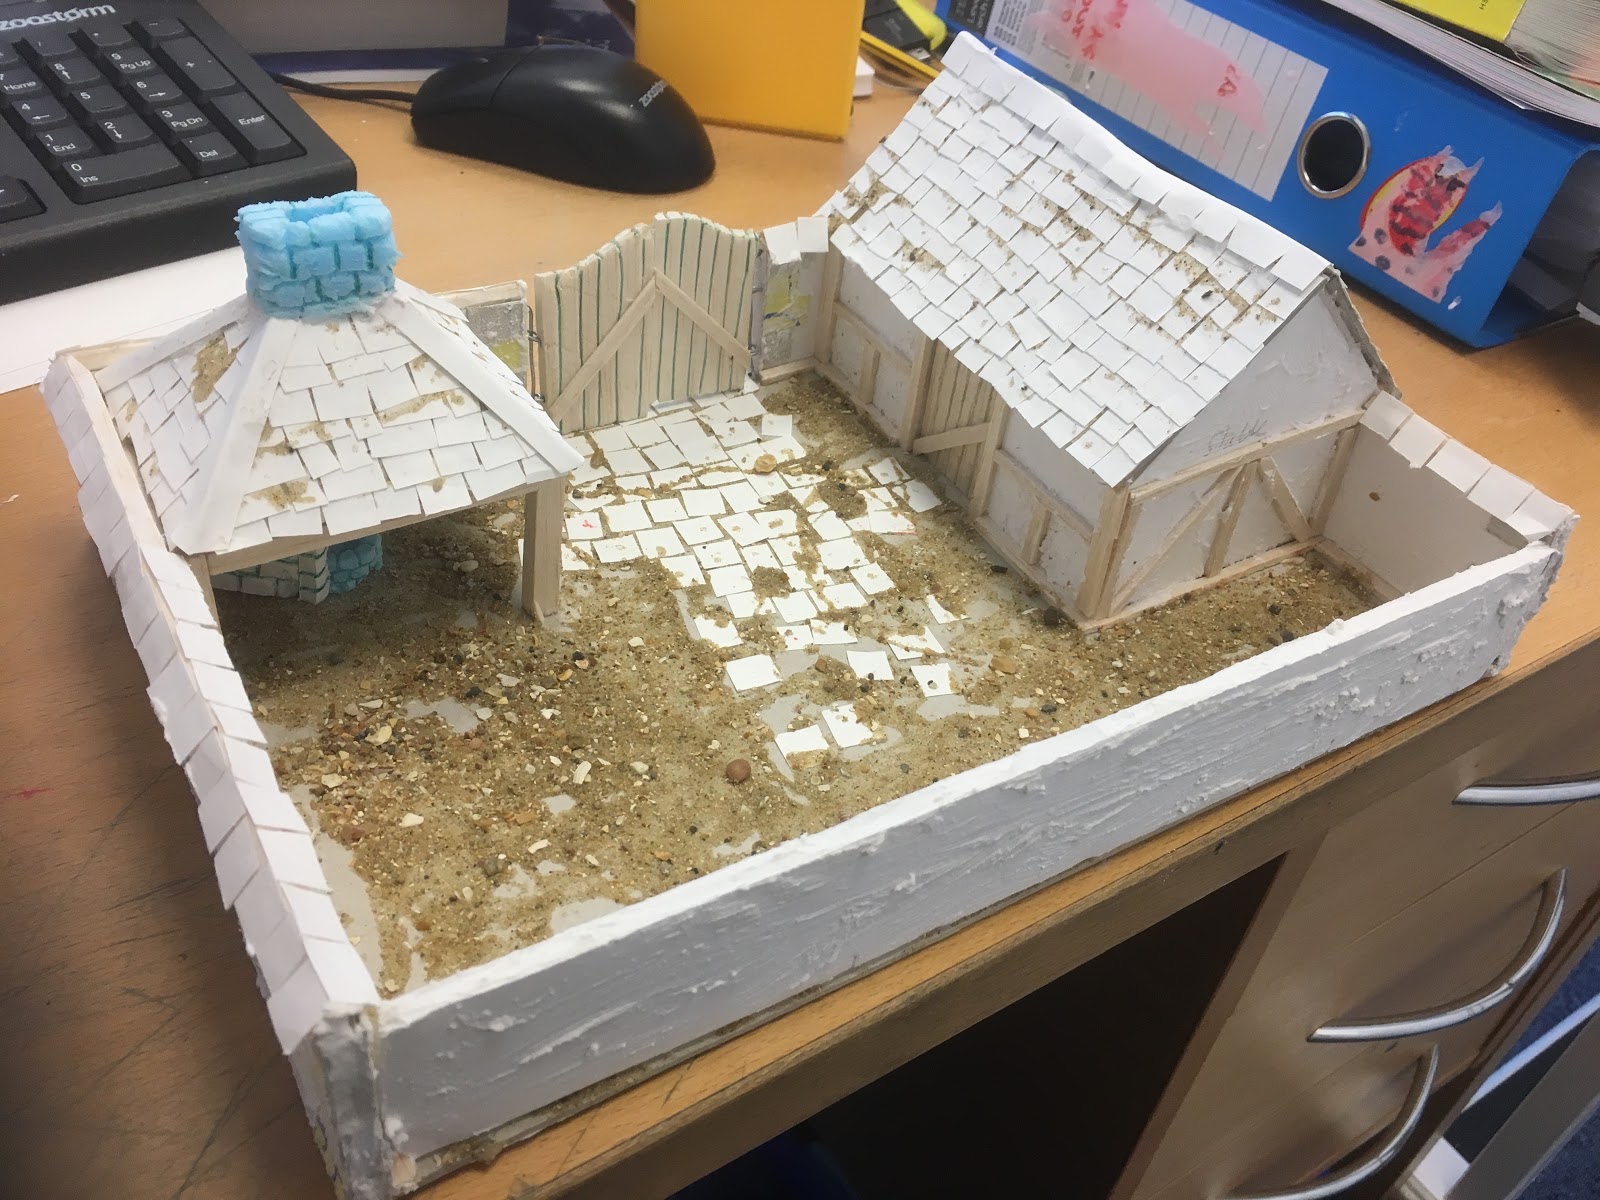
Pretty much everything you see in these photos is scratch-built, the only exceptions being the aforementioned GW Cemetery and the toy fort that I [originally] painted up for my son! He's grown out of it, so, as per my plan, so it's become mine! The scratch-built stuff is largely from the modelling workshop articles from early White Dwarfs; you may recognise the Townhouse, the Barn, the Cottage, the Ruined Temple and the Inn/Forge, but there's also some scenery that is inspired from elsewhere (the entrance toFighting Fantasy's Firetop Mountain for example). And then there's the scenery that's been inspired from a great many parts of the Internet and put together with my imagination and often some prolonged problem solving; my Mausoleum, Church, Ruined building, trees and my modular tiles.

As the title says, this is WIP; I've got more modular tiles to make and some much more fancy ruined buildings, roads, a backdrop, plus some more interiors/dungeon tiles and a load of miniatures to populate this little world of mine. Here's what I have for now though; enjoy!:


Best get cracking then...

Friday, 5 January 2018

Housing my scenery collection

I’ve found a quiet, unused part of the house where I can let my geek run wild and I can set up my little soldiers and their houses - the corner of the attic.

It actually works pretty well because it’s a nice long space and I’m out of the way up here. I’ve installed some decent lighting and then set about creating a very low table. The only problem is it’s too easy to smack my head on the beams, so I may need to invest in some foam to put on these.  It didn’t take very long to make and now I can set up my scenery on the table rather than having to store it in boxes under the bed (vying for space with my wife's paraphernalia).

It’s not a perfect space for gaming (but I rarely do this anyway) because of the cramped space, but it’s easy enough to bring it all downstairs if needs be. So for now this will really just be a place for me to collect and set up my scenery and take some photos of my completed models as I go. 


Some MDf was laid out and given some support using the beams that were already along the floor and some extra legs at each end. I was then able to lay down my green cloth and stretch it out. 


The intent is to have my modular gaming boards on one side, have a wall/gate around them so that they can link up the surrounding green fields and hide the obvious step between cobble and green grass. At least another four of those modular boards to go...

From left to right in the photos you can see the modular boards and a couple of White Dwarf town houses as well as the Modelling Workshop ruined temple in the background:


Some of my trees mounted onto Cd's,the White Dwarf Barn, a converted Superplay castle, a church and in the foreground my recent Coaching Inn and Stables:


And finally, in the top right corner; my entrance to the Warlock of Firetop Mountain, a masoleum (with space between that and the church for a graveyard to be made at a later date), a river, a cottage and a tower.


Happy New Year to you all!

Tuesday, 12 December 2017

Modelling Workshop 5: The Coaching Inn and Forge (WD 143)

This is the final instalment of my revisiting of the Modelling Workshop articles from the White Dwarf's of the early 90's and the only one that I had not previously made as a teenager - the Coaching Inn and the Forge.


It was quite an extensive build and the instructions, at times, were particularly hard to follow, so some problem solving was required (which my teenage self would have struggled with). The roof to the inn was especially problematic; joining two sloping edges...

I've also made a few changes, namely the size of the footprint has increased, it always felt a bit cramped from the photos in White Dwarf and you couldn't really appreciate the two buildings. I've also improved the stable design and made a removable wall from the back of the courtyard so that the two buildings can be separated without creating an open courtyard. 


The doors, as per the article, are hinged on some paperclips.


Here you can see the forge and stable without the coaching inn and the long removable wall in place.


A better view into the forge and with it's roof removed you can see the forge itself (made from foam)


And the coaching inn by itself (pre-weathering):


And some Wip's so that you can see the construction and some of the materials/processes:


This image inspired me for the creation of the forge:


And the original article in case you're interested in re-creating this yourself:


And finally, my terrain building skills came in useful for my daughter's History homework, we worked on this together and she now has to learn the secrets of painting and in particular some quick dry-brushing and weathering techniques....


Wednesday, 11 October 2017

Modelling Workshop 4: The Cottage (White Dwarf 130)

This is my 4th post in this little series of terrain building using the Modelling Workshop articles from White Dwarf, following on from number three; the barn, number two; the ruined temple and number one; the townhouse, with just the more complicated coaching inn and stables to go.

For this classic cottage, I wanted to approach it from a slightly different perspective, partly because I have made these before and also because I wanted to add to my Frostgrave / Mordheim collection with more ruined buildings. So after a bit of image research I decided to go for a ruined and burnt out cottage but still using the same materials and templates as per the original design.


The painting of this was really quick. A grey primer was sprayed on and then everything was washed with a very dilute dark grey. This was then highlighted up with a few drybrushed lighter greys. I then worked a cream colour onto the less burnt areas of wall and again drybrushed the highlights.

A little tip: always drybrush in the direction you want the light to be from; in this case from top to bottom. There will be more paint on your brush as you begin and therefore you'll automatically create a lighter tone at the top which will recede to darker through the brushstoke as you brush is less laden with paint. 

I then applied a multitude of green and brown washes to the walls to show it's derelict, mossy state. Finally I re-applied some black to the areas where the fire damage would have been most extensive, where the wooden aspects of the building are - window frames, beams etc.

Here's a couple of wips to show the process of making using all the traditional materials and techniques as suggested in the original Modelling Workshop articles. I meant to add clay stones to the chimney but totally forgot and instead applied my thinned polyfilla to all the walls.


And finally the plans from the White Dwarf, if anyone fancies having a go themselves.